Appearance
How to Add and Display Testimonials
The Testimonials feature is a powerful tool that allows you to manually add, manage, and display your best customer reviews.
Unlike the Business reviews (like Google or Facebook) that are fetched automatically, the Testimonials feature is for all the other positive feedback you've collected. This is perfect for reviews you receive via email, private messages, or contact forms.
This guide will walk you through the entire process, from adding your first testimonial to designing a beautiful template to display it.
Part 1: How to Add a New Testimonial
Before you can create a template, you need to add some testimonials to the plugin.
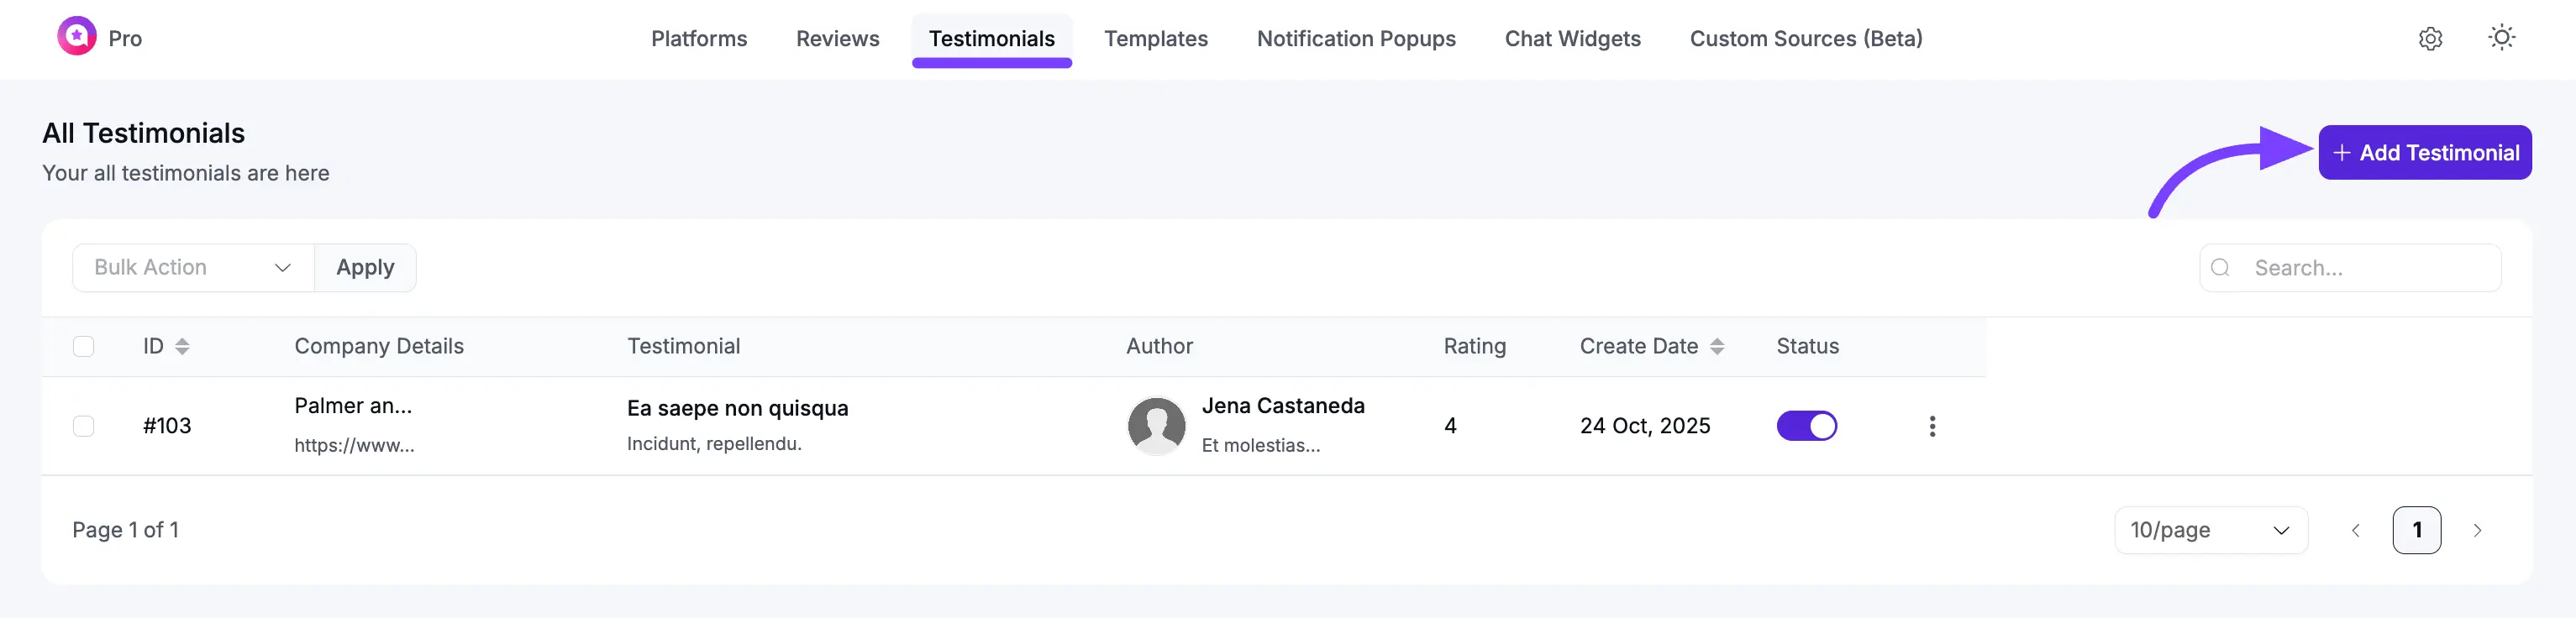
Step 1: Go to the Testimonials Tab
From your WordPress dashboard, go to WP Social Ninja → All Testimonials. This will open the main dashboard where all your manually-added testimonials will be listed.
Step 2: Add Your First Testimonial
Click the + Add New Testimonial button in the top-right corner to get started.
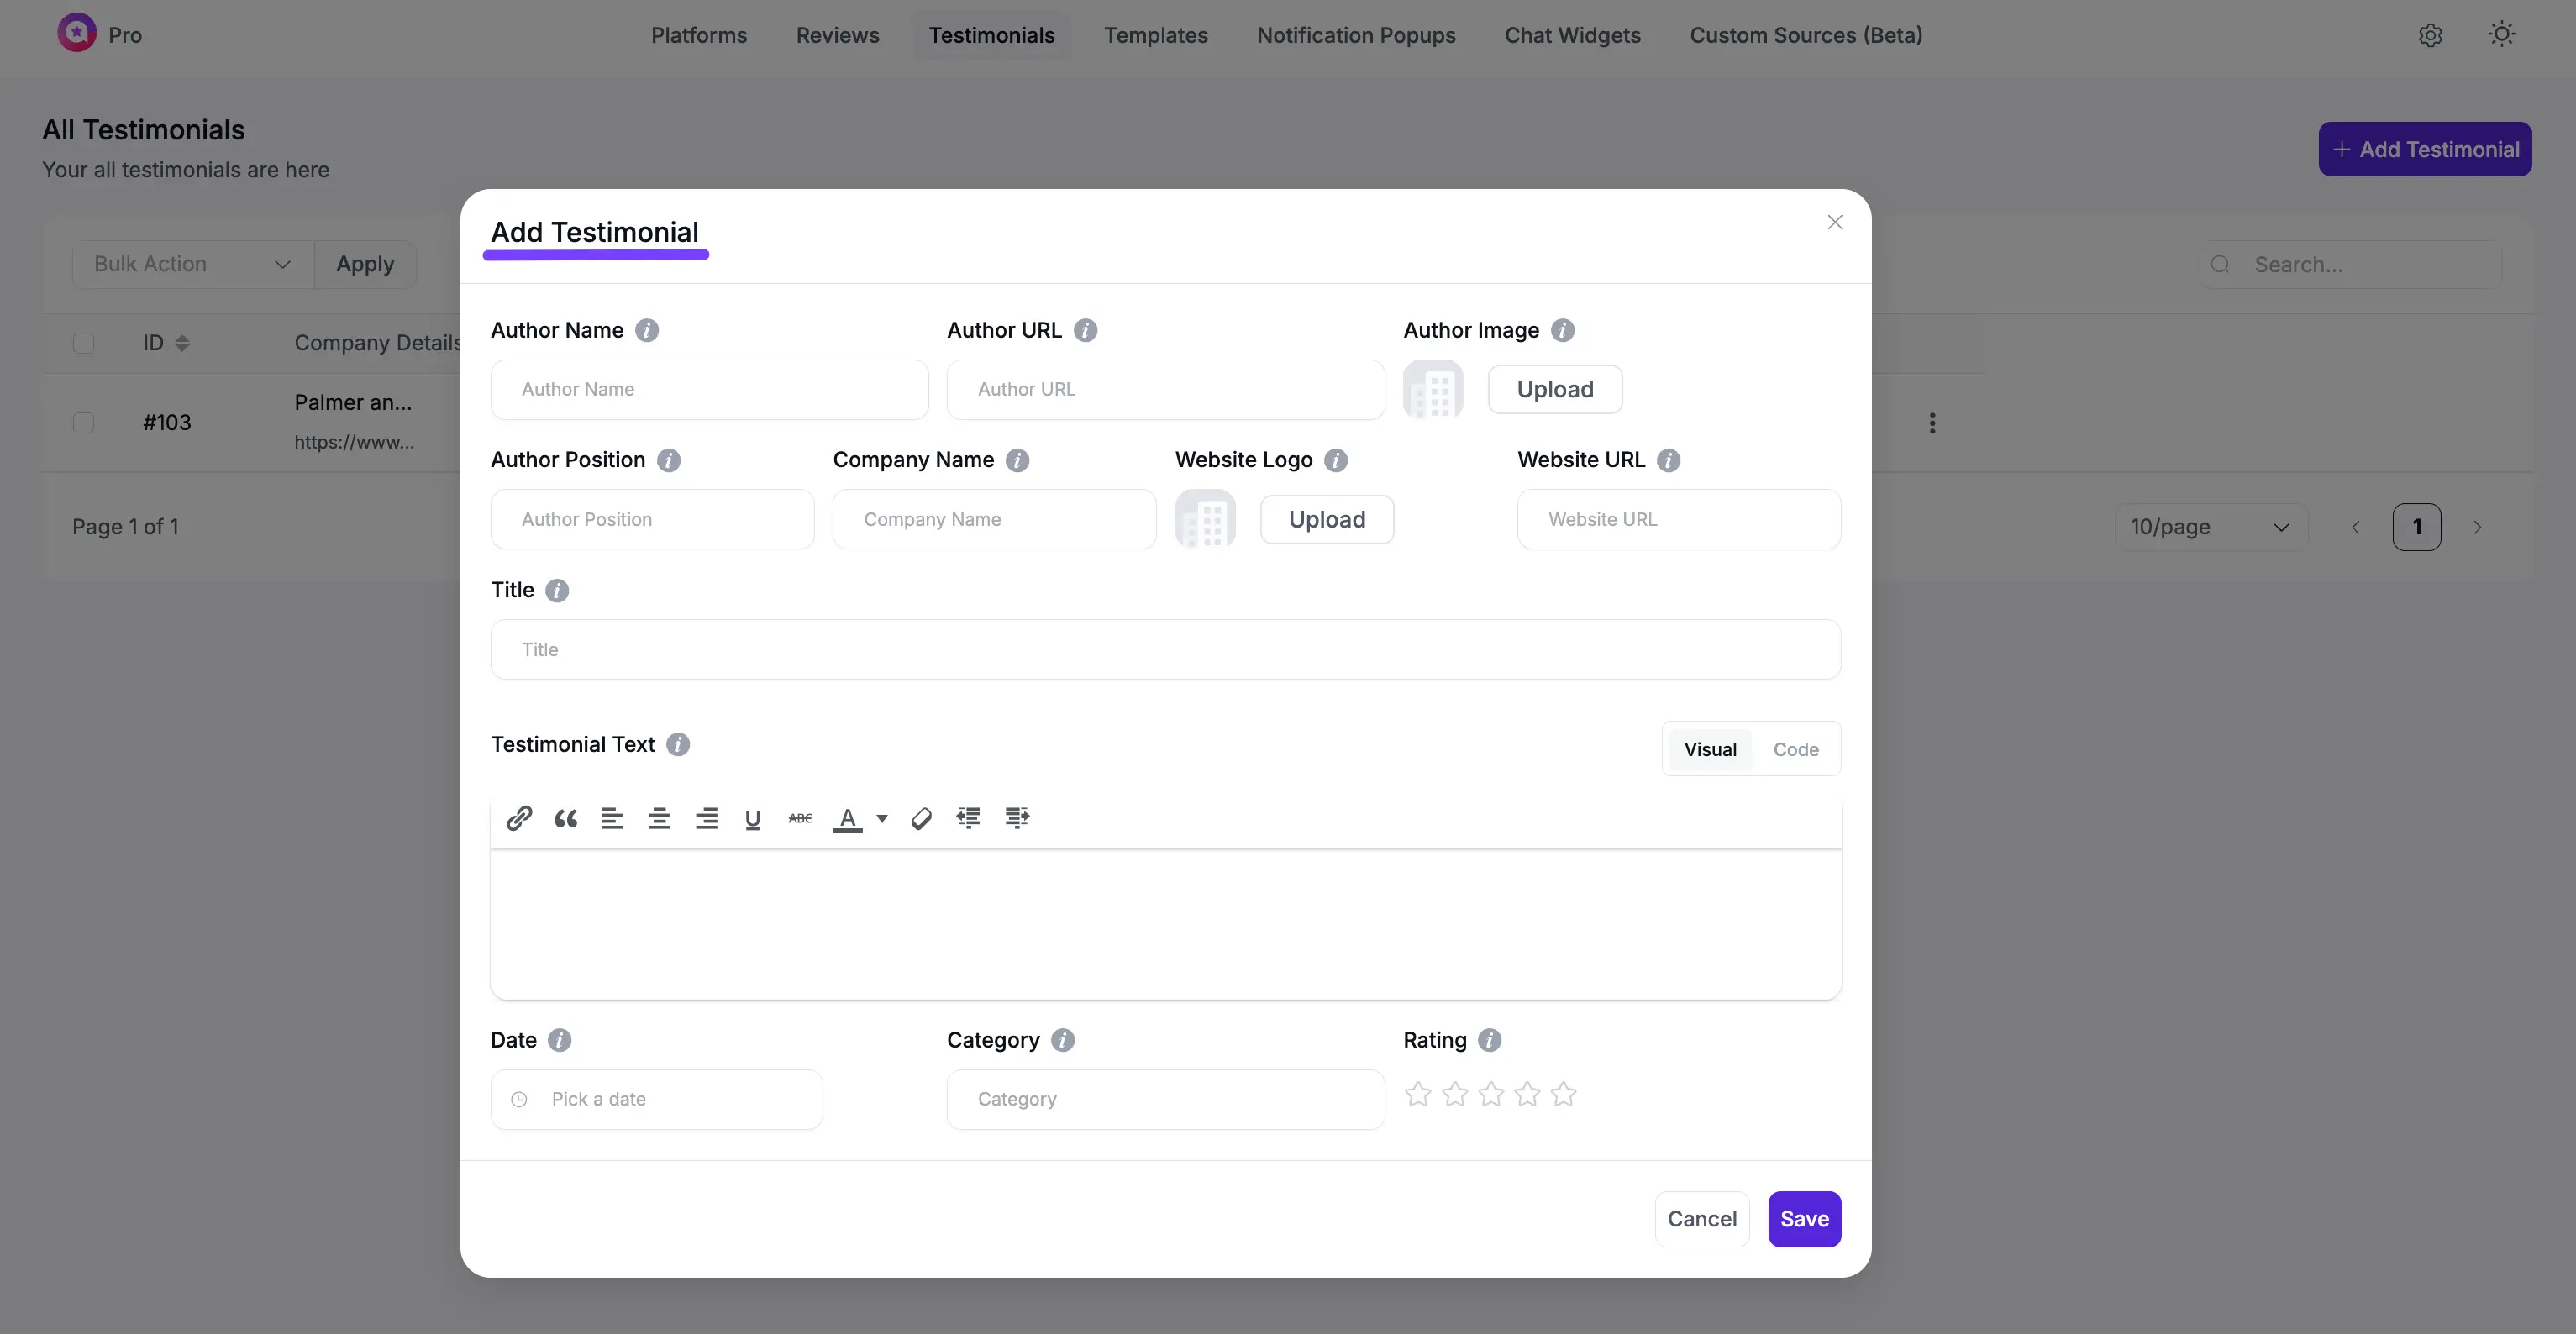
Step 3: Fill in the Testimonial Details
A pop-up window will appear with all the fields you need to create a rich, professional-looking testimonial.
Here is a breakdown of each field:
- Author Name: Enter the full name of the person who gave the review (e.g., "John Doe").
- Author Position: Enter the person's job title (e.g., "Marketing Manager"). This is great for B2B social proof.
- Company Name: Enter the name of their company (e.g., "Example Inc.").
- Author Website: Enter the URL of their company's website.
- Author Image: Click to upload a photo of the author. This adds a huge amount of authenticity.
- Company Logo: Click to upload the author's company logo.
- Rating: Click the stars to set a rating from 1 to 5. This is crucial for filtering your templates later.
- Testimonial Title: Add a short, powerful "headline" for the review (e.g., "The Best Plugin I've Ever Used!").
- Testimonial Text: This is the most important part. Paste the full text of the review here.
- Date: Select the date you received the testimonial.
- Category: This is a very useful organizing tool. You can create categories (like "Service Reviews," "Product Feedback," etc.) to group your testimonials. This allows you to create templates that only show testimonials from a specific category.
Step 4: Save and Manage Your Testimonials
Click the Save Testimonial button. Your testimonial is now saved!
You will be returned to the "All Testimonials" dashboard, where you will see your new entry in a list. From here, you can click the Edit or Delete buttons to manage your testimonials at any time.
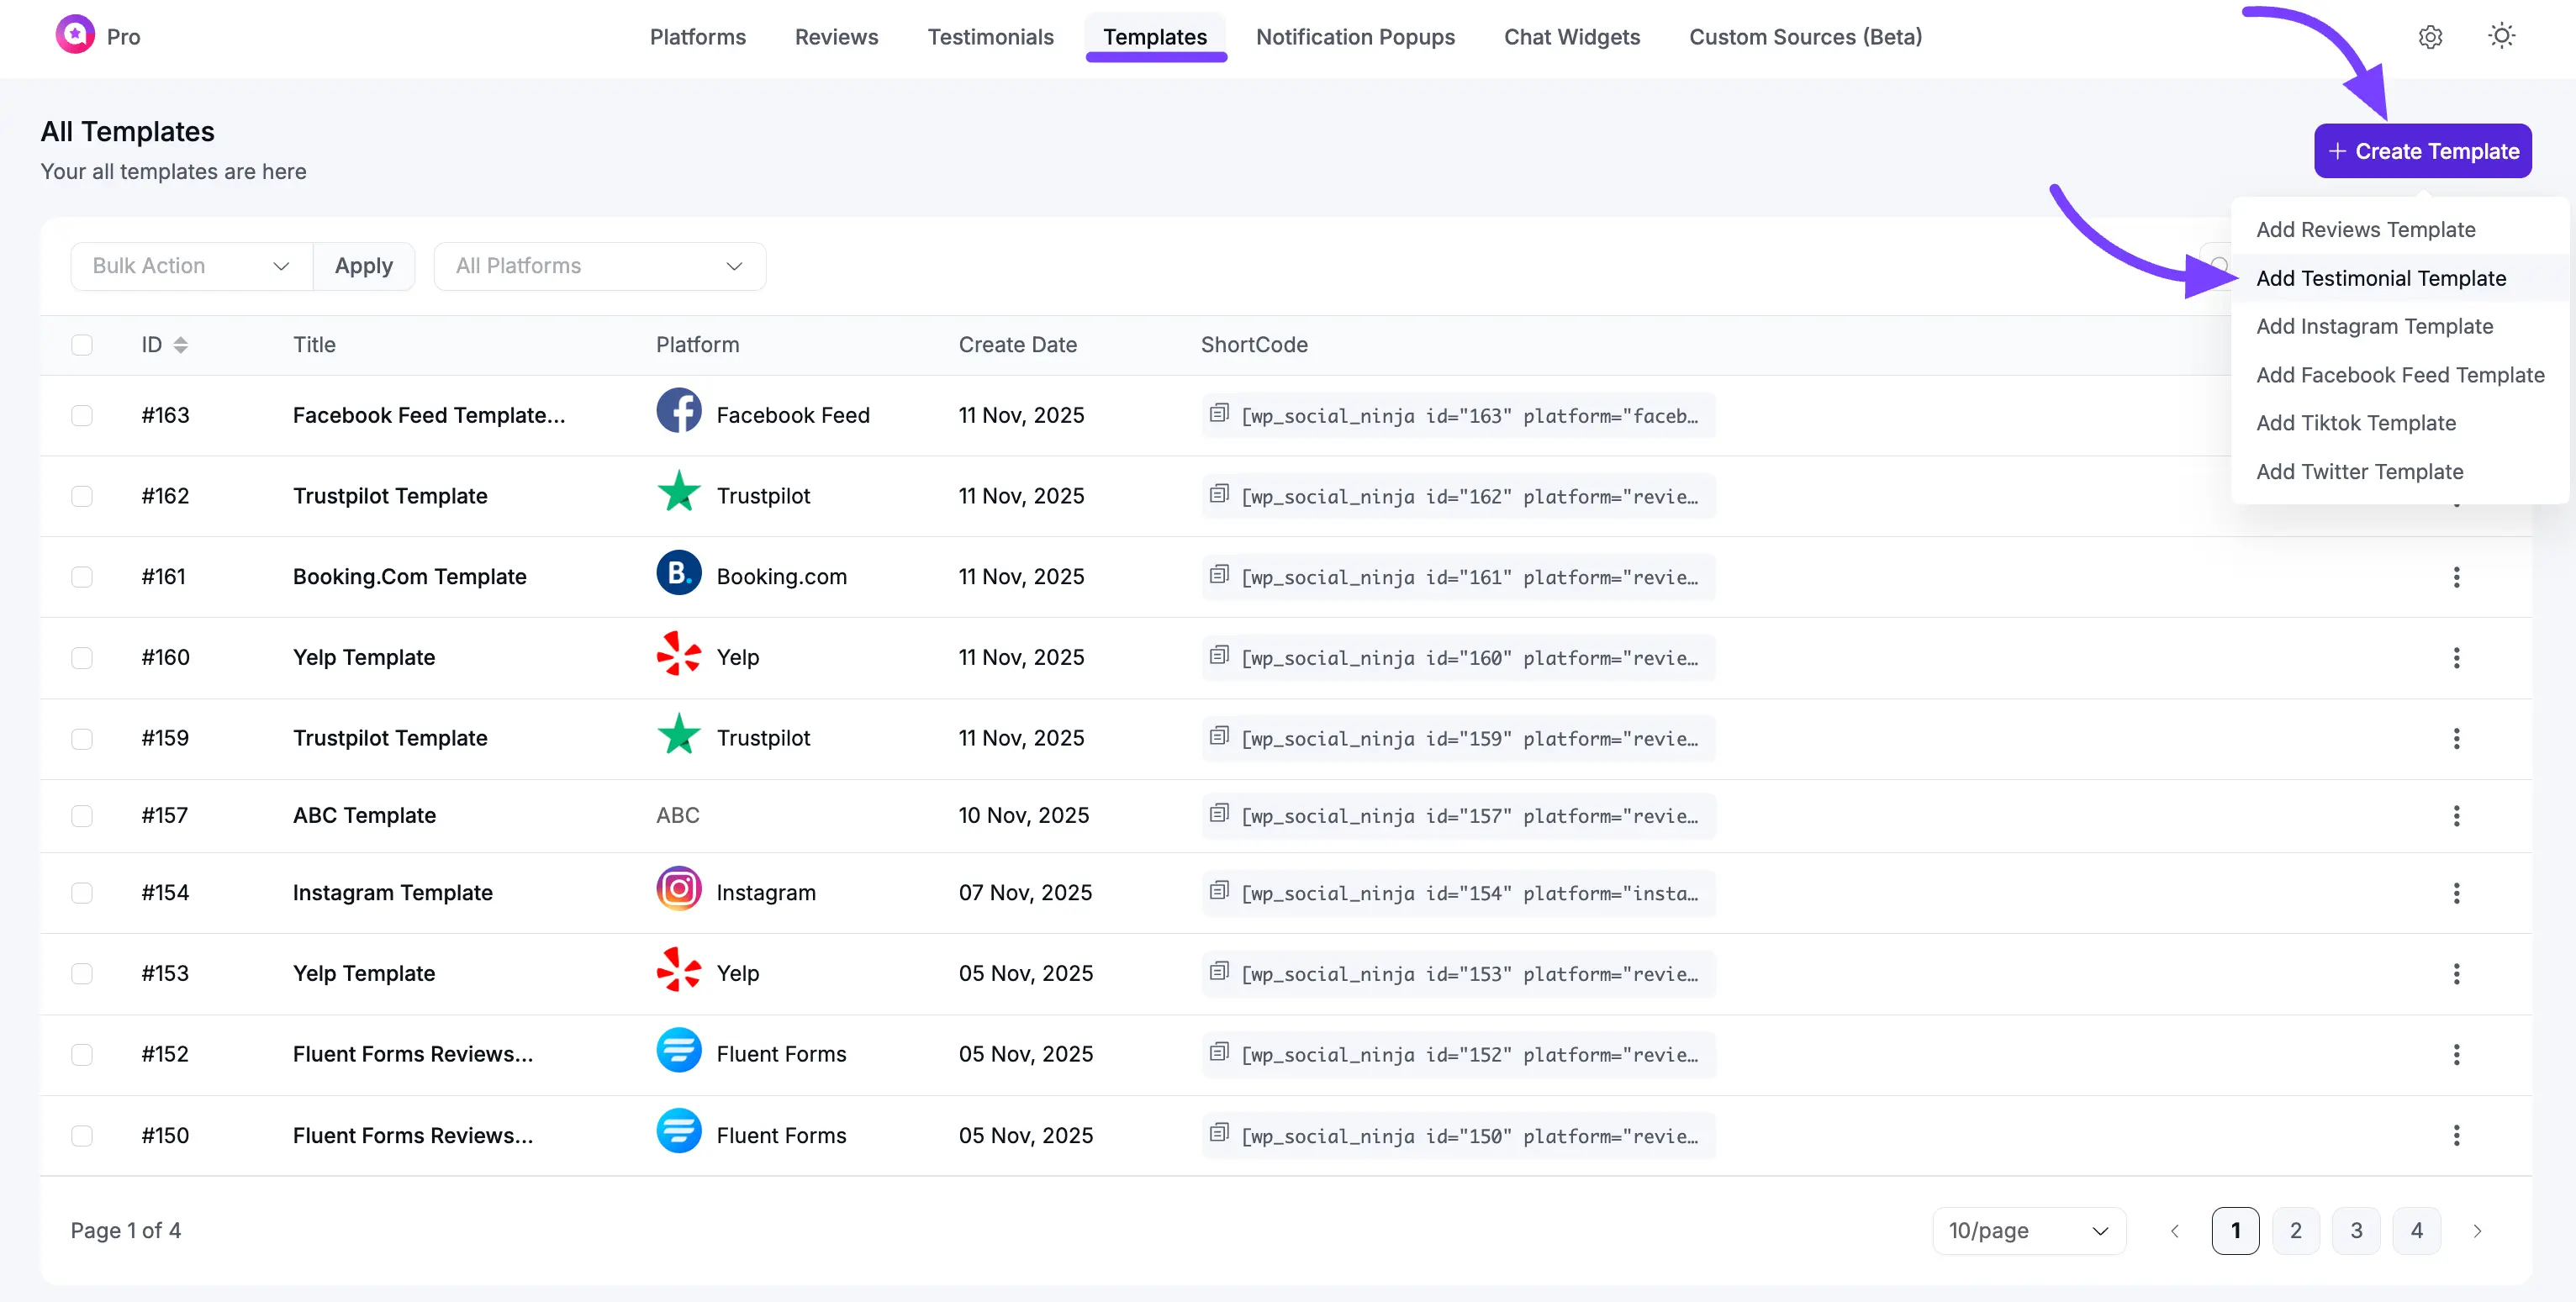
Part 2: Customizing Your Testimonial Template (General Settings)
Now that you have some testimonials, it's time to create a template to display them on your website.
Go to WP Social Ninja → Templates and click "Add New Template". Select Testimonials as your platform. This will take you to the template editor. The General tab controls what your template shows and how it functions.
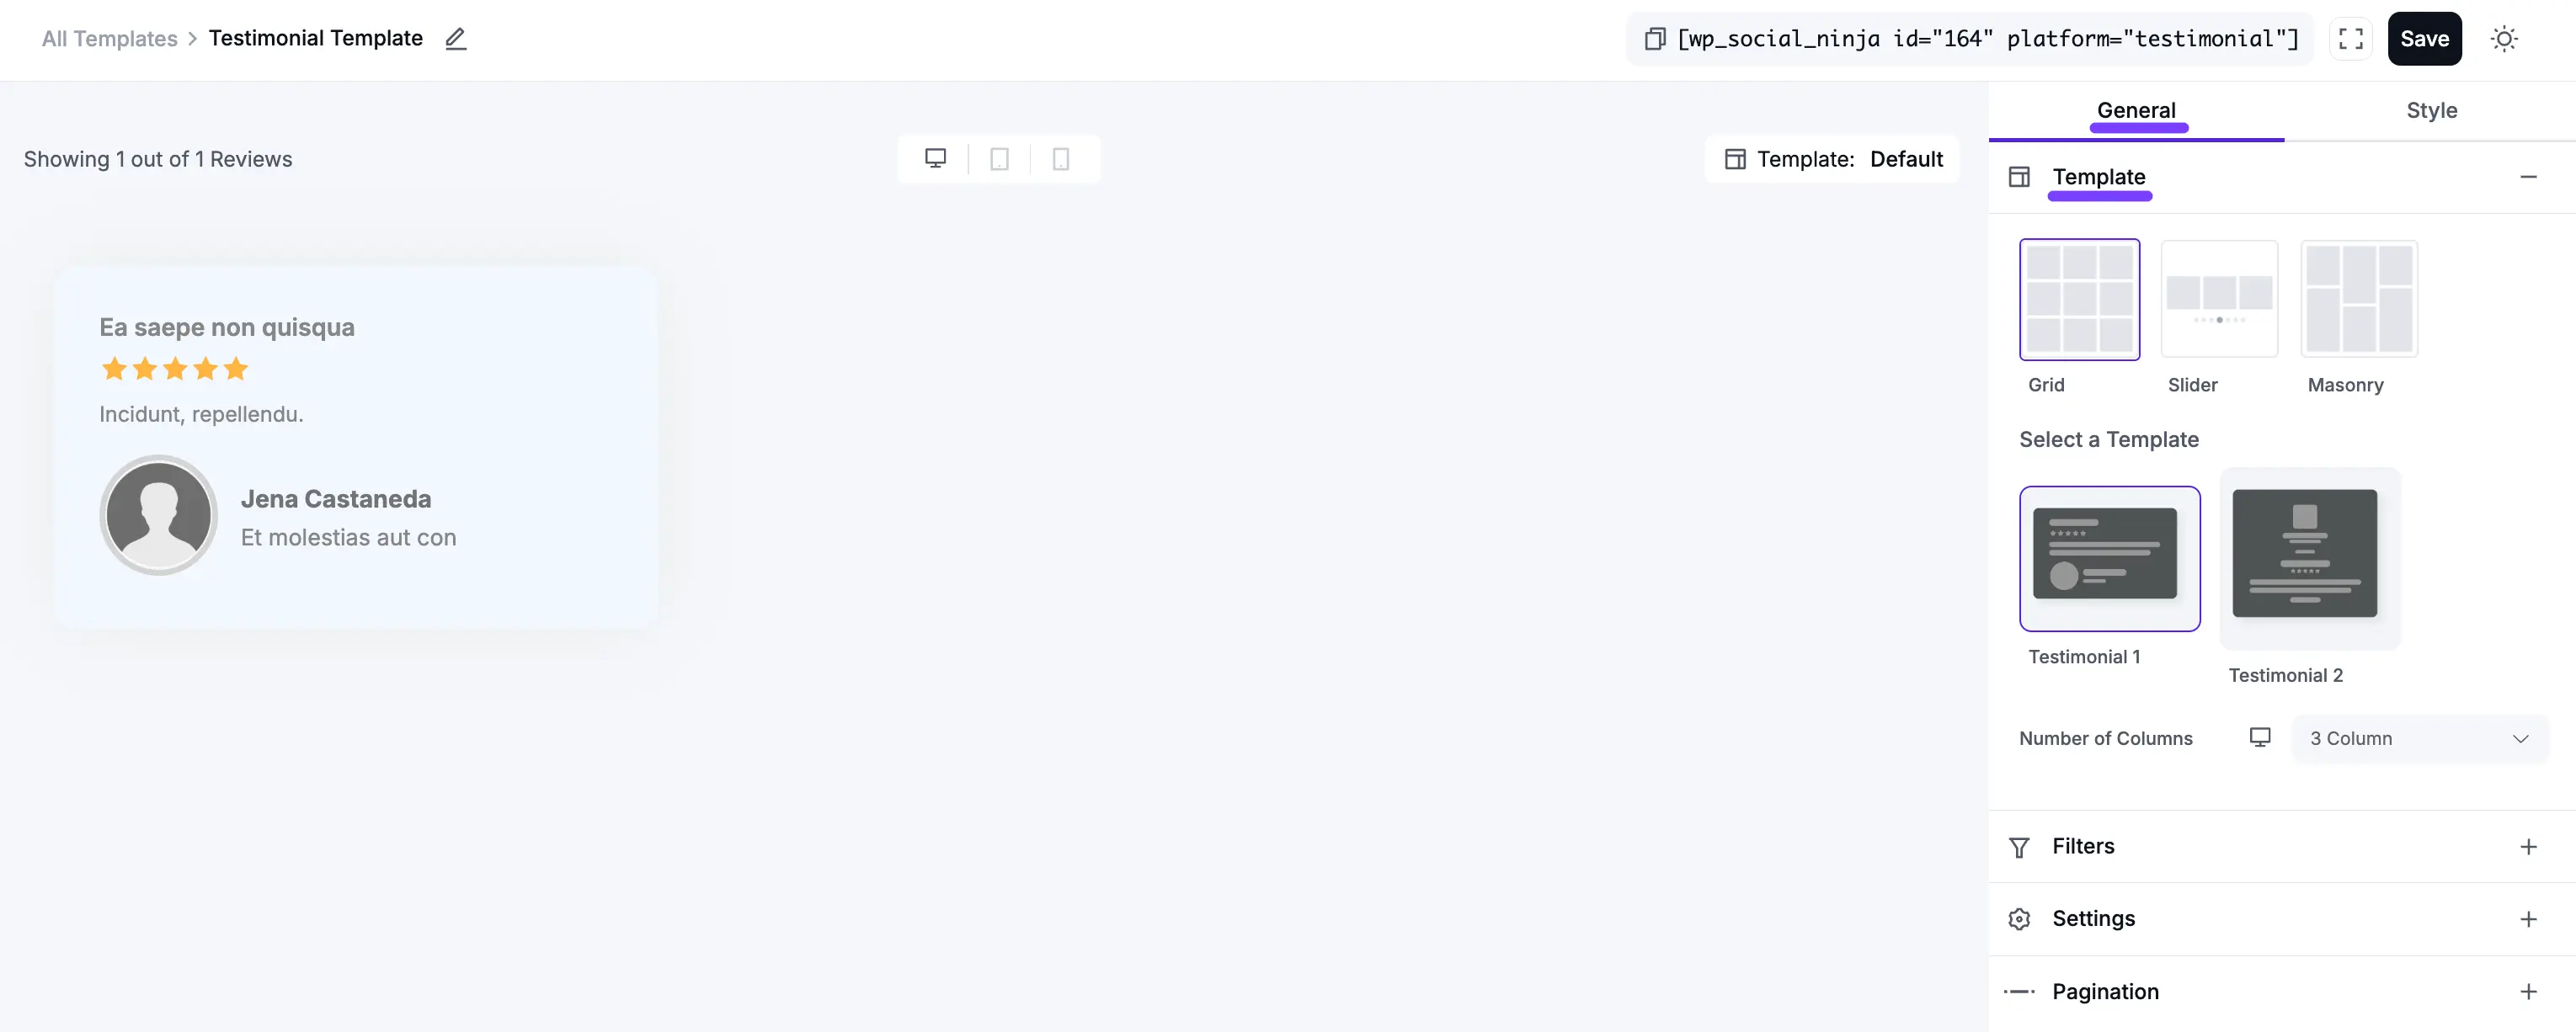
1. Template
This section controls the visual structure and arrangement of your testimonials.
- Layout Type: This is the foundational structure of your feed.
- Grid: Creates a clean, multi-column grid where all boxes are the same height.
- Slider: Displays your testimonials in a horizontal, swipe-able carousel.
- Masonry: A "Pinterest-style" grid where boxes have different heights to fit together.
- Select a Template: These are pre-designed visual "skins" (e.g., Testimonial 1, Testimonial 2) that change the look of your testimonial boxes.
- Number of Columns: Set the number of columns to show on Desktop, Tablet, and Mobile.
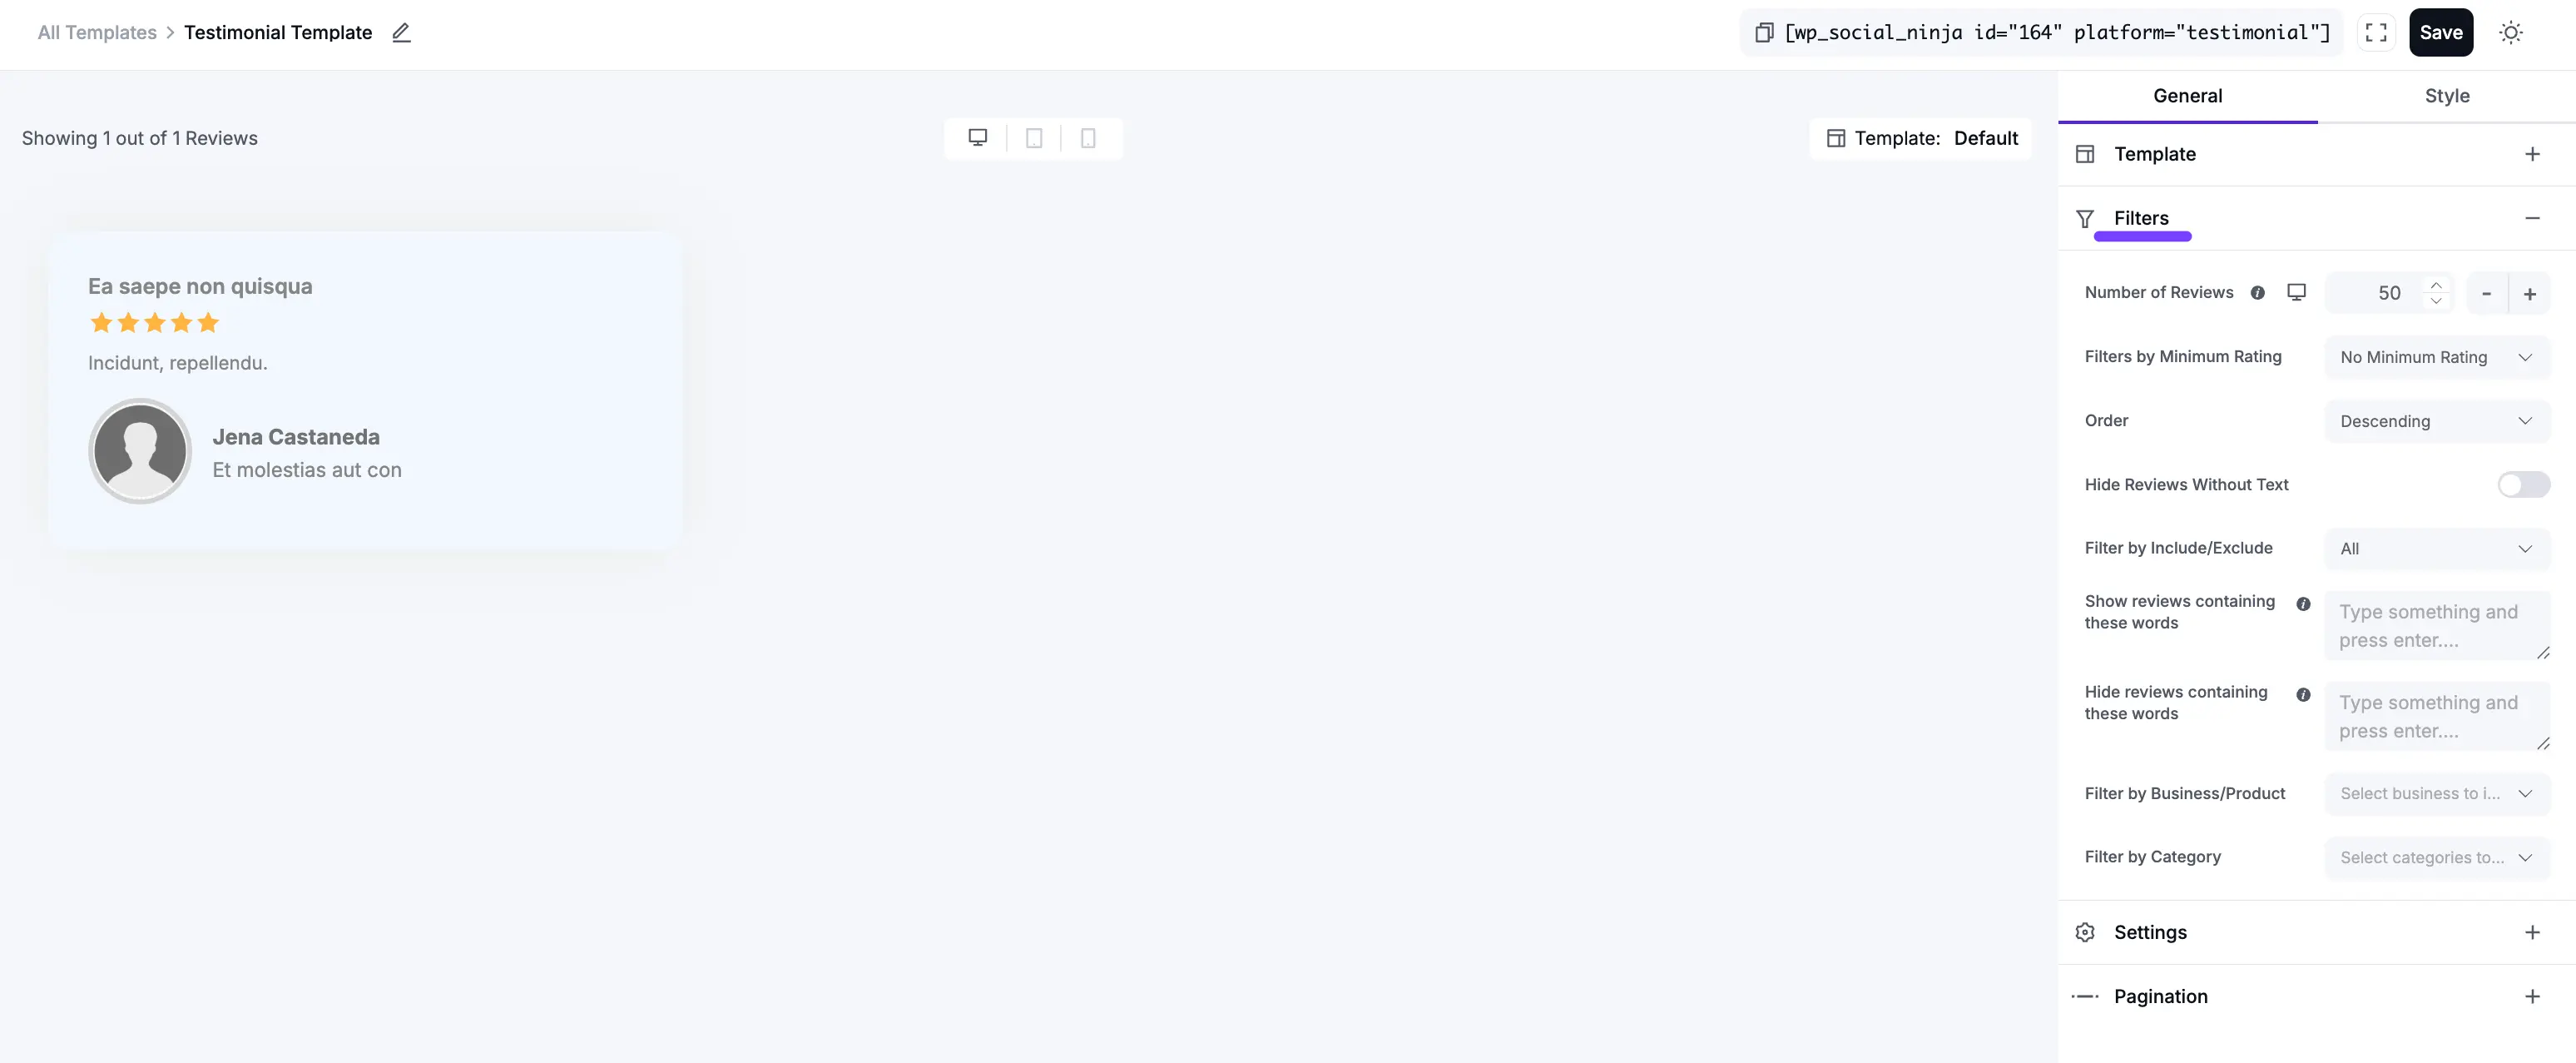
2. Filters
This section is how you refine your feed to only show the specific testimonials you want.
- Number of Reviews: Sets the total number of testimonials to load into this template.
- Filters by Minimum Rating: A powerful filter. Select "5 Stars" to create a template that only shows your best 5-star reviews.
- Order: Sort your testimonials by Descending (newest first) or Ascending (oldest first).
- Hide Reviews Without Text: If turned On, this will hide any testimonials that have a star rating but no written text.
- Filter by Include/Exclude: Manually select specific testimonials to either Include (show only these) or Exclude (show all except these).
- Show reviews containing these words: Create a topic-specific feed. For example, enter "customer support" to only show testimonials that mention that phrase.
- Hide reviews containing these words: A moderation tool to hide testimonials that mention certain words (e.g., "bug," "problem").
- Filter by Business/Product: (If applicable) Show testimonials associated with a specific WooCommerce product.
- Filter by Category: This is very powerful. It lets you create a template that only shows testimonials from a specific category you created in Part 1 (e.g., "Service Reviews").
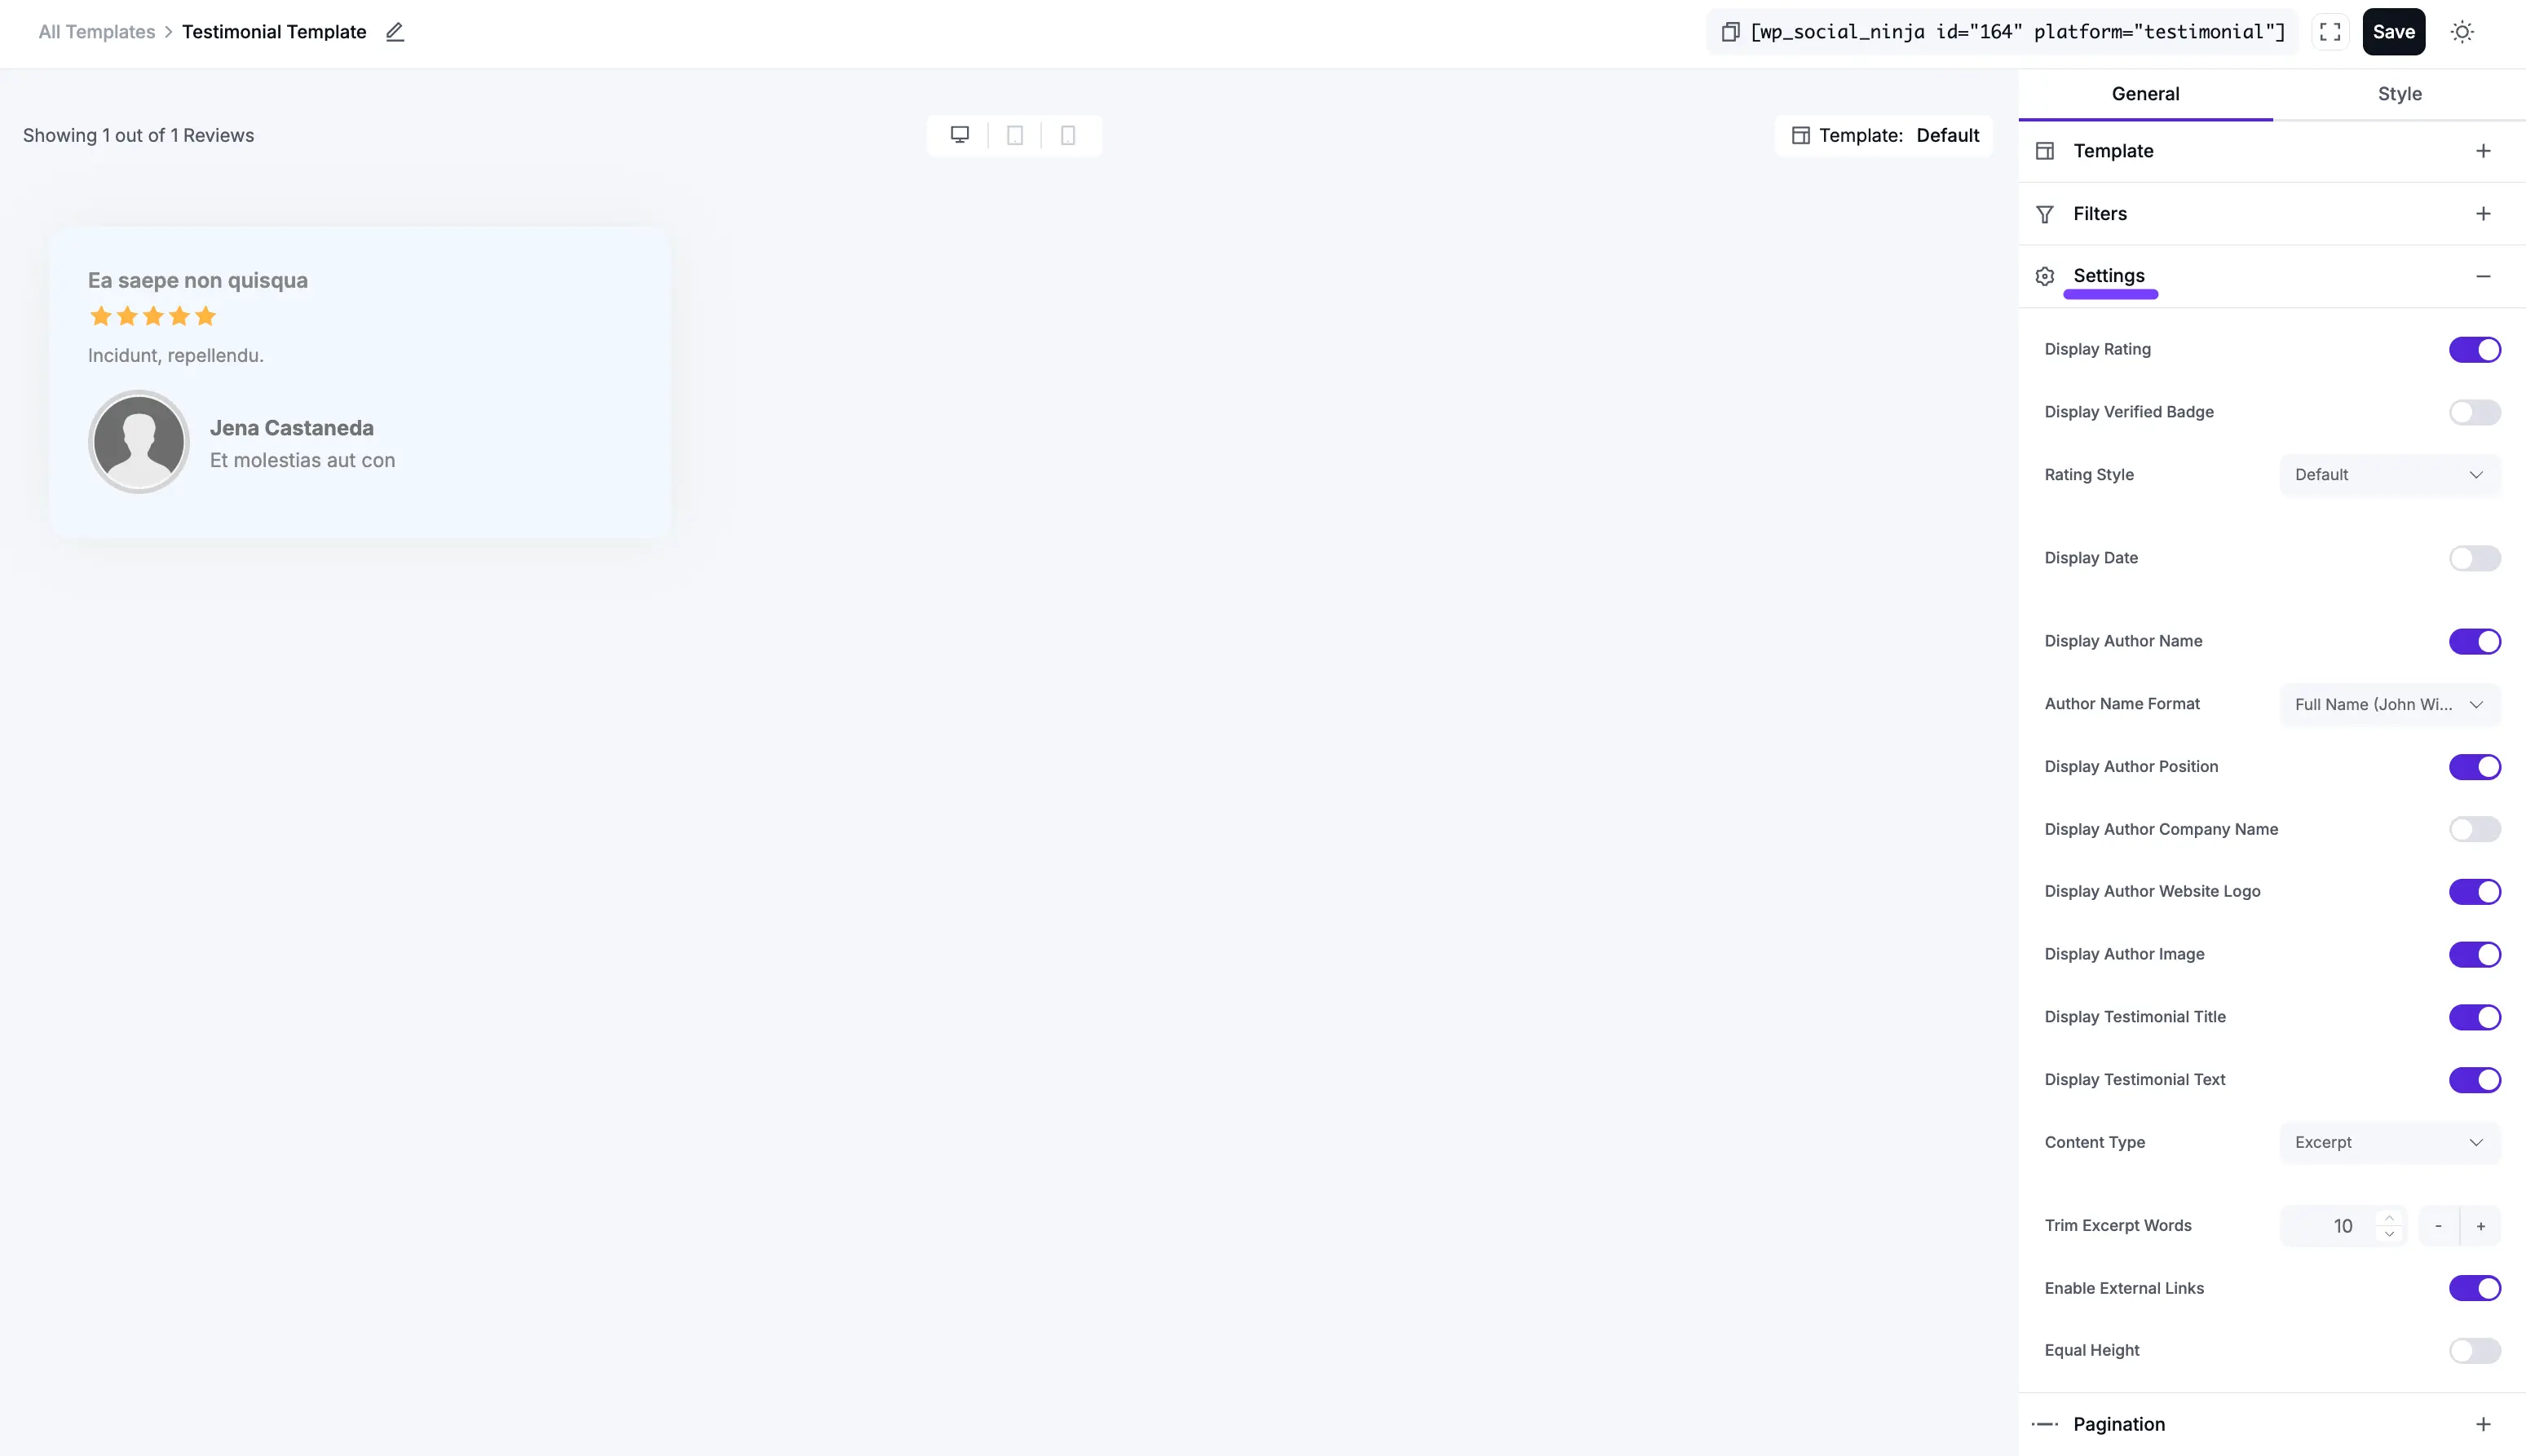
3. Settings (Content Display)
This section controls which pieces of information you want to display on each testimonial card.
- Display Rating: Show or hide the star rating.
- Display Verified Badge: Show or hide a "Verified" badge for extra trust.
- Rating Style: Choose the visual style for the stars.
- Display Date: Show or hide the date.
- Display Author Name: Show or hide the author's name.
- Author Name Format: Choose to display the Full Name or just the First Name.
- Display Author Position: Show or hide the author's job title (e.g., "Marketing Manager").
- Display Author Company Name: Show or hide the author's company.
- Display Author Website Logo: Show or hide the company's logo. This adds huge credibility.
- Display Author Image: Show or hide the author's profile picture.
- Display Testimonial Title: Show or hide the main "headline" of the testimonial.
- Display Testimonial Text: Show or hide the main body of the review.
- Content Type: Choose to show the Full Content or a short Excerpt.
- Trim Excerpt Words: If you chose "Excerpt," set the maximum number of words (e.g., 25) to show. This is key for creating a clean, uniform look.
- Enable External Links: A toggle to make any links in the text clickable.
- Equal Height: Essential for the Grid layout. Turn this On to force all boxes to the same height. Turn it Off for the Masonry layout.
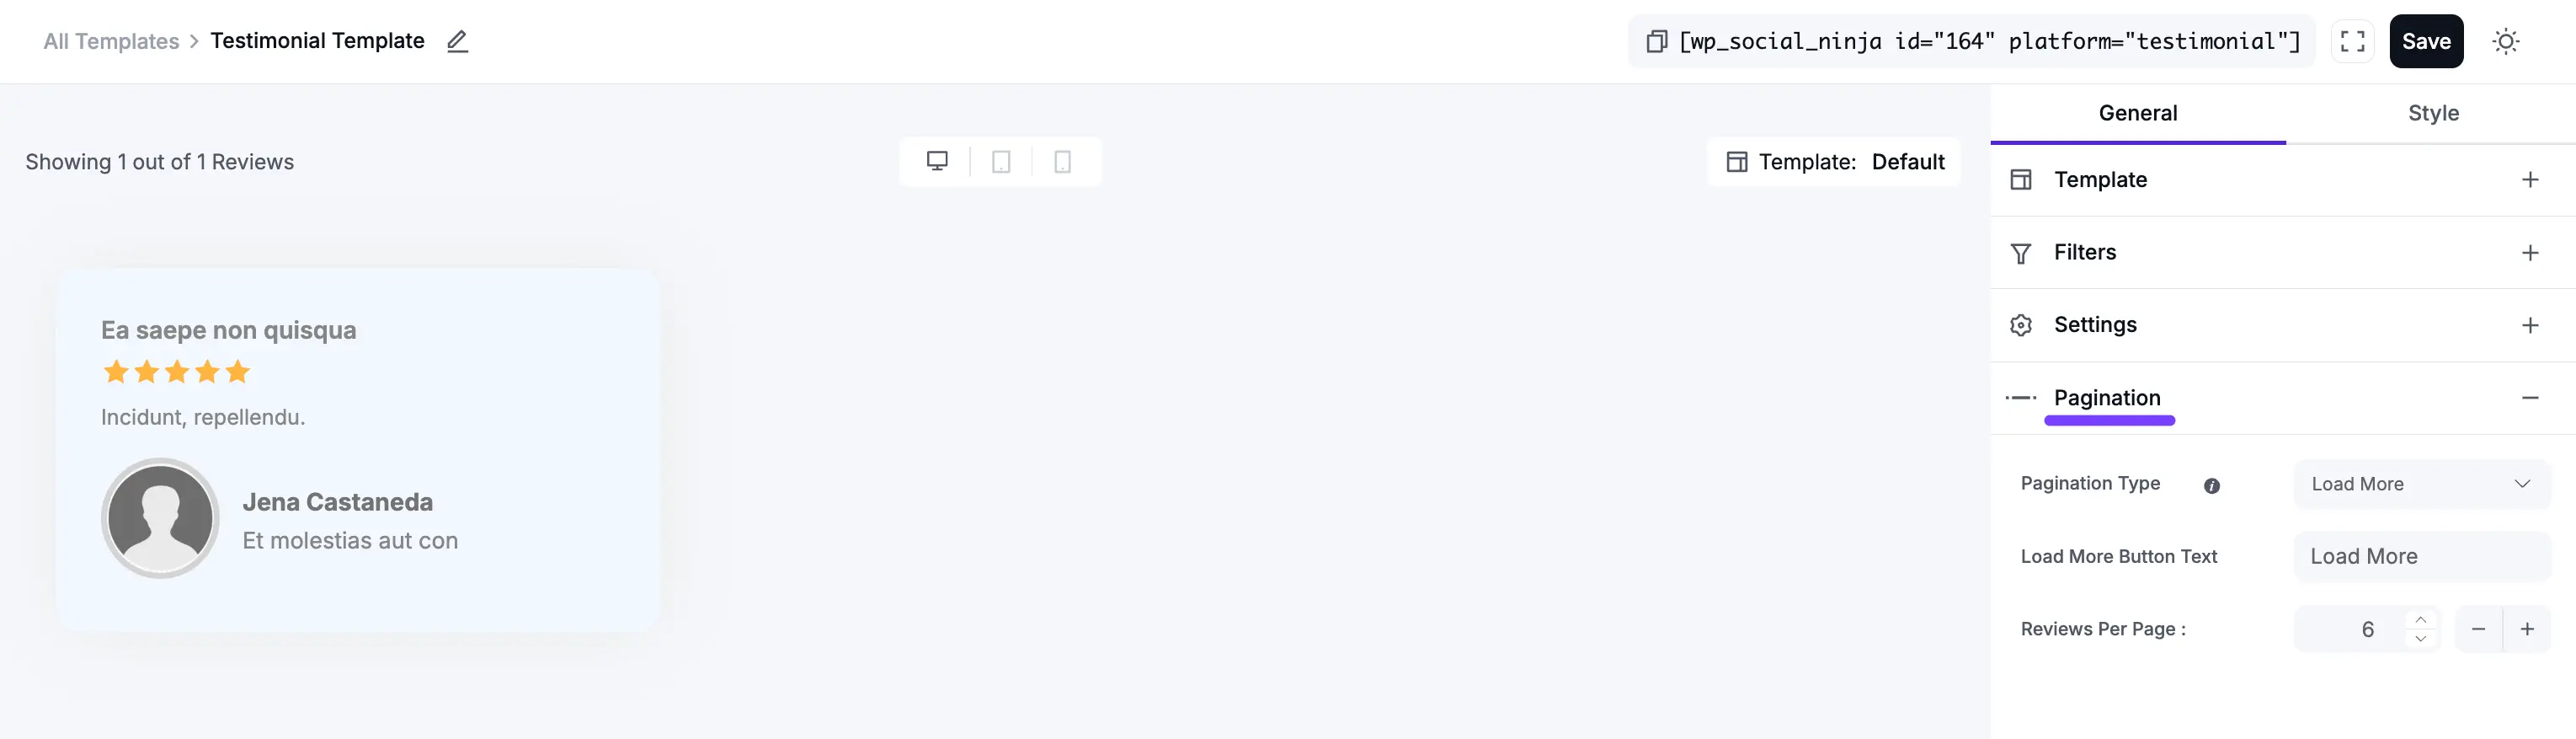
4. Pagination
This controls how visitors load more testimonials.
- Pagination Type: Choose None (to show a fixed number) or Load More (to add a button).
- Load More Button Text: Customize the text (e.g., "Show More Stories").
- Reviews Per Page: Set how many new testimonials load each time the "Load More" button is clicked.
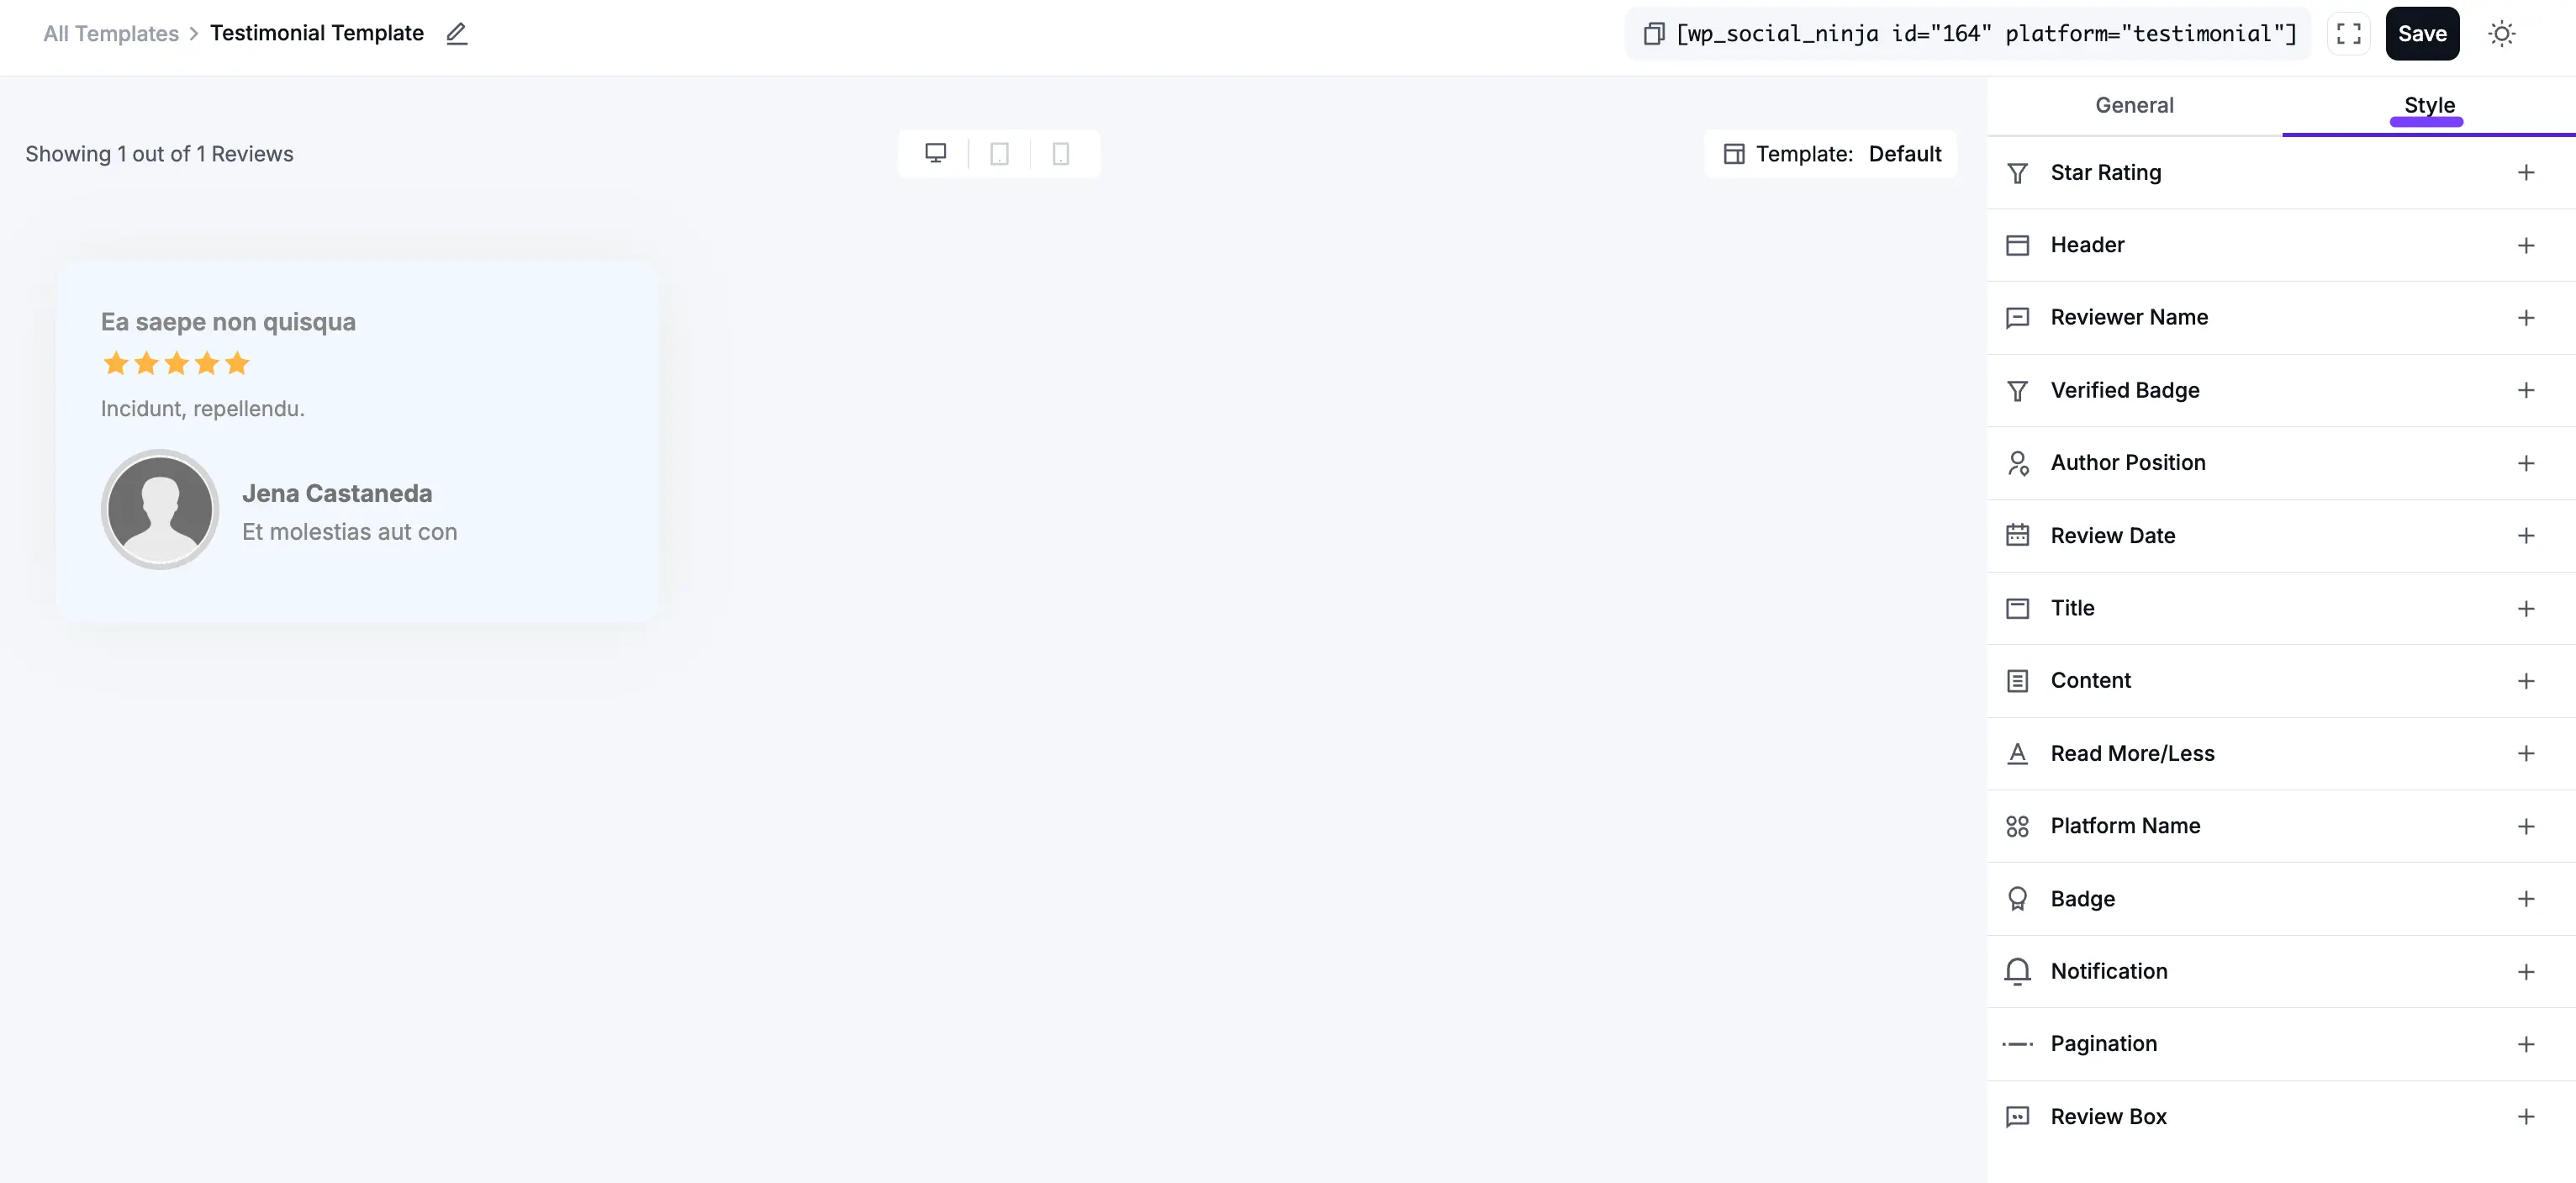
Part 3: Customizing Your Testimonial Template (Style Settings)
Now that you've set up the content, click on the Style tab to control the visual design. This is where you match your template to your brand's colors and fonts.