Appearance
Style
Designing your Feeds and Reviews is simple and fun with WP Social Ninja’s powerful styling options. The Style settings give you complete control over the appearance of your social feeds and review templates. From colors, fonts, and borders to spacing and layout, you can easily match your website’s branding in just a few clicks.
Access the Style Settings
When editing any of your feed or review templates, simply click on the Style tab, located right next to the General tab.
This will open a panel with all the customization settings. You can change everything from colors and typography to spacing and borders.
Styling Your Social Feeds (Twitter, Facebook, etc.)
When you are styling a social feed, the Style (Pro) tab organizes the settings into logical sections. You can customize every part of it simply and easily.
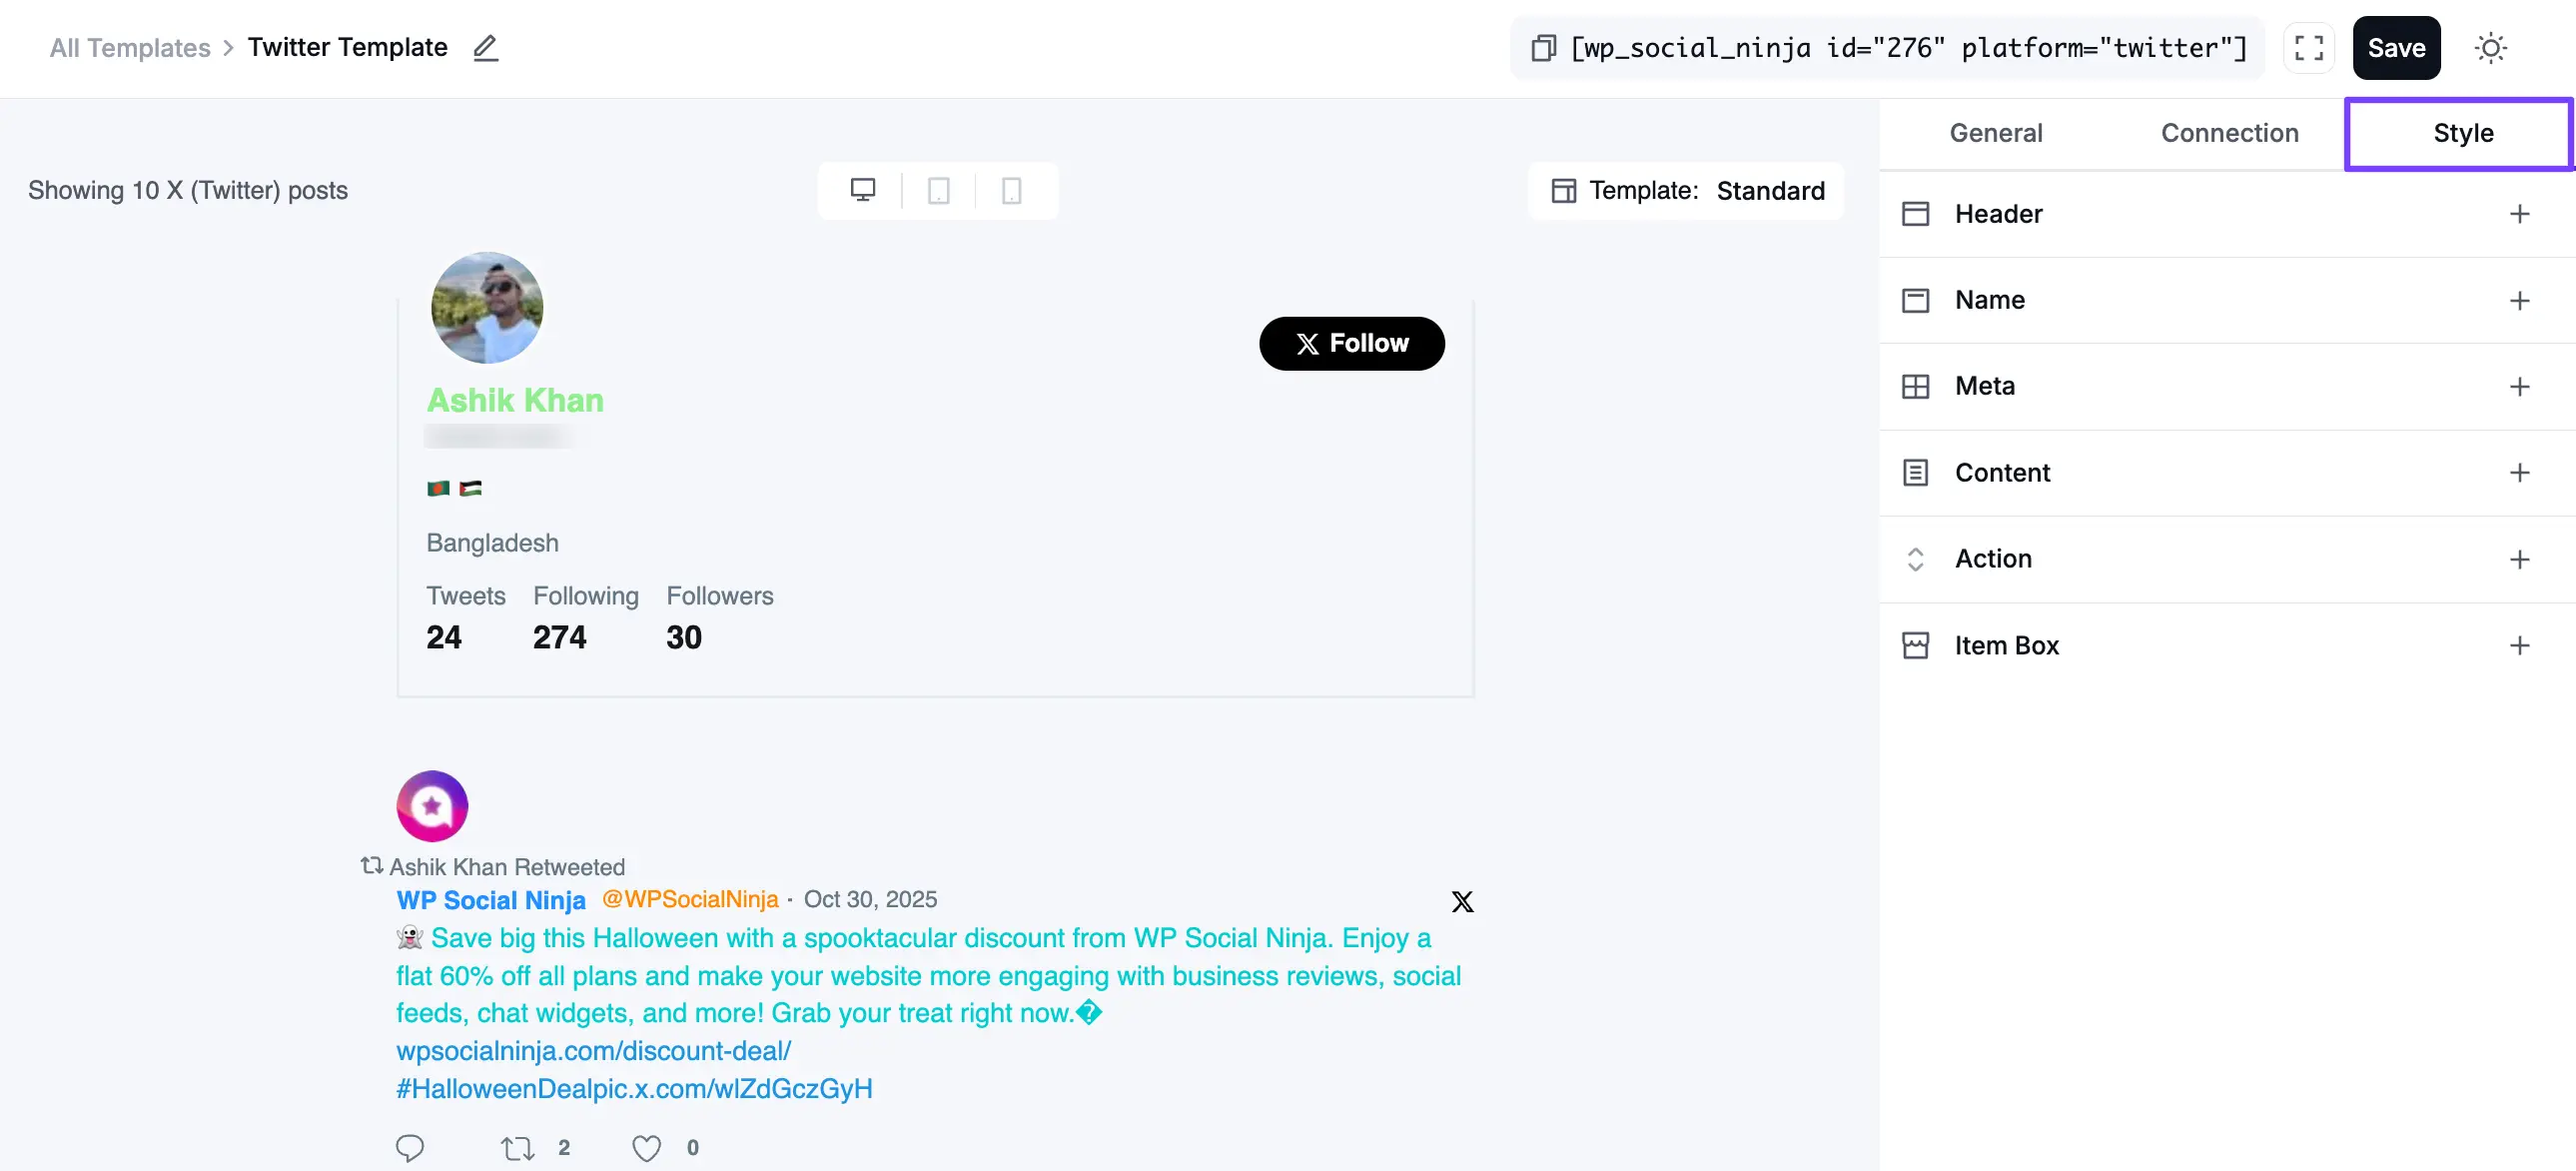
- Header: This allows you to style the main header block at the top of your feed. You can customize the "Follow" button, the profile name, bio text, and the follower/following counts.
- Name: This controls the appearance of the author's name (e.g., "Josep Peter") on each post or tweet.
- Meta: This allows you to style the metadata associated with each post, such as the @username and the date it was posted.
- Content: This is for styling the main text of the post or tweet itself. You can change the font, color, and size of the post's content.
- Action: This allows you to customize the action icons at the bottom of each post, such as the "Reply," "Retweet," and "Like" buttons.
- Item Box: This controls the container for each post. You can use it to add a background color, border, or shadow to each "card" in your feed.
Styling Your Reviews (Google, WooCommerce, etc.)
Customizing your review templates helps you create a polished, on-brand display that builds trust with your audience.
When editing a review template, go to the Style tab to access all the available customization options. Each section gives you full control over how your review cards look and feel.
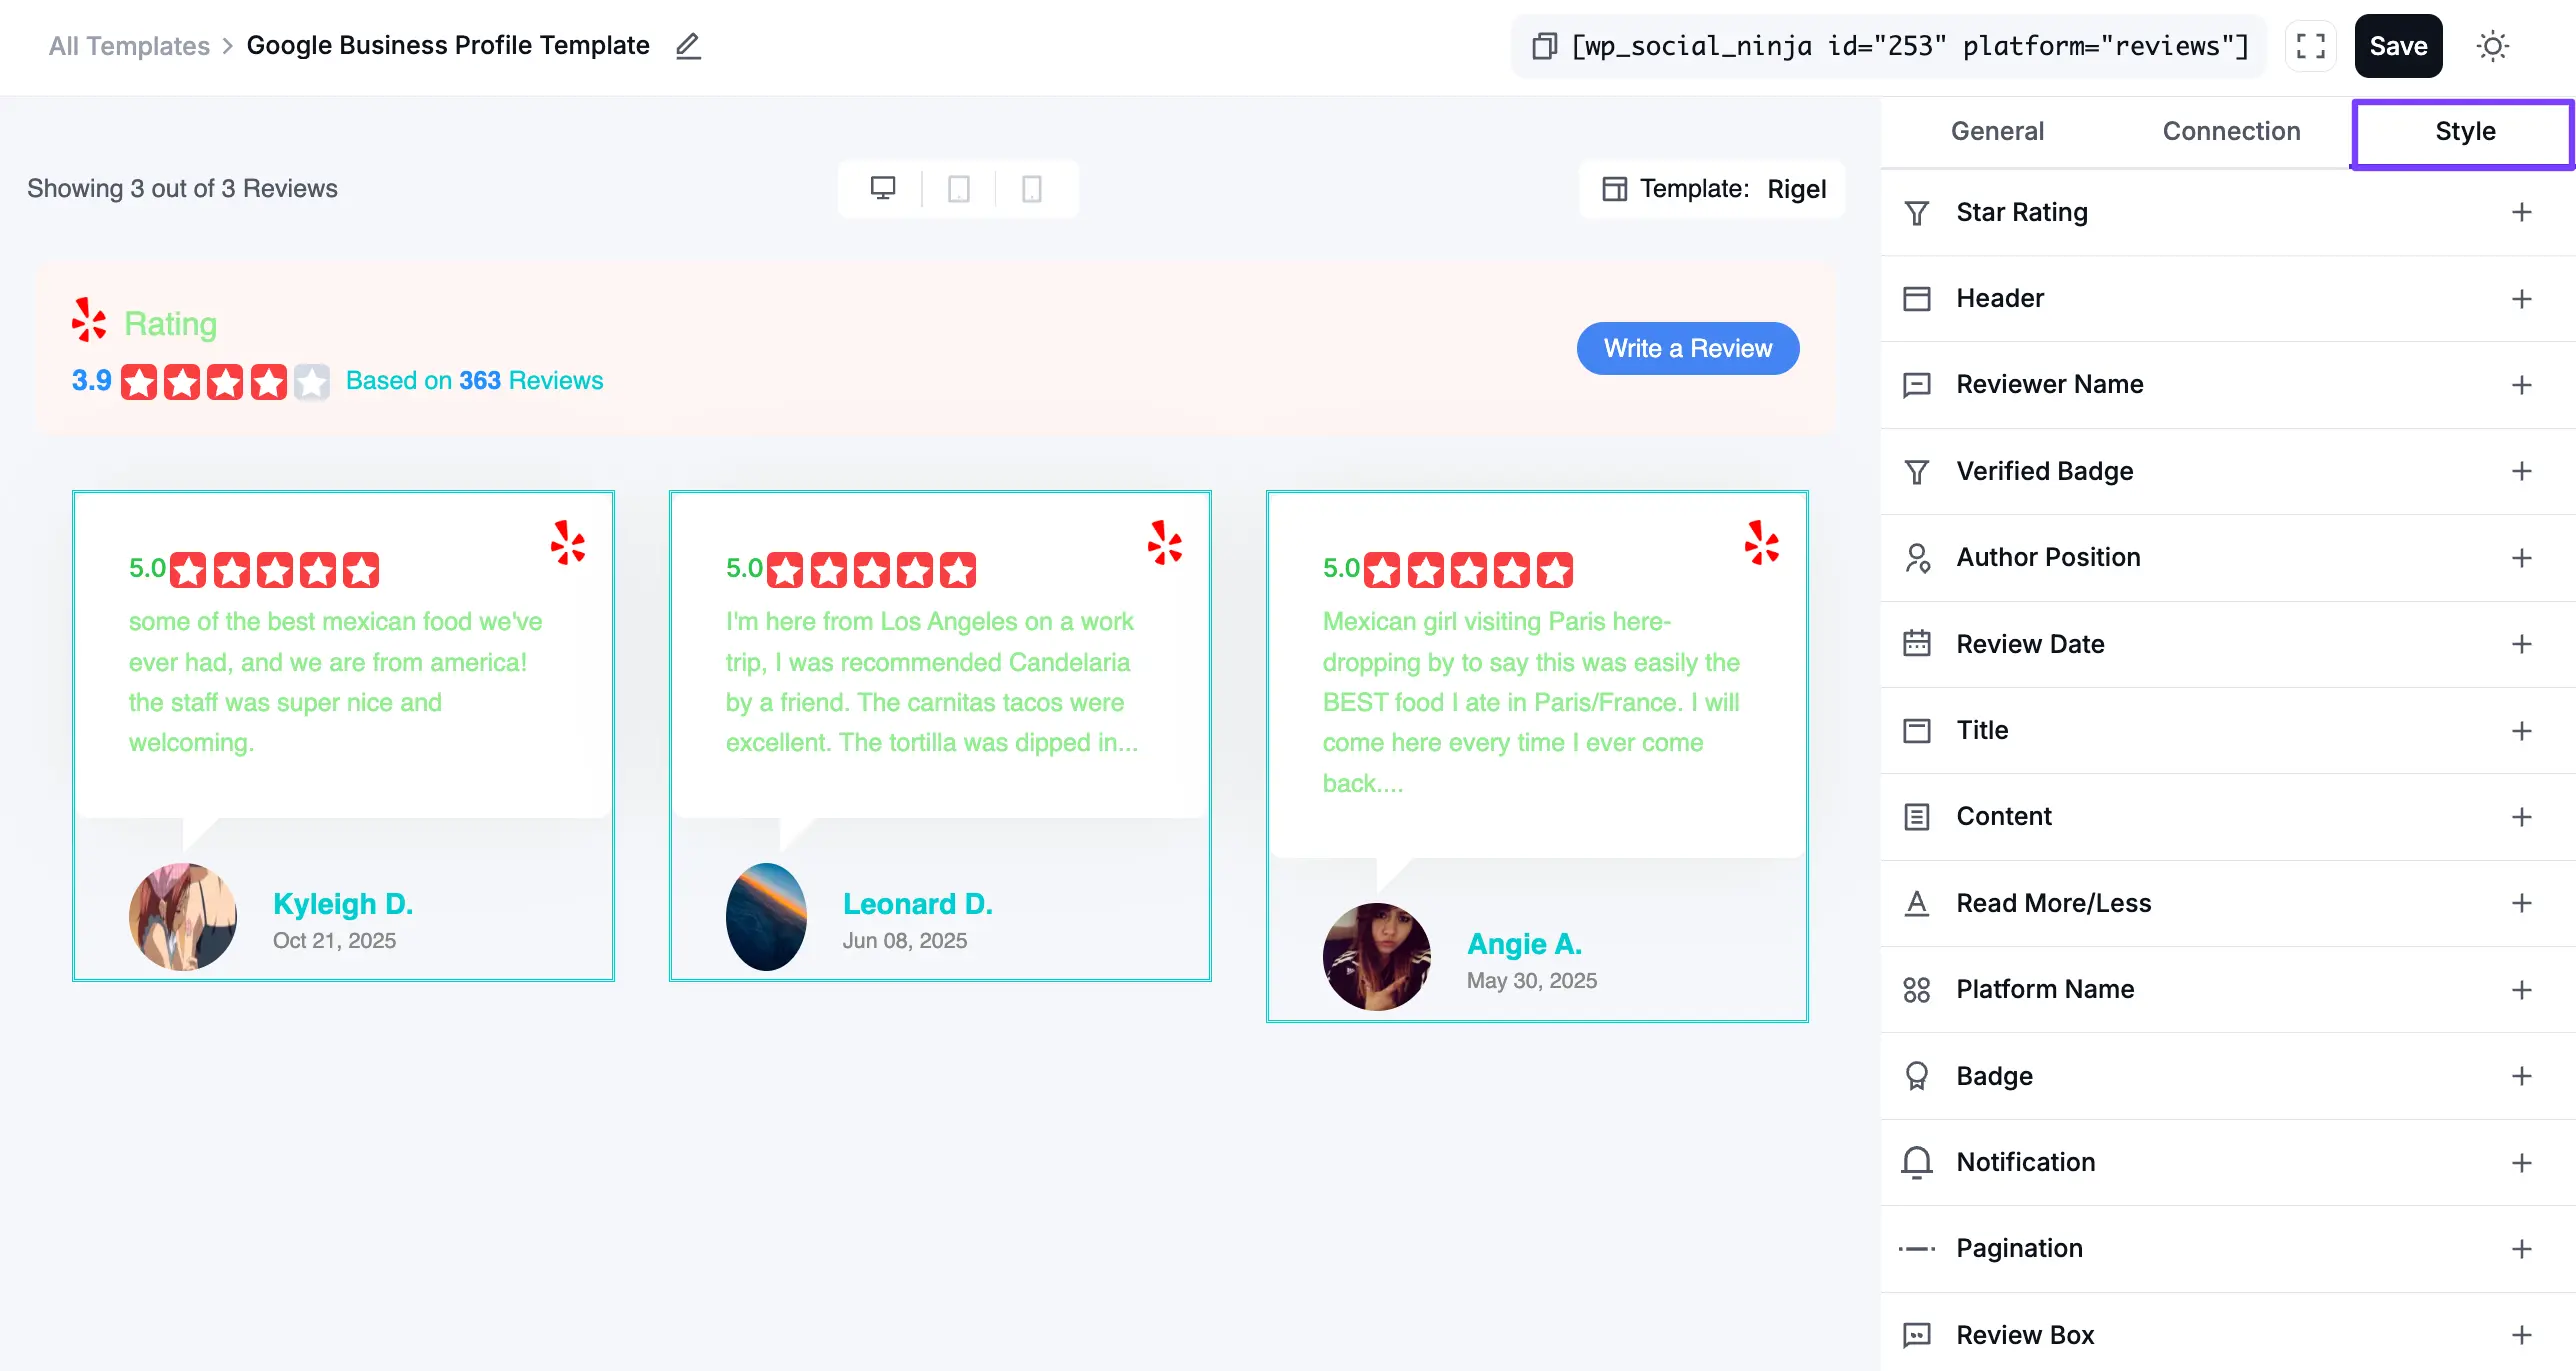
Here’s what you can customize:
- Star Rating: Adjust the color of the star icons in your main rating header.
- Header: Style the main heading of your reviews block (for example, the “Rating” label or “Based on 3 Reviews” summary).
- Reviewer Name: Change the font, color, and size of the reviewer’s name (e.g., “Kyleigh D.”).
- Verified Badge: Customize the appearance of the “Verified” badge shown on certain reviews.
- Author Position: Style the reviewer’s job title or position, if displayed.
- Review Date: Set the color, font, and size of the date when the review was posted.
- Title: Adjust the styling of the review title (for example, “Great Service!”).
- Content: Style the main body text of the review.
- Read More/Less: Customize the “Read More” or “Read Less” links for longer reviews.
- Platform Name: Control how the platform name (e.g., "WooCommerce" or "Google") appears on the review card.
- Badge: Adjust the platform’s icon or badge style.
- Notification: Configure styling for notification popups (if used with this template).
- Pagination: Style the “Load More” button for templates that show multiple reviews.
- Review Box: Customize the container for each review including background color, border, shadow, and padding. This helps you create a clean and consistent look, just like the sample shown above.
Responsive Styling
Want to make sure your feeds look perfect on any device? You can! WP Social Ninja lets you adjust your styling for different screen sizes. At the top of the styling panel, you will see device icons:
- Desktop: How your feed looks on large screens.
- Tablet: How your feed looks on tablets.
- Mobile: How your feed looks on mobile phones.
TIP
Responsive Device options are also available for the Review Template.
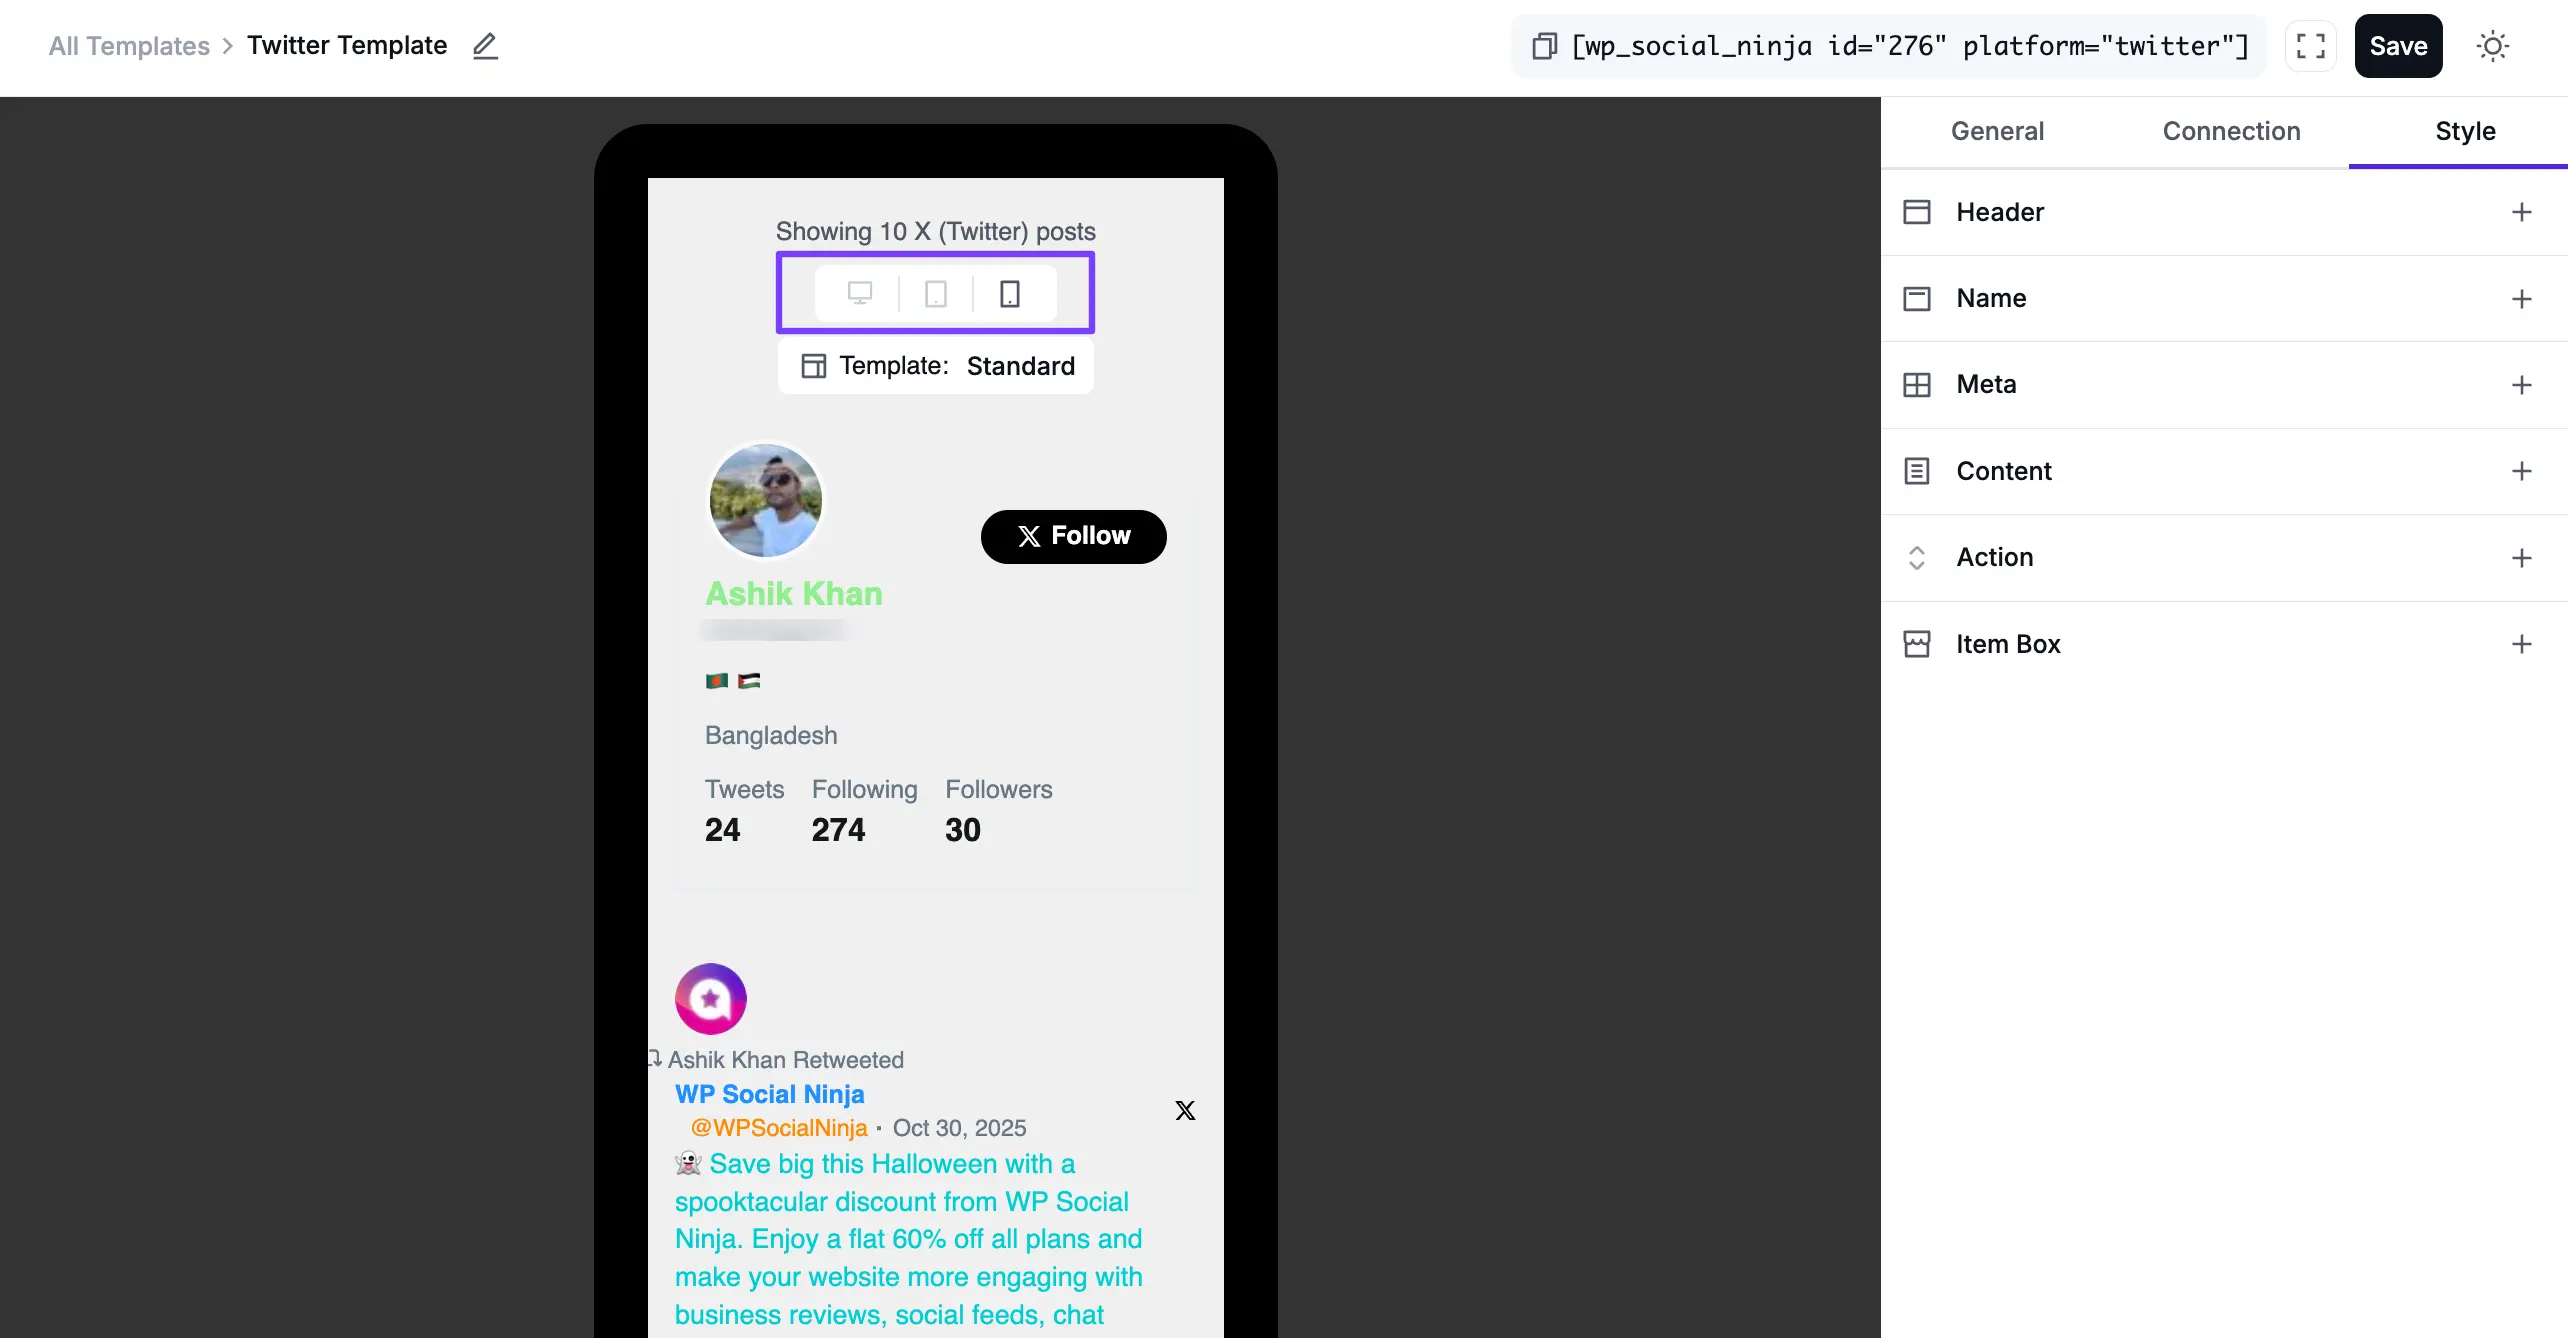
Simply click an icon (like Tablet), and any style changes you make (like a smaller font size or a different layout) will only apply to that view. This gives you complete control over the responsive design.
When you're finished styling, don't forget to click the Save Templates button to make your changes live!