Appearance
Notification Popup
Want to show off your best reviews as live social proof? WP Social Ninja’s Notification Popup feature lets you display your reviews one by one in a small, eye-catching pop-up on your site.
This is a fantastic way to build trust and show visitors that real people are enjoying your products or services. Let's walk through how you can set it up!
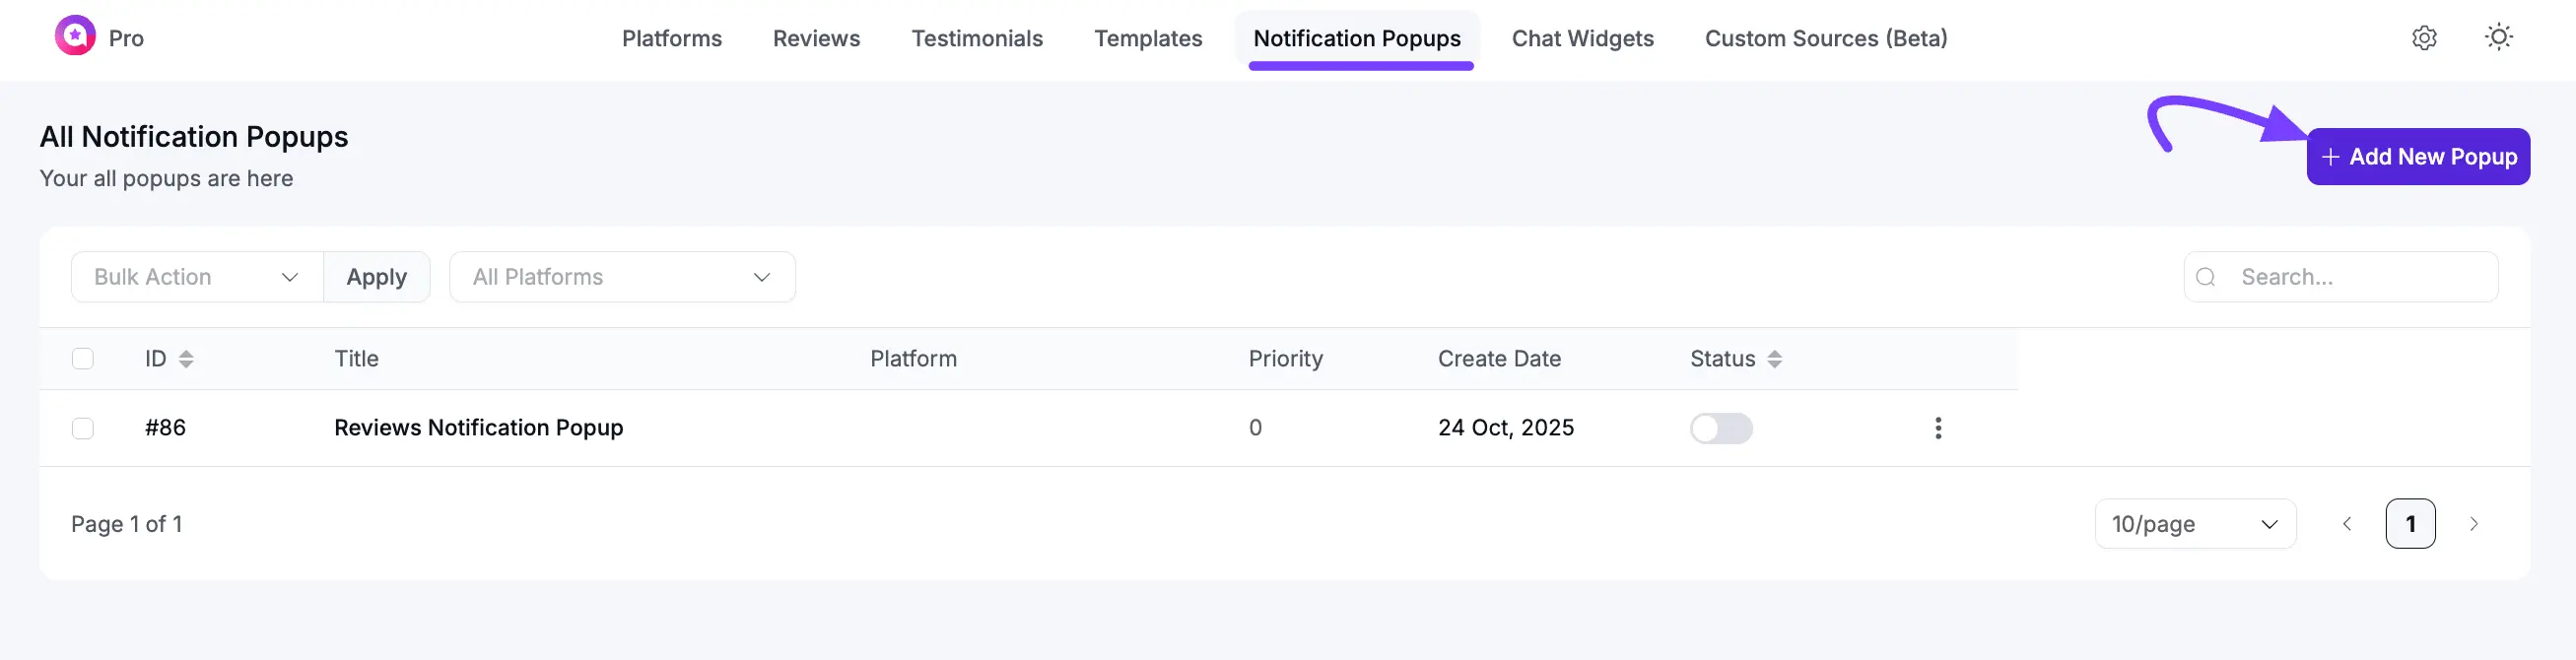
Create a New Notification Popup
To get started, you first need to create a pop-up template.
From your WordPress dashboard, navigate to WP Social Ninja → Notification Popups. Click the "Add New Popup" button in the top-right corner to open the editor.
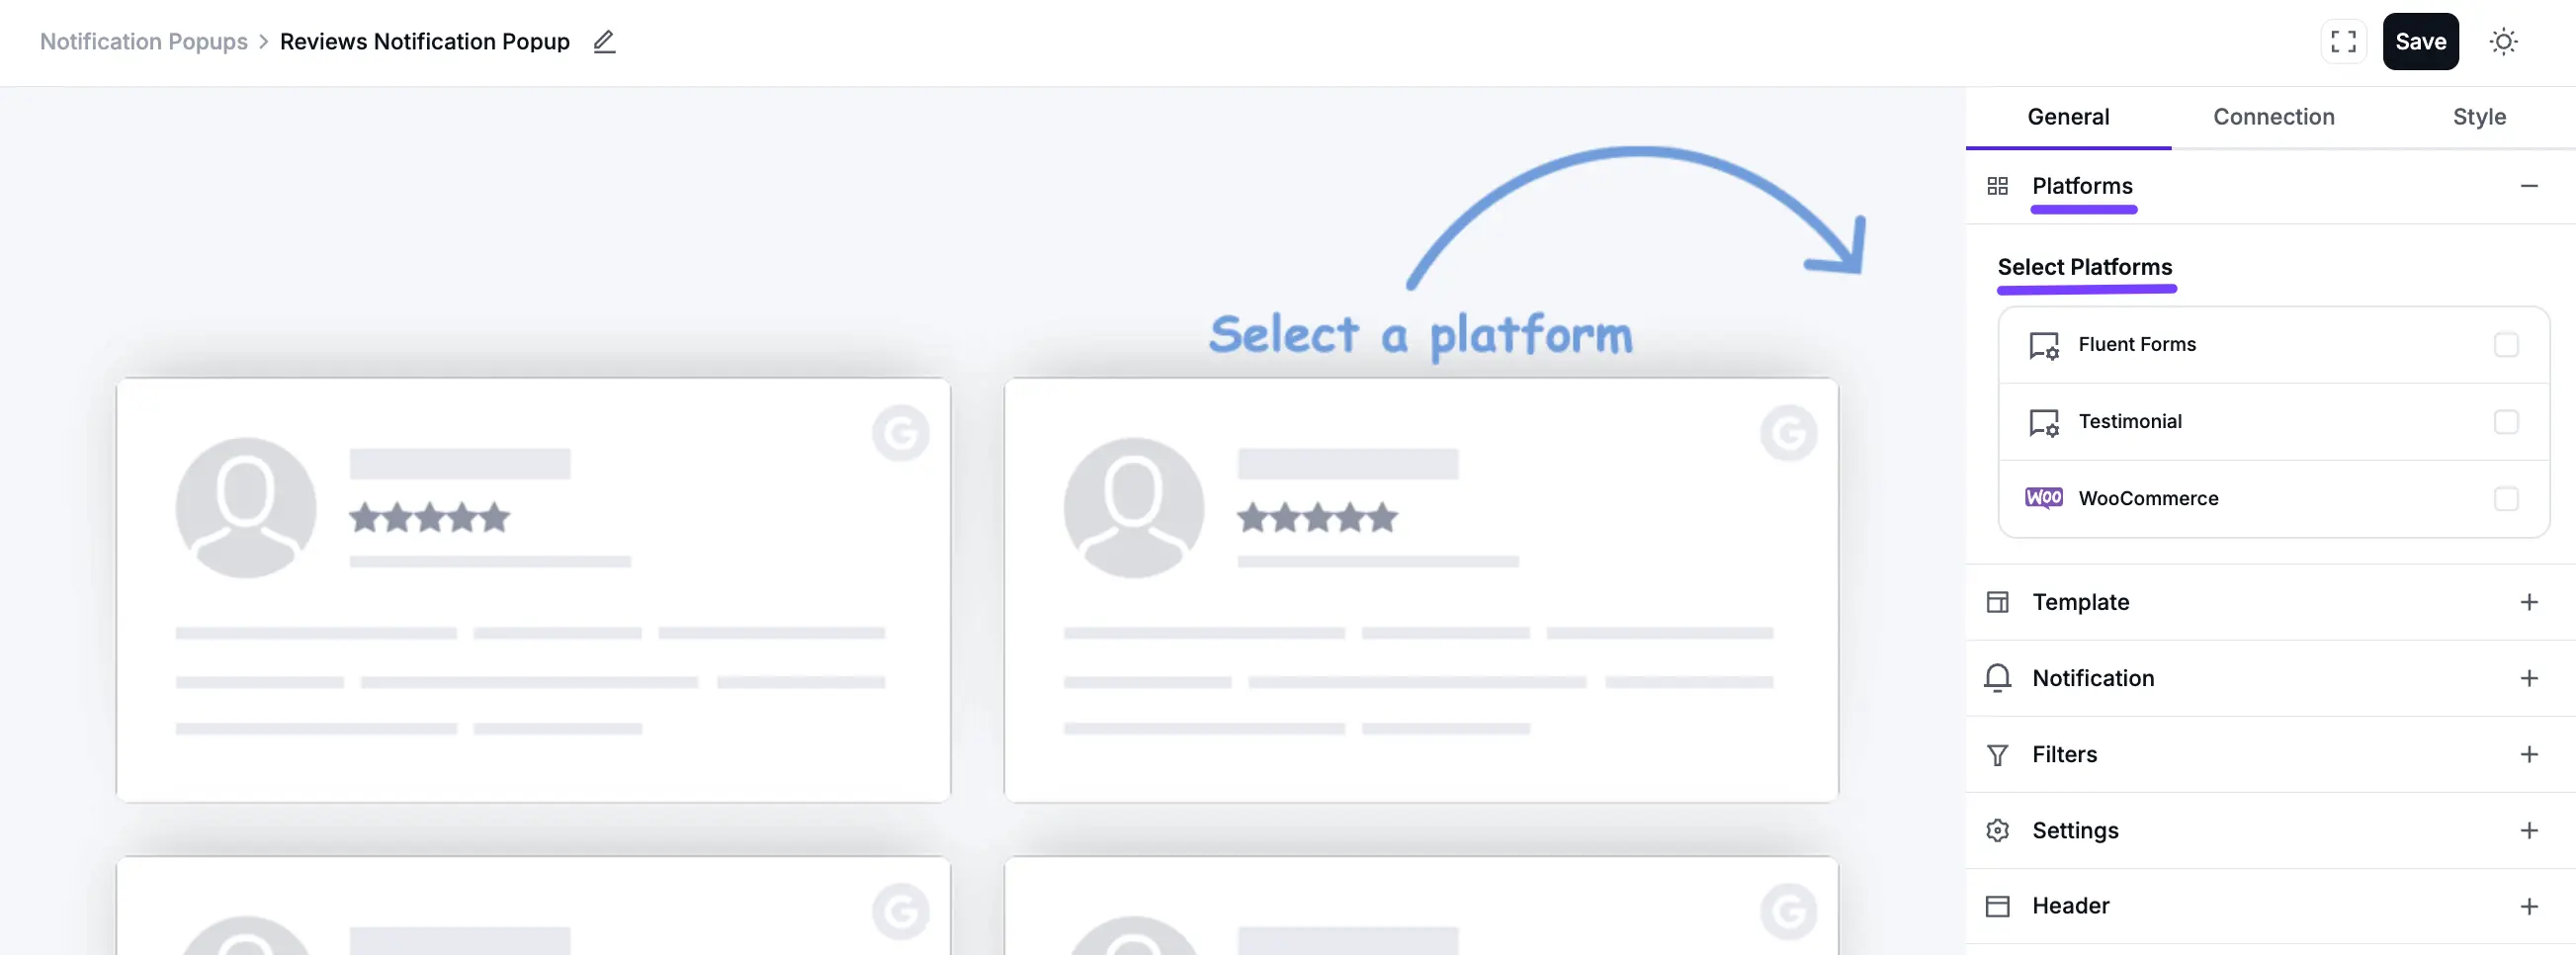
Configuring Your Popup (General Tab)
The General tab is where you select which reviews to display and set the basic style.
Select Platforms: First, you need to select your source. Click on the Platforms section and check the box for where you want to pull reviews from, like Testimonial, Fluent Forms, Google My Business, Booking.com, Amazon, Tripadvisor, or WooCommerce etc.
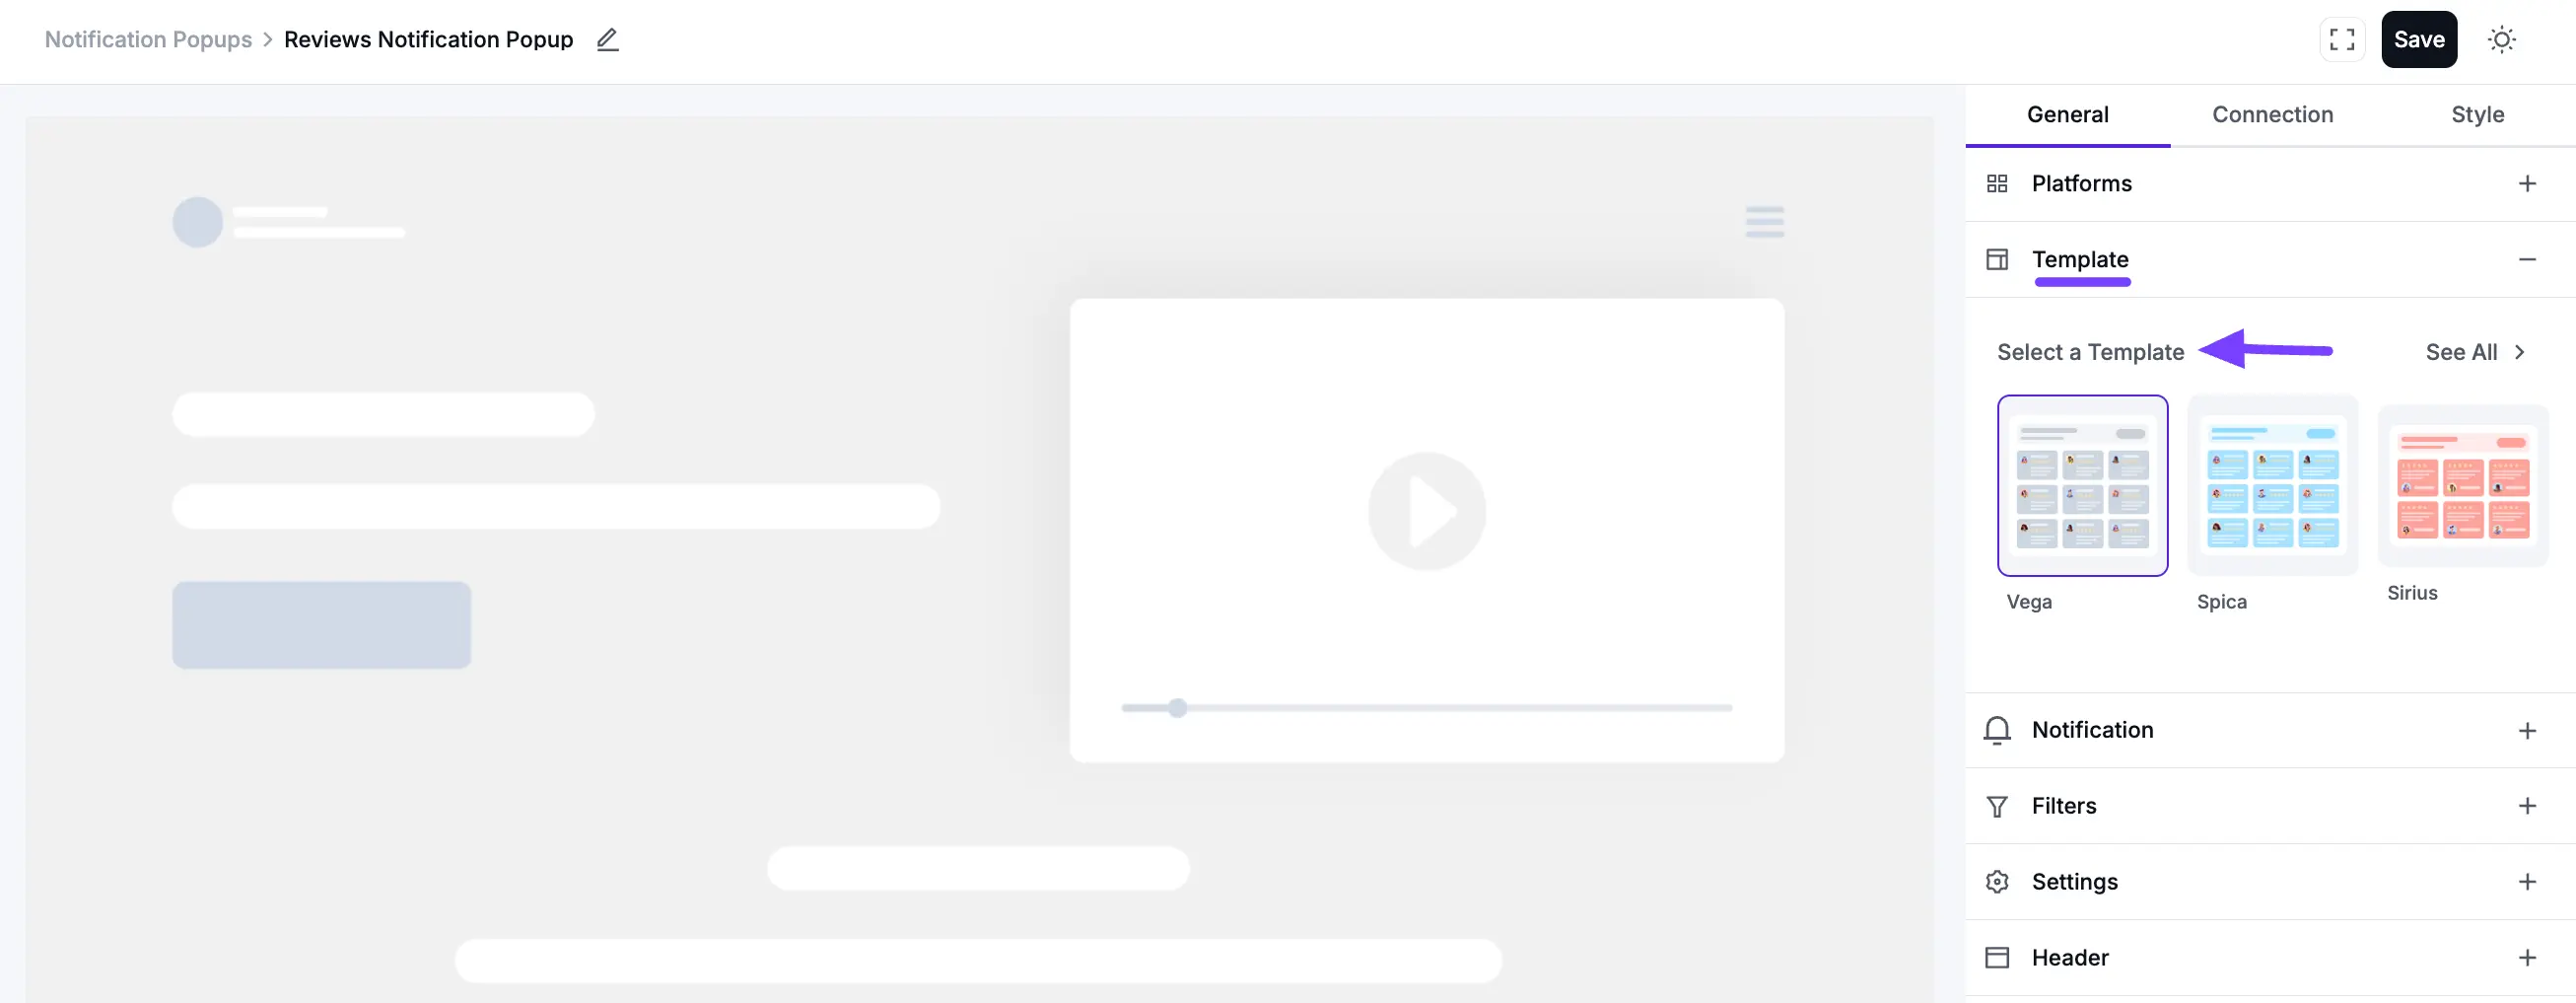
Select a Template: Next, click on the Template section. This allows you to choose the visual style for your pop-up. Select a design you like, such as Vega, Spica, or Sirius. You can click the see all button to find all the available template.
Customize Your Notification Settings
This is the most important section for controlling how, where, and when your pop-ups appear. Click on the Notification tab to see all the options.
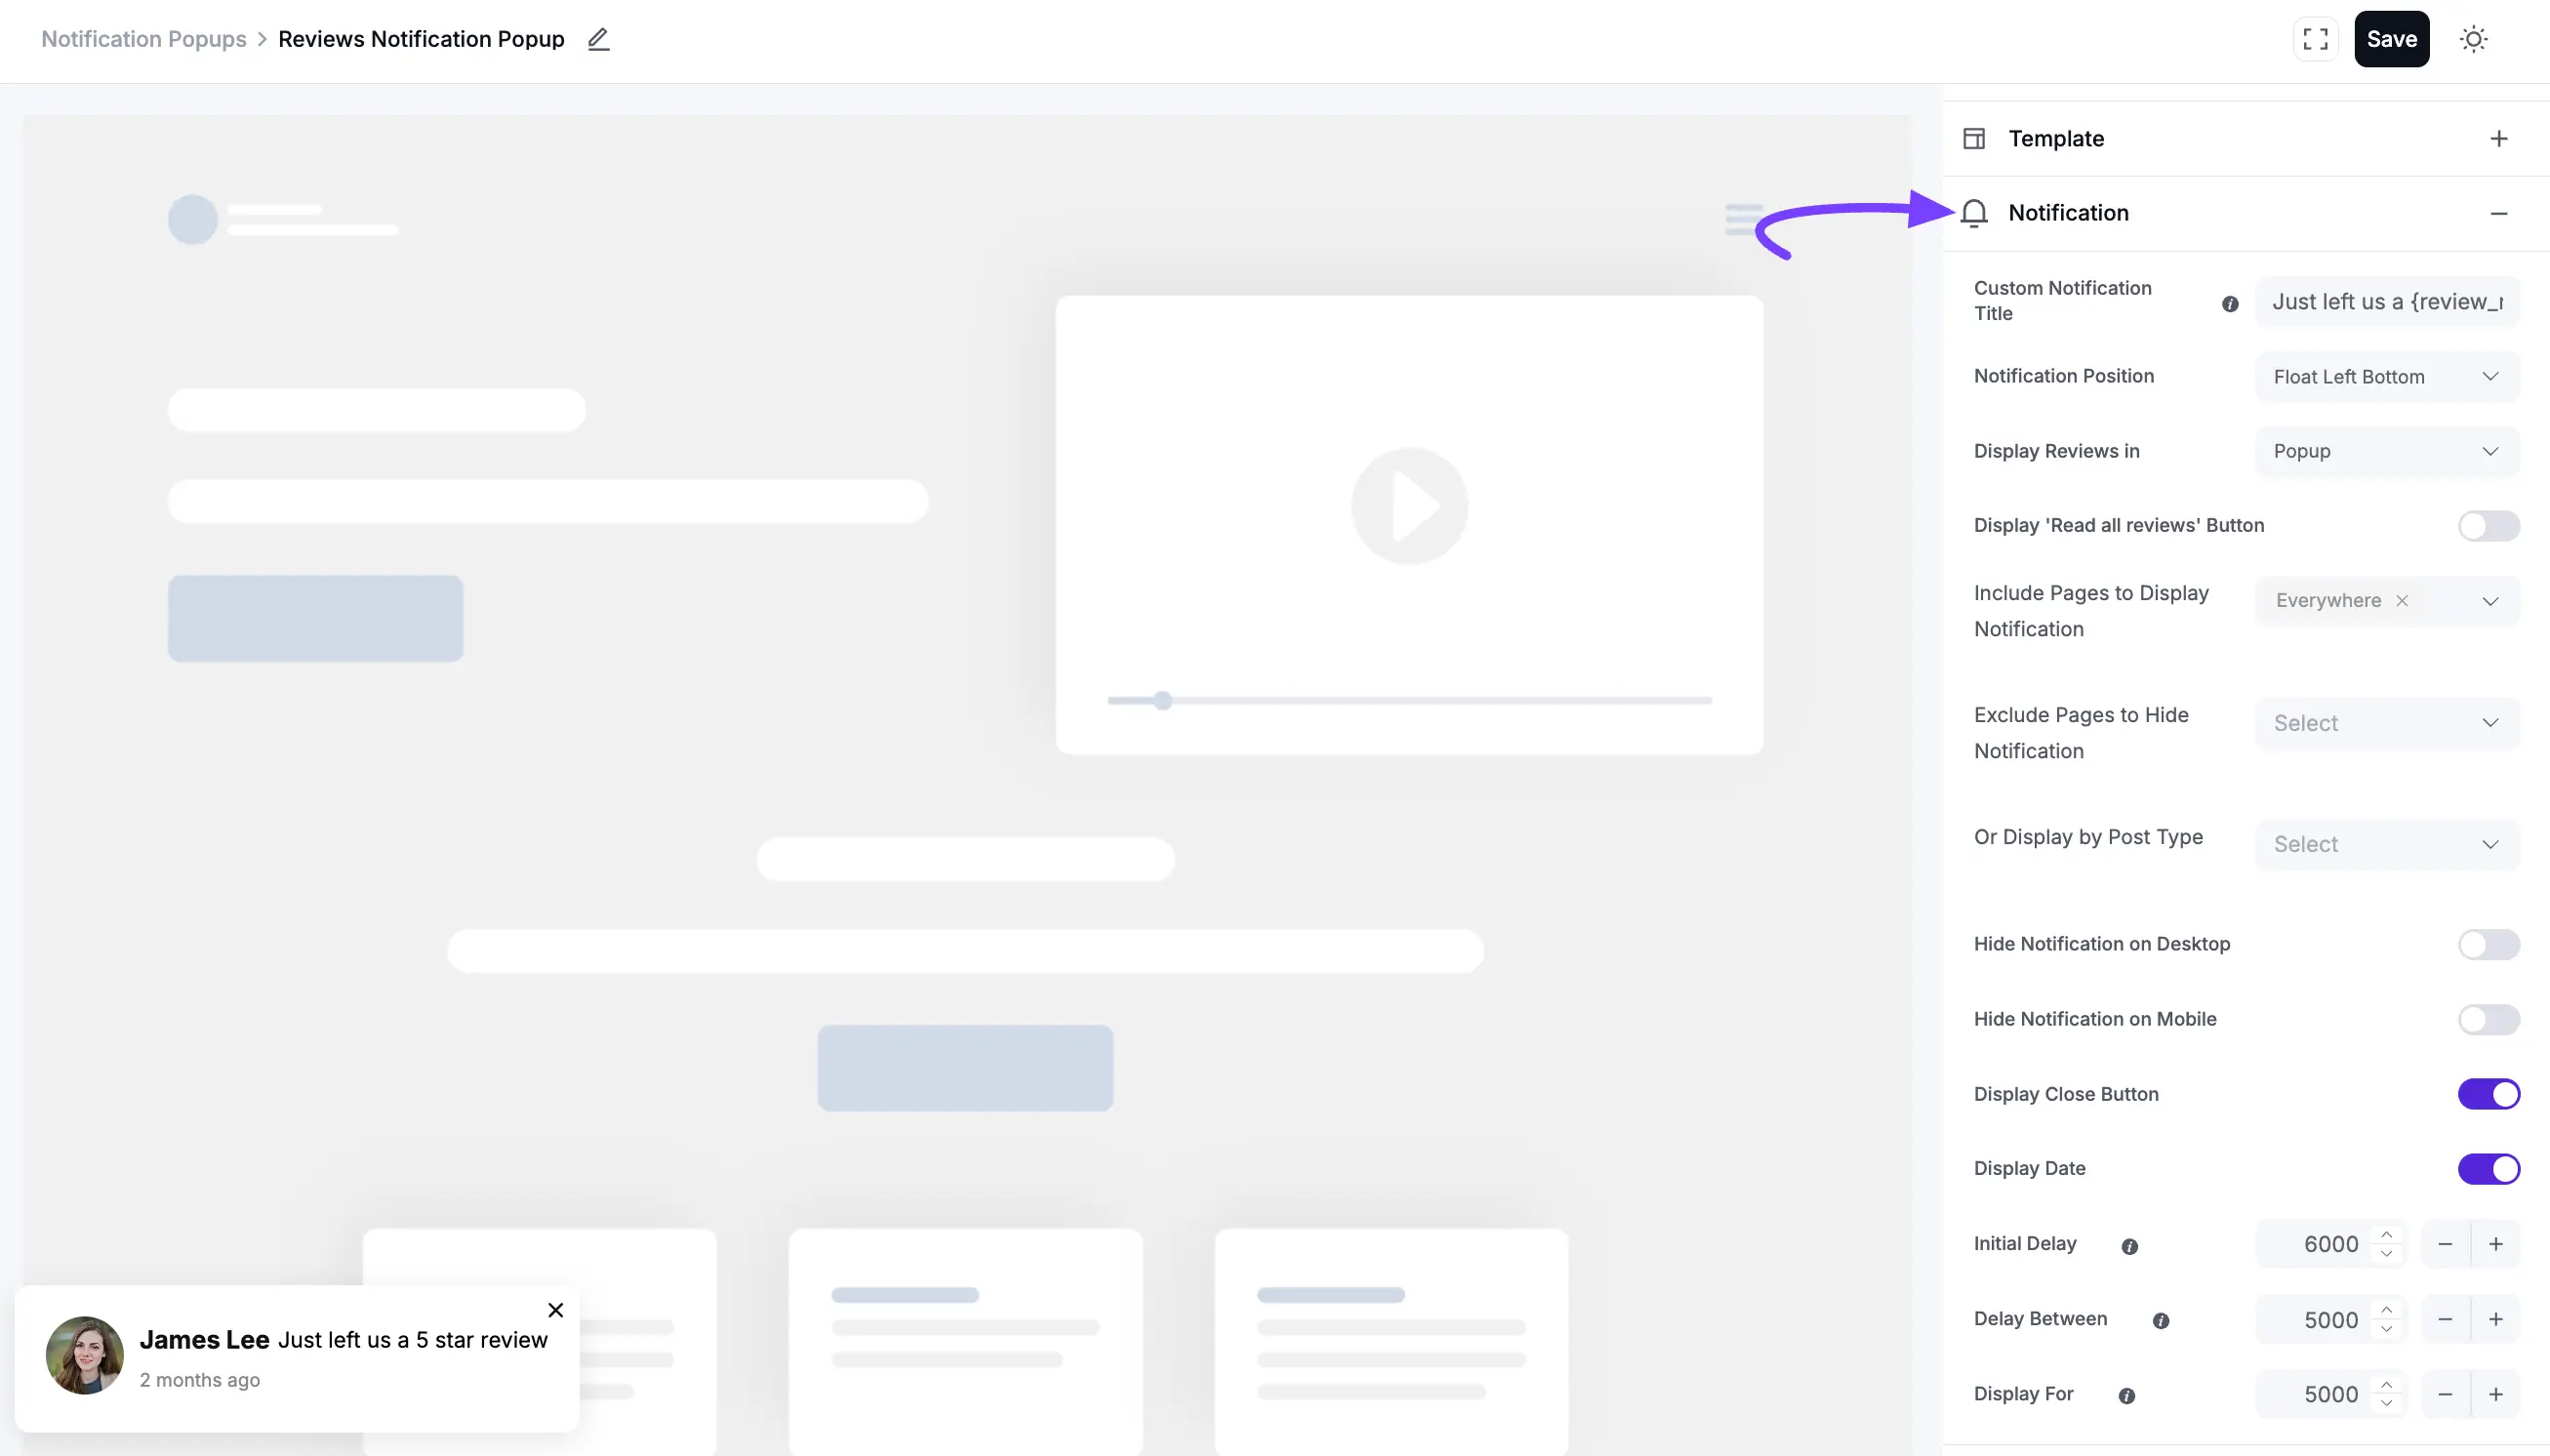
Here’s what each setting does:
- Custom Notification Title: Change the default text. For example, you can write "Just left us a 5-star review!" to add a personal touch.
- Notification Position: Choose which corner of the screen the pop-up will appear in (e.g., "Float Left Bottom" or "Float Right Bottom").
- Display Reviews in: Select what happens when a visitor clicks the pop-up. The Popup option will open a larger lightbox showing a feed of all your reviews.
- Display 'Read all reviews' Button: Toggle this on to show a button that links to your main reviews page (if you have one).
- Include Pages to Display Notification: This controls where the popups will appear. You can choose "Everywhere" to show them on all pages, or select specific pages.
- Exclude Pages to Hide Notification: Use this to prevent popups from showing on specific pages, such as your "Checkout" or "Thank You" page.
- Or Display by Post Type: This is another option to control display. For example, you could choose to only show popups on your "Posts."
- Hide Notification on Desktop / Mobile: Use these toggles to hide the pop-ups on certain devices.
- Display Close Button: This shows a small "X" on the pop-up so users can close it.
- Display Date: Show or hide the date the review was left.
- Initial Delay: This is the time (in milliseconds) to wait before the first pop-up appears after a visitor loads your page. (e.g., 6000ms = 6 seconds).
- Delay Between: This is the time (in milliseconds) to wait between each notification. (e.g., 5000ms = 5 seconds). Display For: This sets how long (in milliseconds) a single pop-up will stay on the screen before hiding. (e.g., 6000ms = 6 seconds).
When you're all done, don't forget to click the Save button! You can also use the Filters, Header, and Style tabs to refine further which reviews are shown and how they look, just like a standard feed template.