Appearance
Onboarding Setup Wizard
After successfully installing and activating WP Social Ninja, you will see some easy steps to set up the wizard. This guided process is designed to help you configure the foundational settings for your first social platform.
You are always in control. If you prefer to explore the full dashboard first, click the Skip All onboarding link at any time.
Let's walk through the setup, step by step.
Step 1: Select Your Category
The first step asks you to choose which Category of features you want to start with. As the image shows, your options are:
- Social Feeds: To display posts from your social accounts.
- Business Reviews: To display business reviews.
- Social Chat: To add a chat widget to your website.
- Notification Popup: To display notification popups on your website.
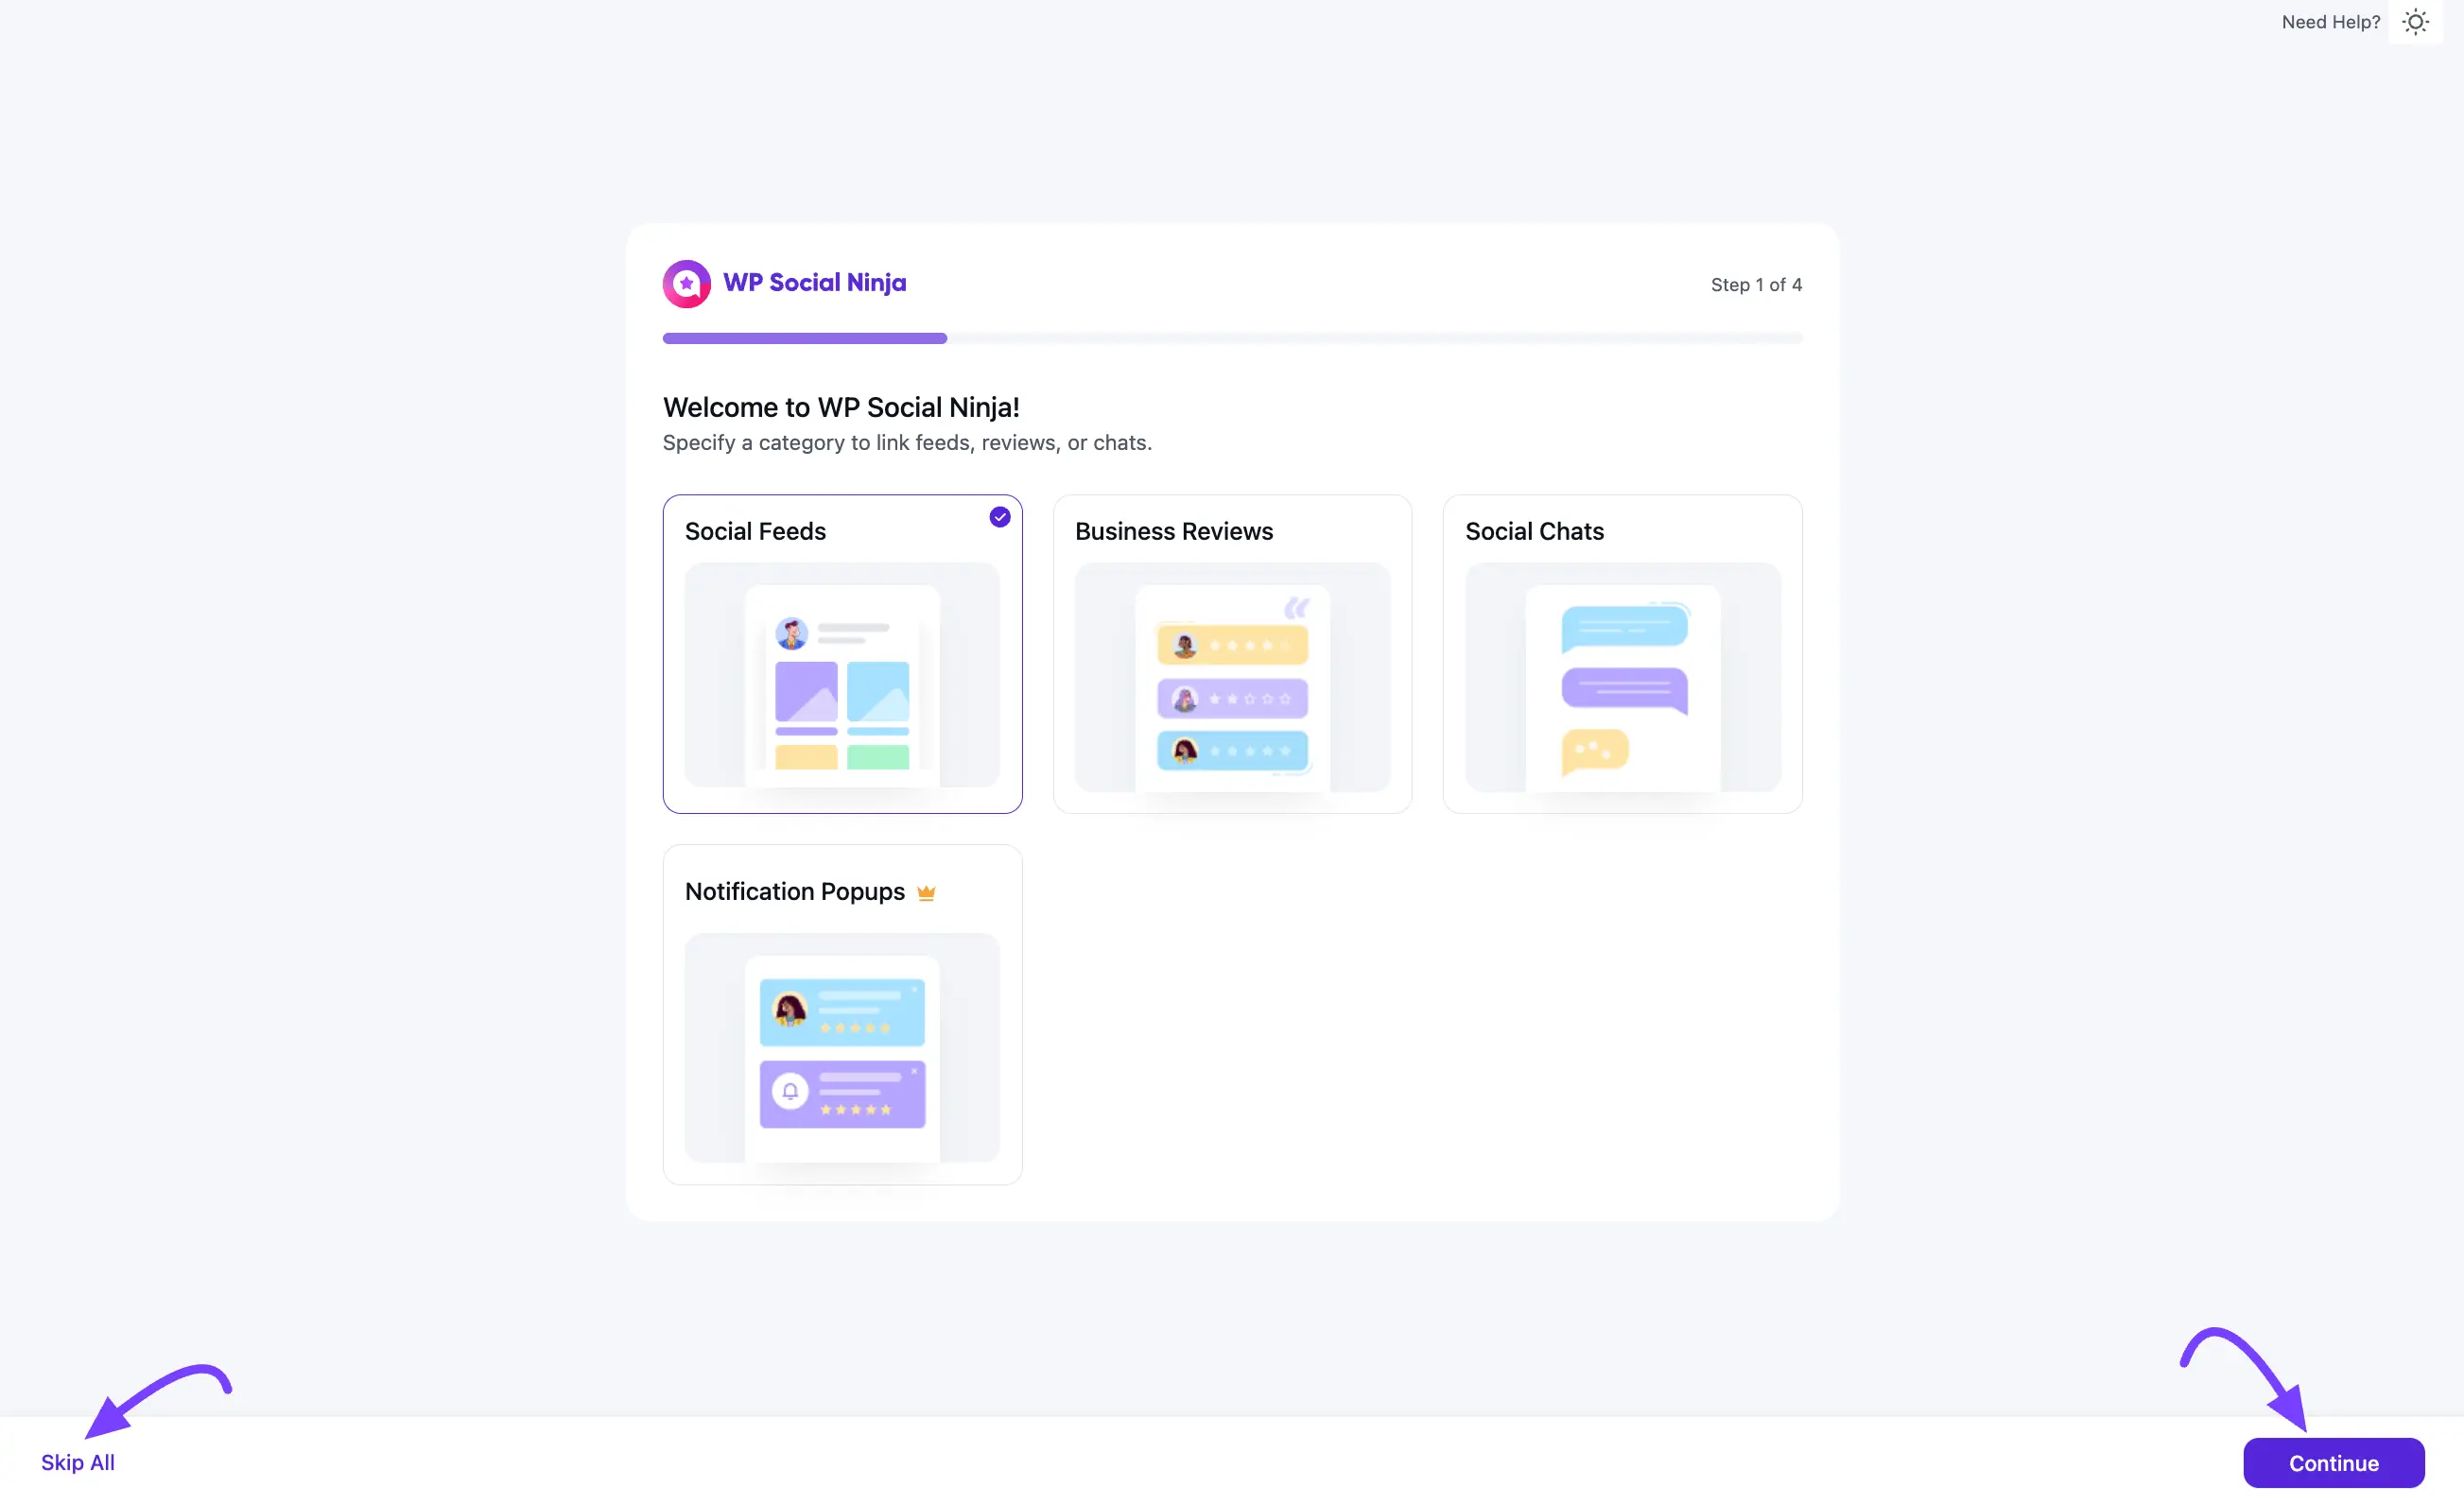
Select one and click the "Continue" button to proceed to the next step.
NOTE
In this example, the Social Feed category is selected. The next steps will be based on this category. If you choose Business Reviews instead, the following steps will change according to that category.
Step 2: Select Your Platform
Here, you will select the specific social platform you want to connect.
The list of platforms shown (like Instagram, YouTube, TikTok, Twitter, Google My Business, Yelp, or Facebook Feed) will depend on the category you just selected.
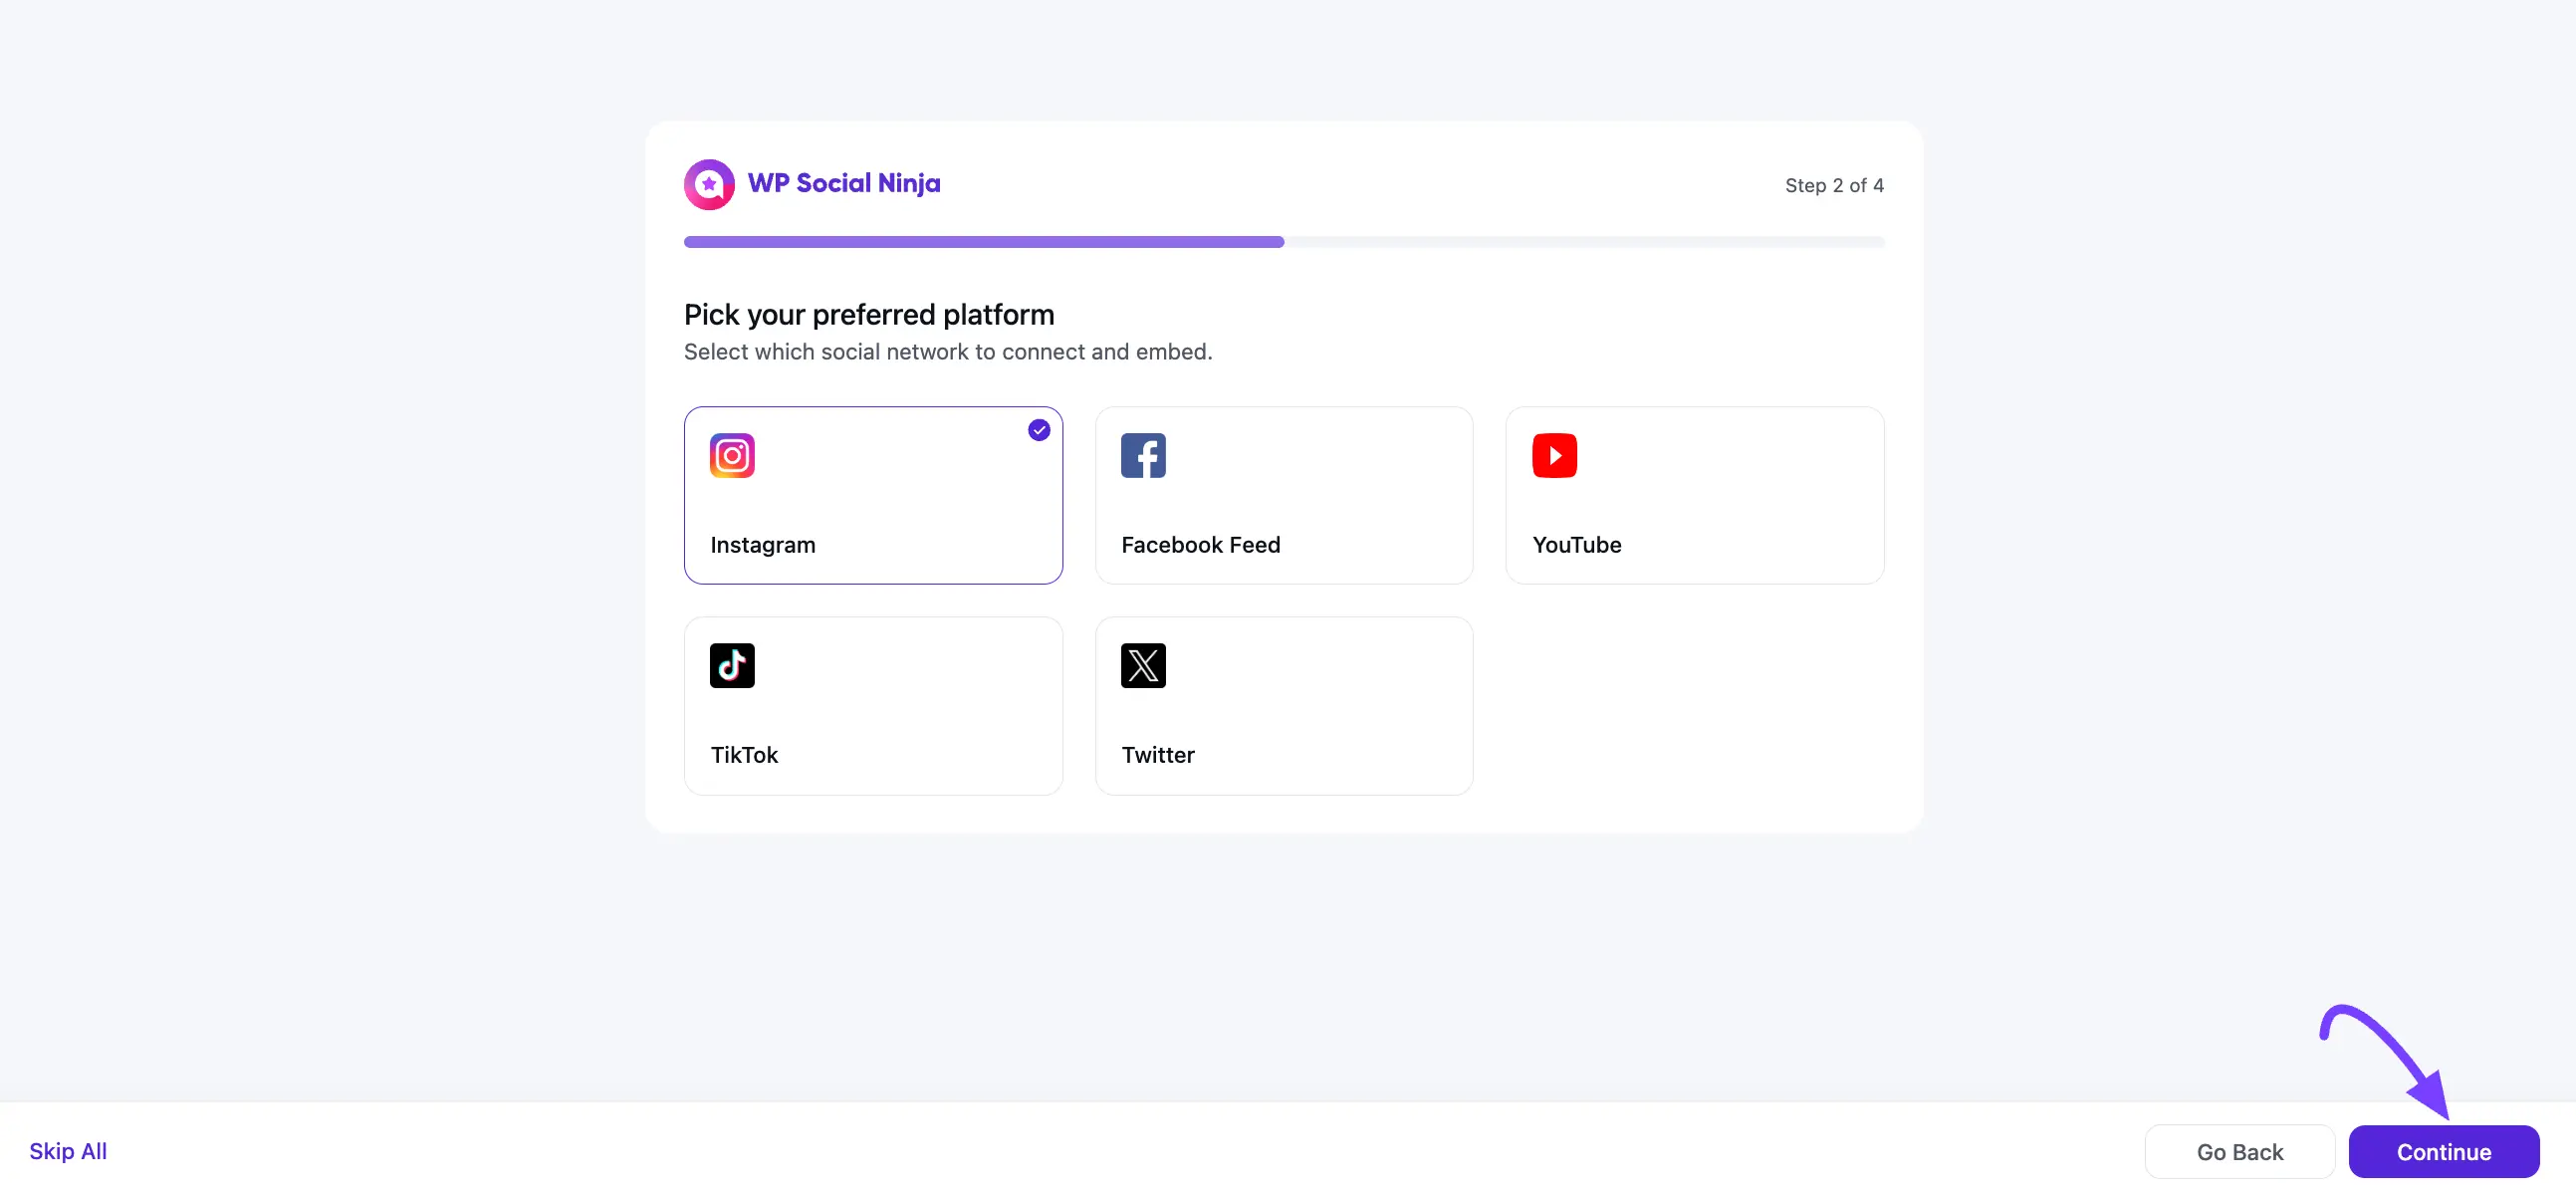
Click on your desired platform and press the Continue button for the next step.
Step 3: Select the Post Type
This step is to decide the type of content you want to display.
- Timeline Feed: Embed photos and videos from any Instagram account directly.
- Hashtag Feed: Showcase public Instagram posts if they use specific hashtags in their caption.
- Shoppable Feed: Connect the shoppable feed to convert visitors from the Instagram feed to websites.
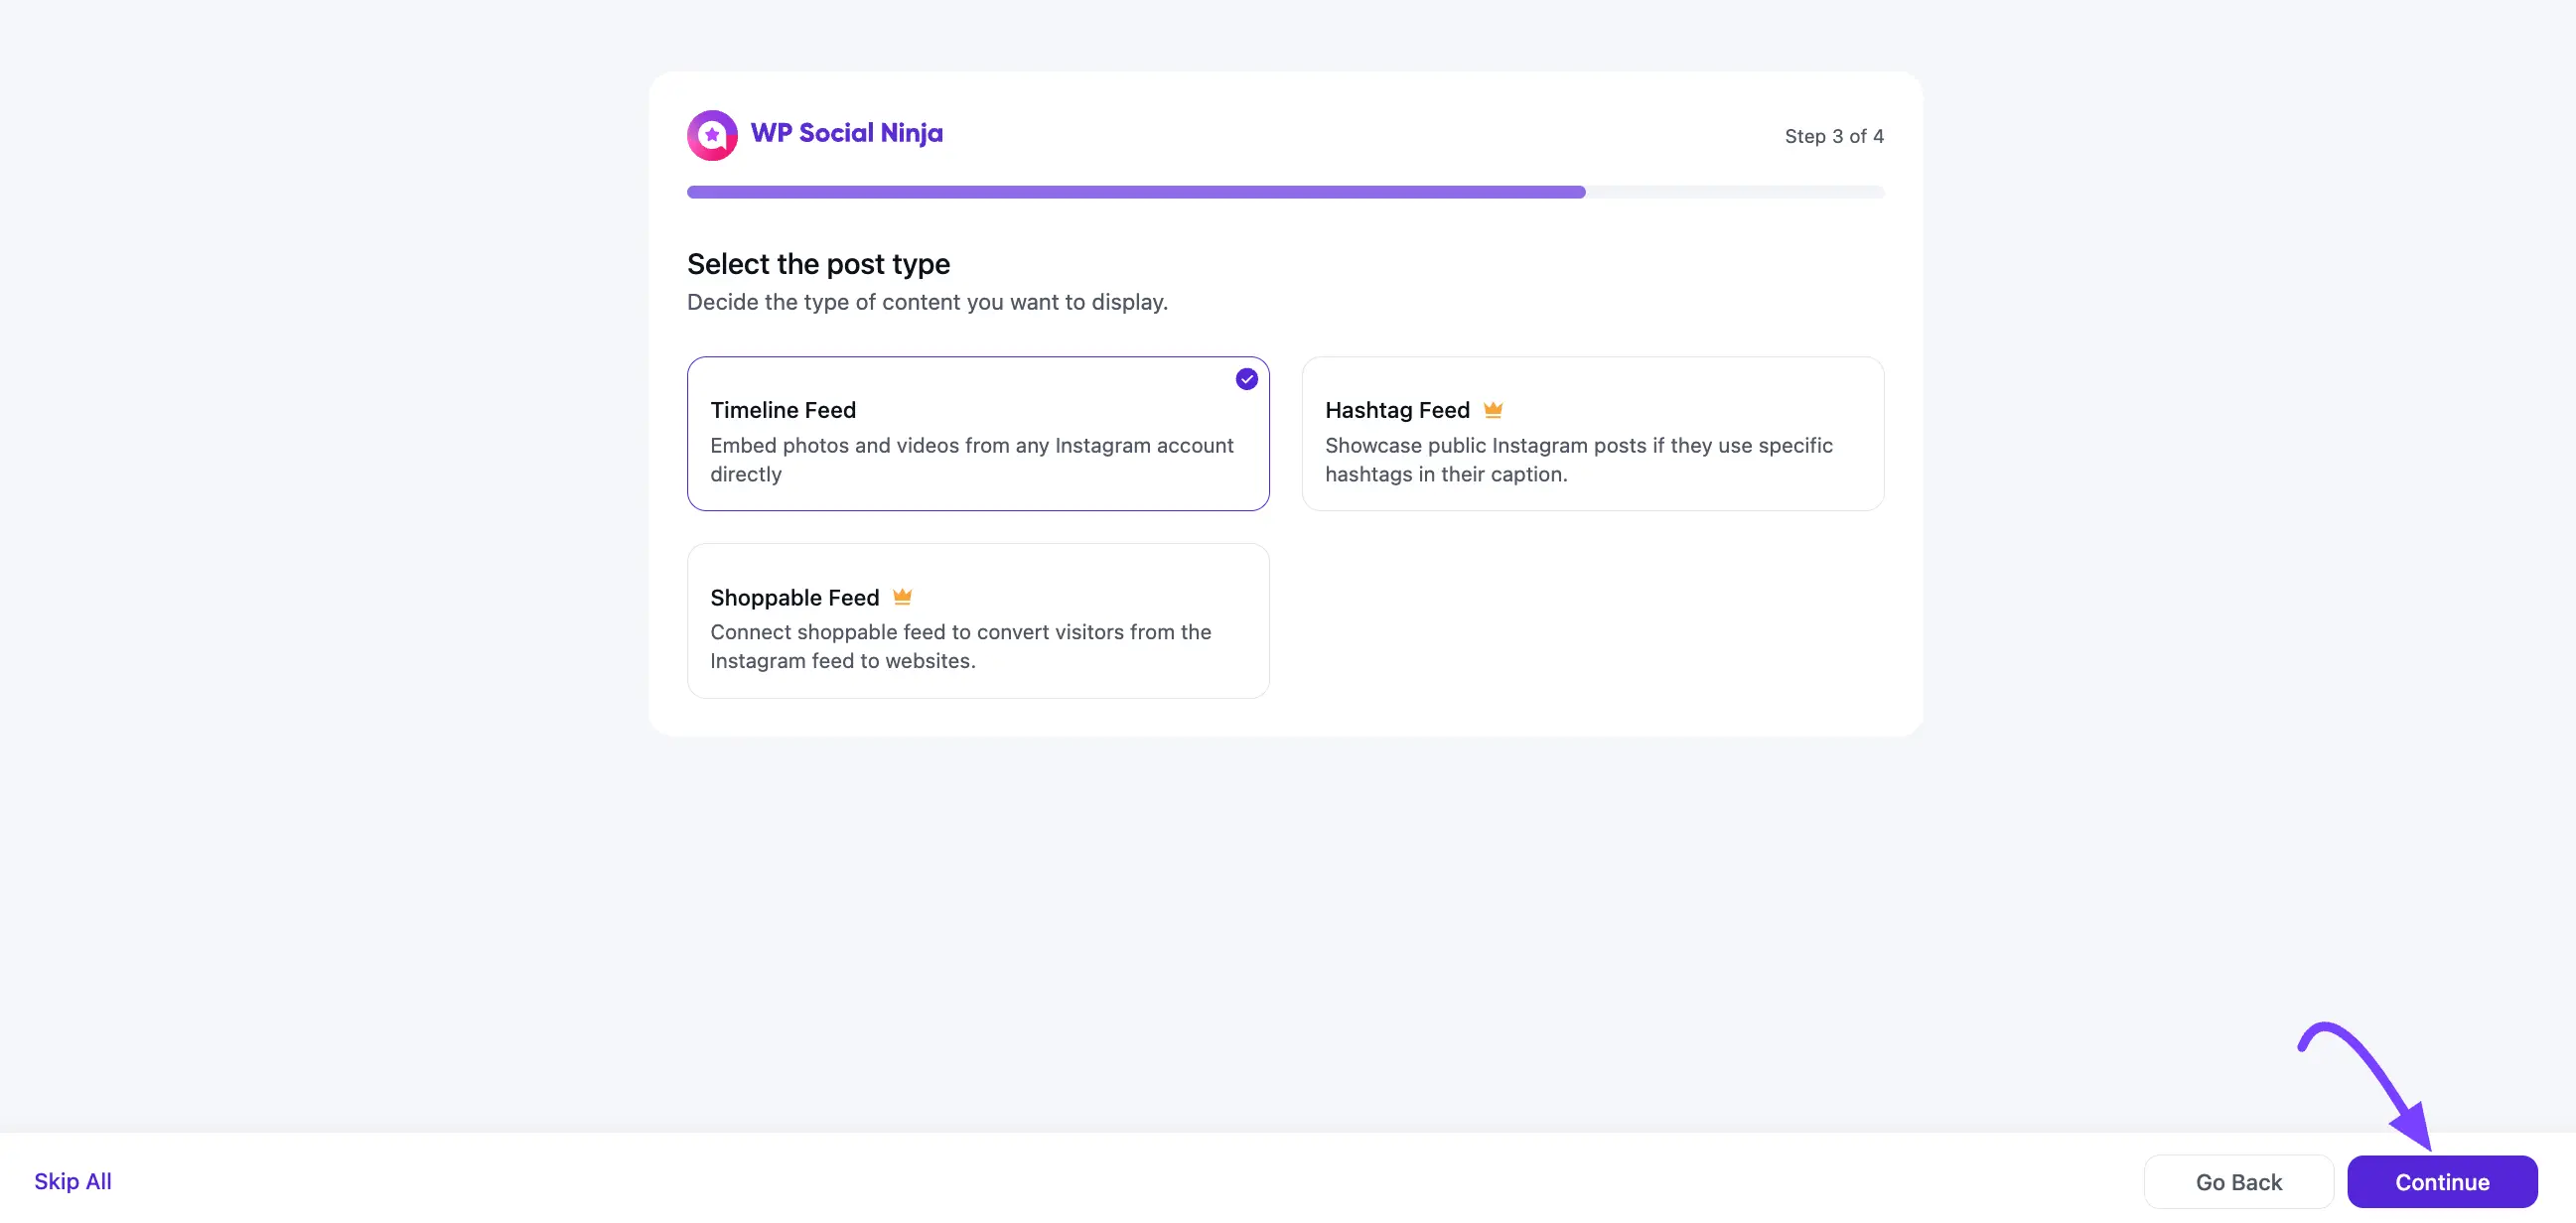
Make your selections and click the Continue button.
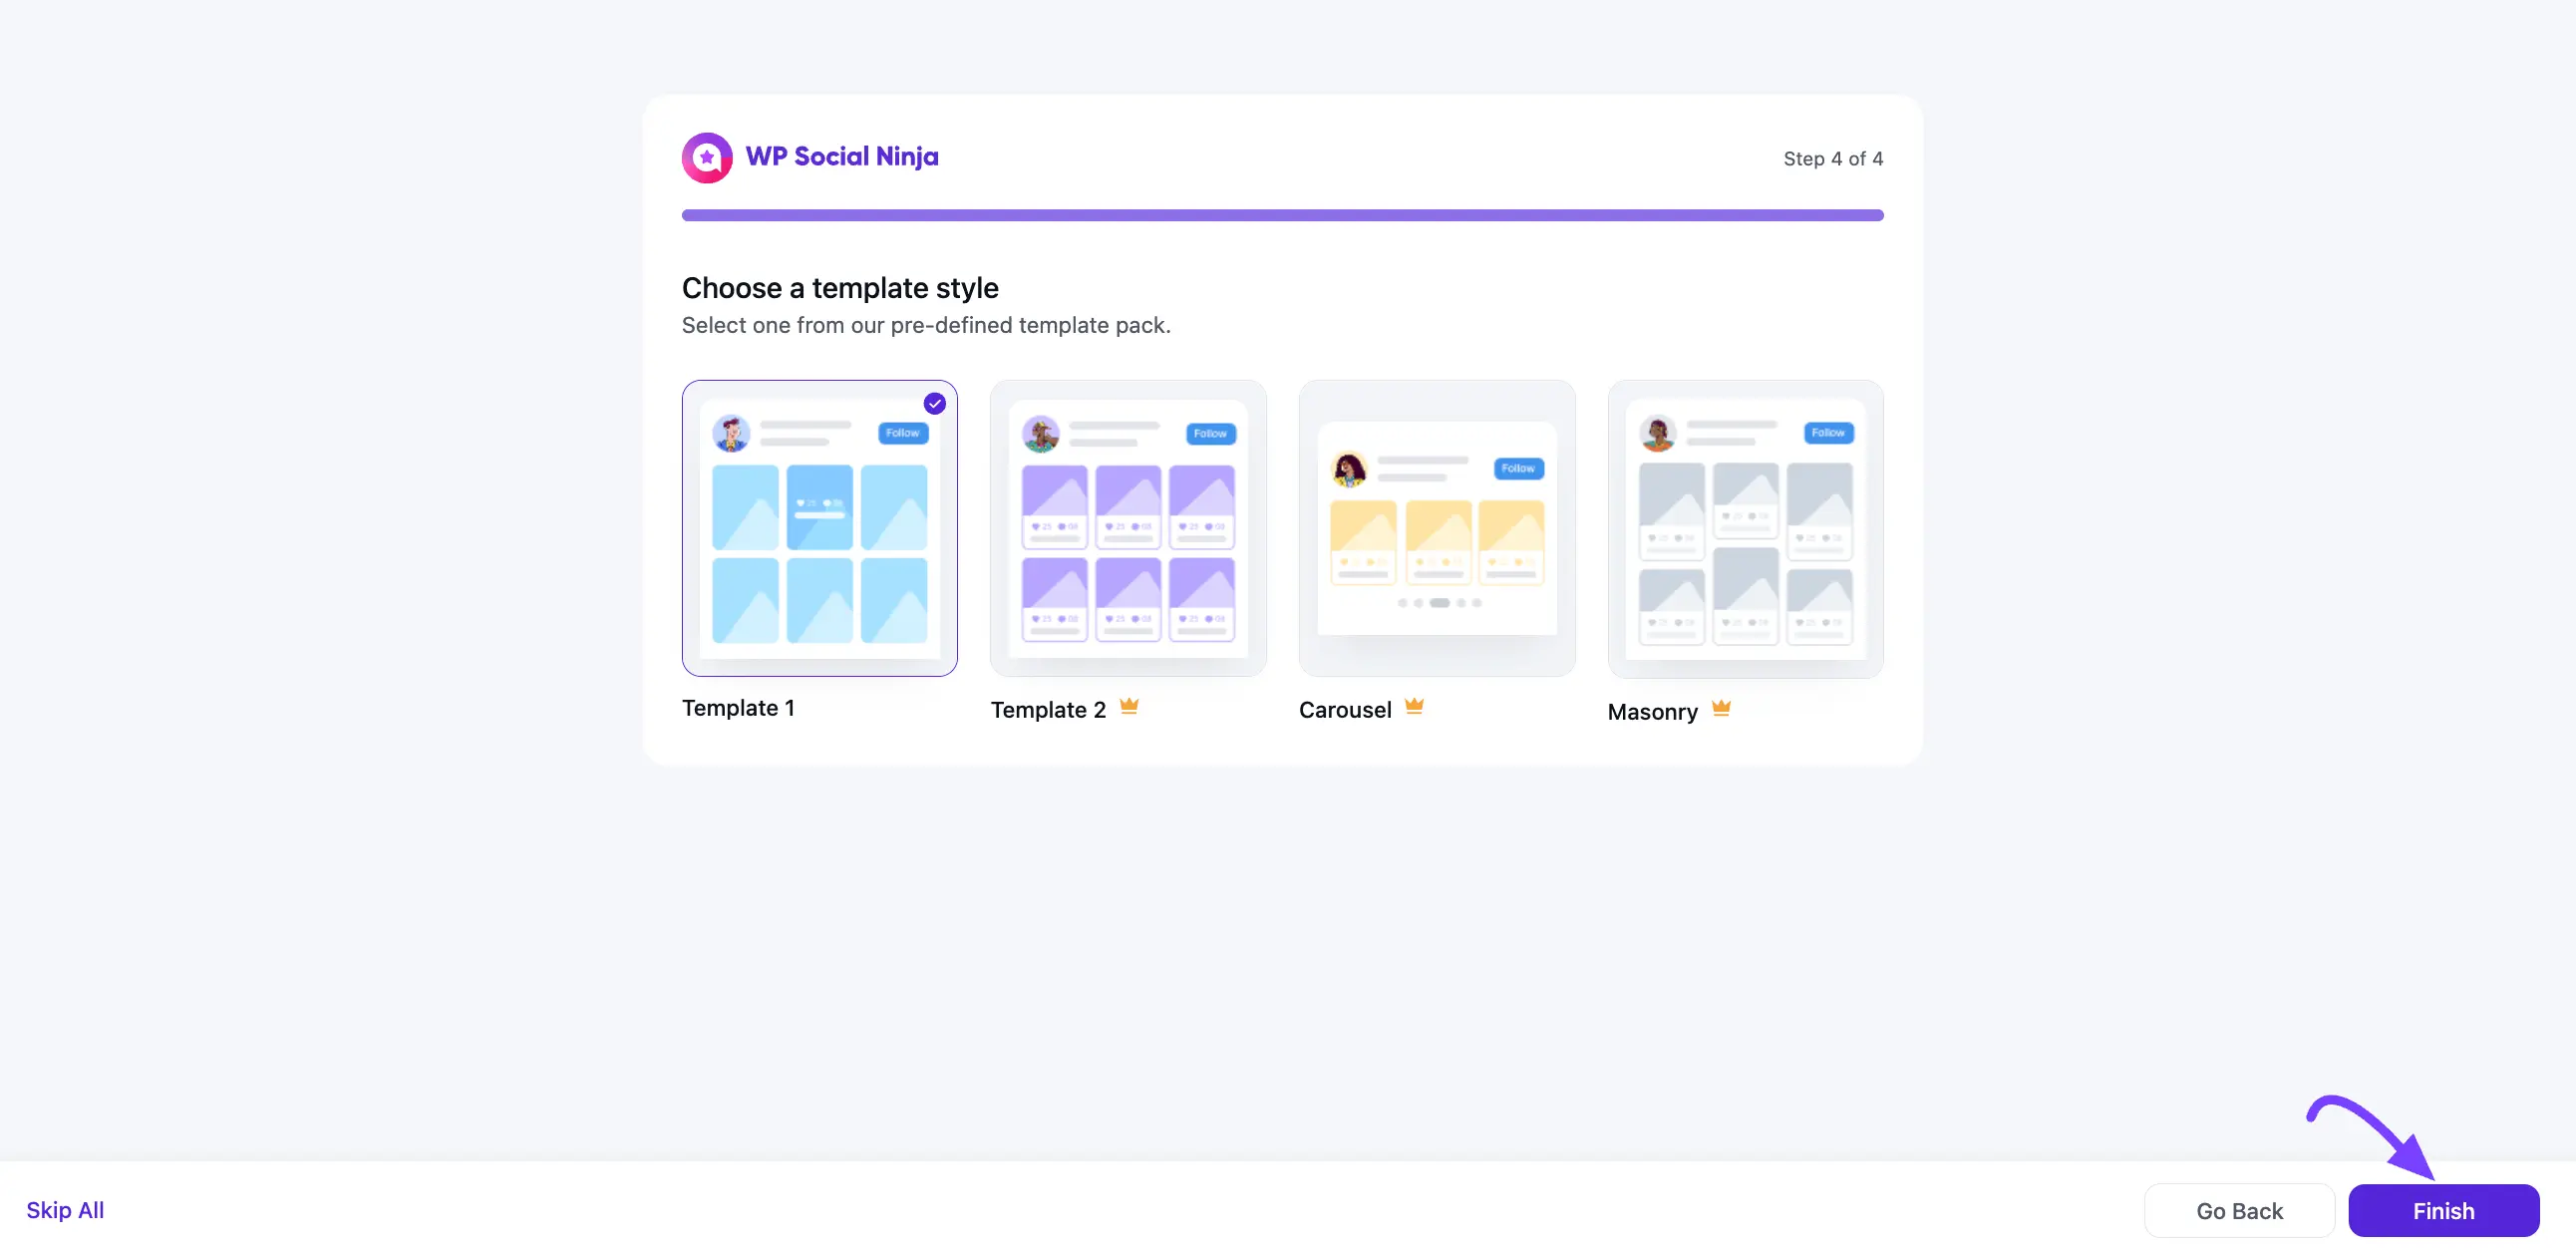
Step 4: Choose a Template
This step is for choosing the visual style of your feed or reviews. You have two settings to configure:
- Layout Type: This is the structure (e.g., Grid, Slider, Carousel, or Masonry).
- Template: This is the design skin (e.g., Vega, Sirius, or Polaris).
Step 5: Configure Your Template
In this final step, you will connect your account and apply basic filters.
- Configuration: Click the Connect... button (for example, Connect with Instagram) to authorize your account. A pop-up will guide you through the login and permission process.
- Filters: After connecting, you can use the Filters dropdown. For example, you can use Filter by Rating to only show 5 Star reviews.
Click the Save button to finish.
After clicking Save, you have successfully created your first template. You will be taken to the full template editor, where you can copy the Shortcode to embed on your site or continue to customize its advanced settings.
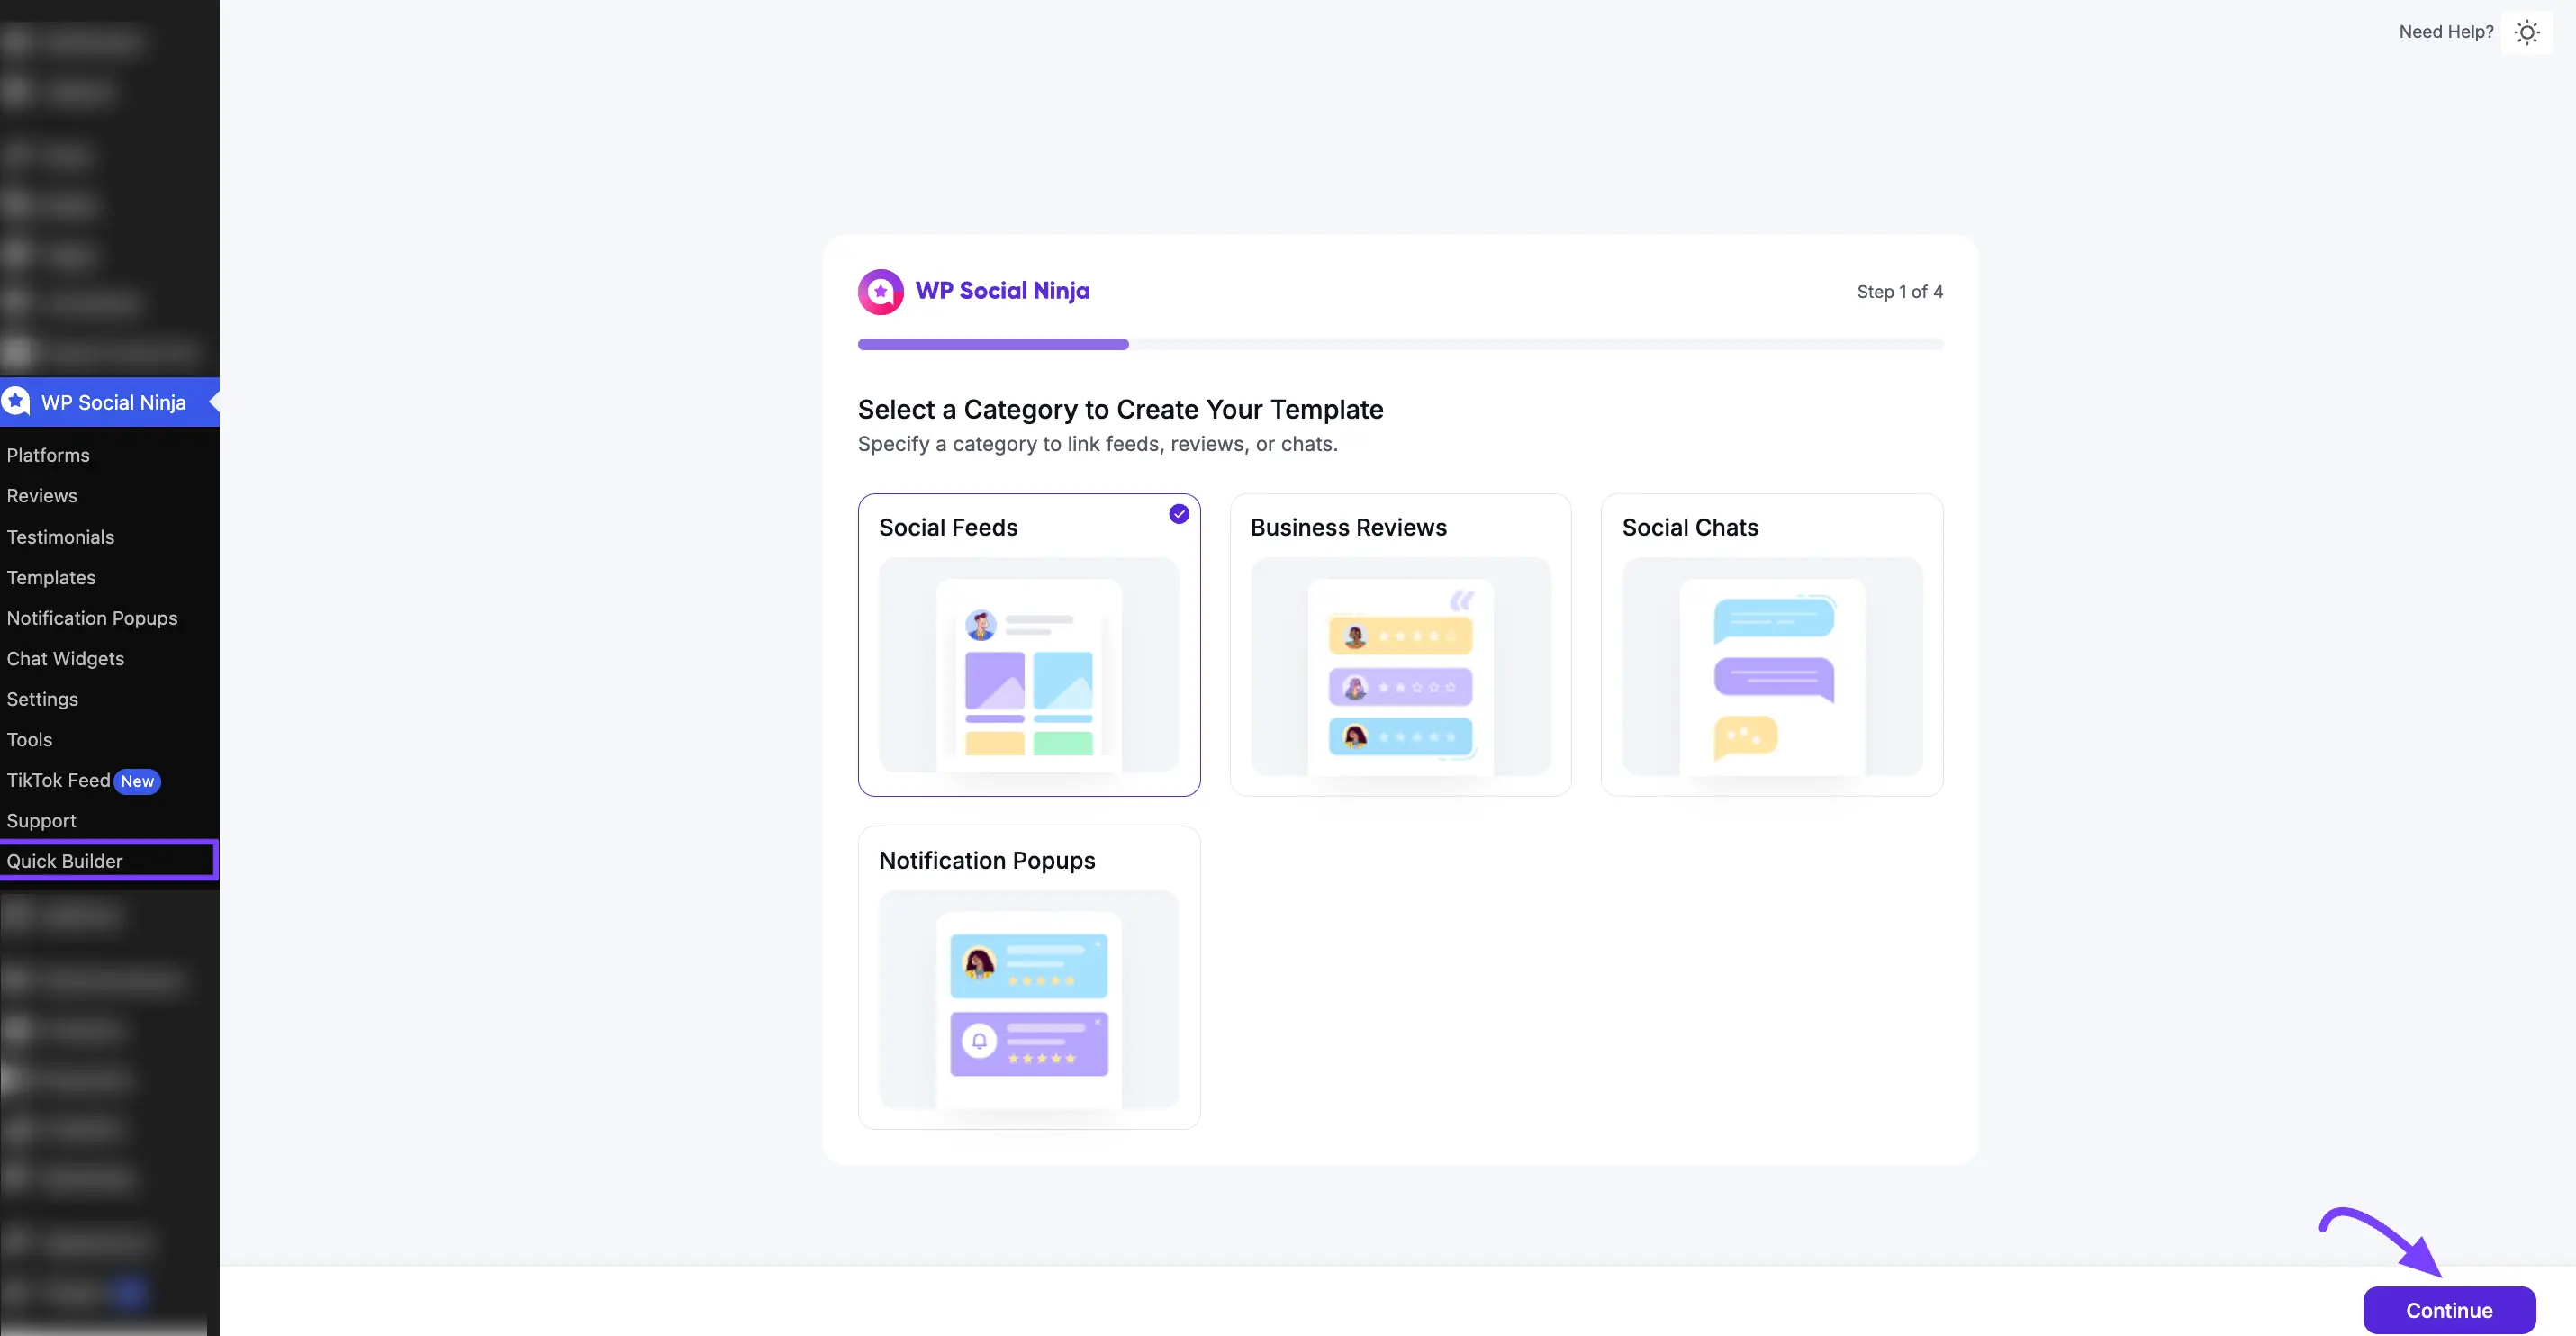
Quick Builder
If you skipped the initial setup wizard (onboarding), you can easily access it again at any time using the Quick Builder feature.This feature is perfect for quickly creating a new template without going through the full, advanced editor.To Access the wizard:
From your WordPress dashboard, navigate to WP Social Ninja dasborads from the leftsidebar.Click the Quick Builder button.This will open the 3-step pop-up wizard, allowing you to select a category, platform, and template to instantly create and save a new feed or review display.