Appearance
Add a Custom Button Chat Widget to Your Website
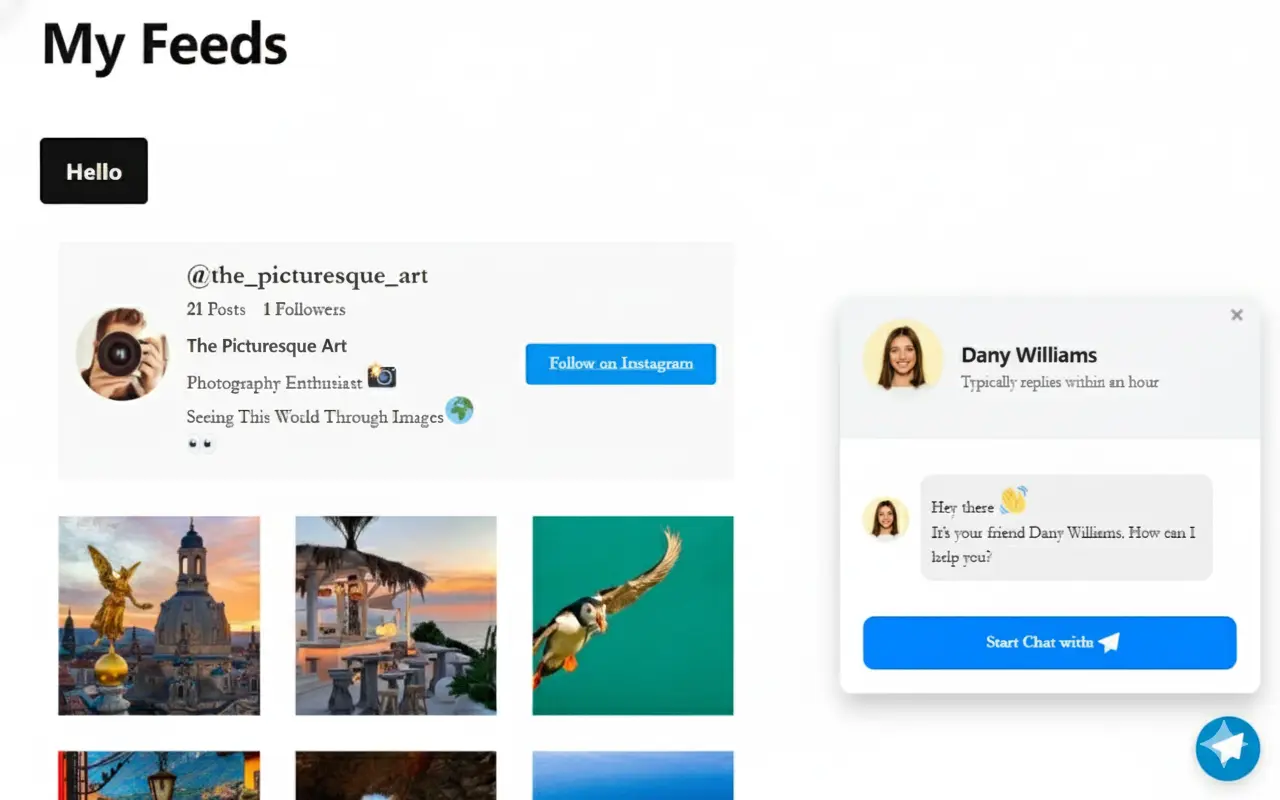
Want to open your WP Social Ninja chat widget from a "Contact Us" button or a special link on your page? While the floating bubble is great, this powerful feature lets you trigger the chat window from any button, anywhere on your site.
This gives you full control to integrate your chat support directly into your site's design and content. Let's see how to set it up.
NOTE
Before you begin, you must have your Chat Widget set up and your channels (like Messenger, WhatsApp, etc.) already configured in WP Social Ninja. This custom button will trigger your existing, active widget.
Step 1: Go to Your Page
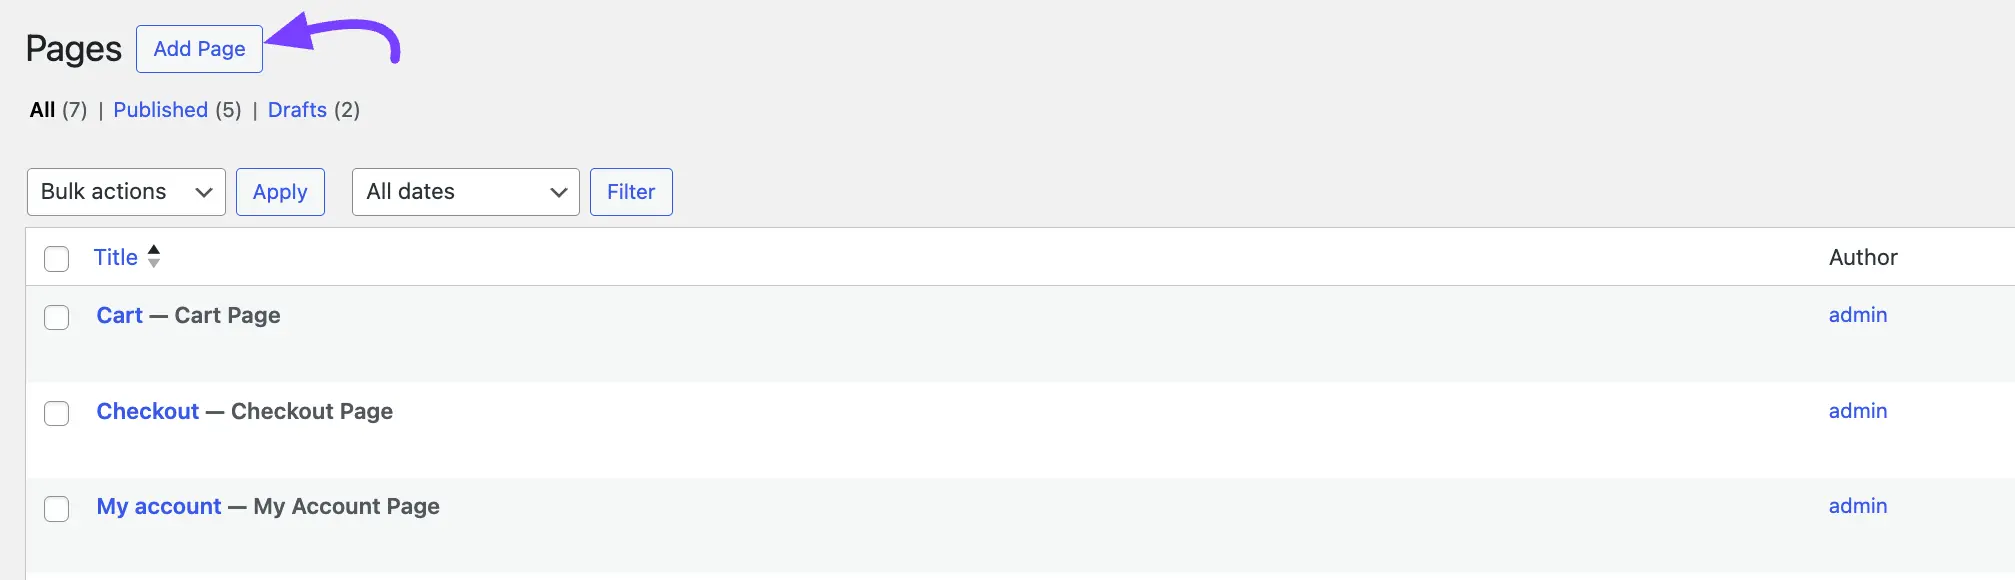
First, go to your WordPress dashboard. Navigate to Pages → Add Page to create a new page, or simply edit an existing page where you want to place your button.
Step 2: Add a Button Block
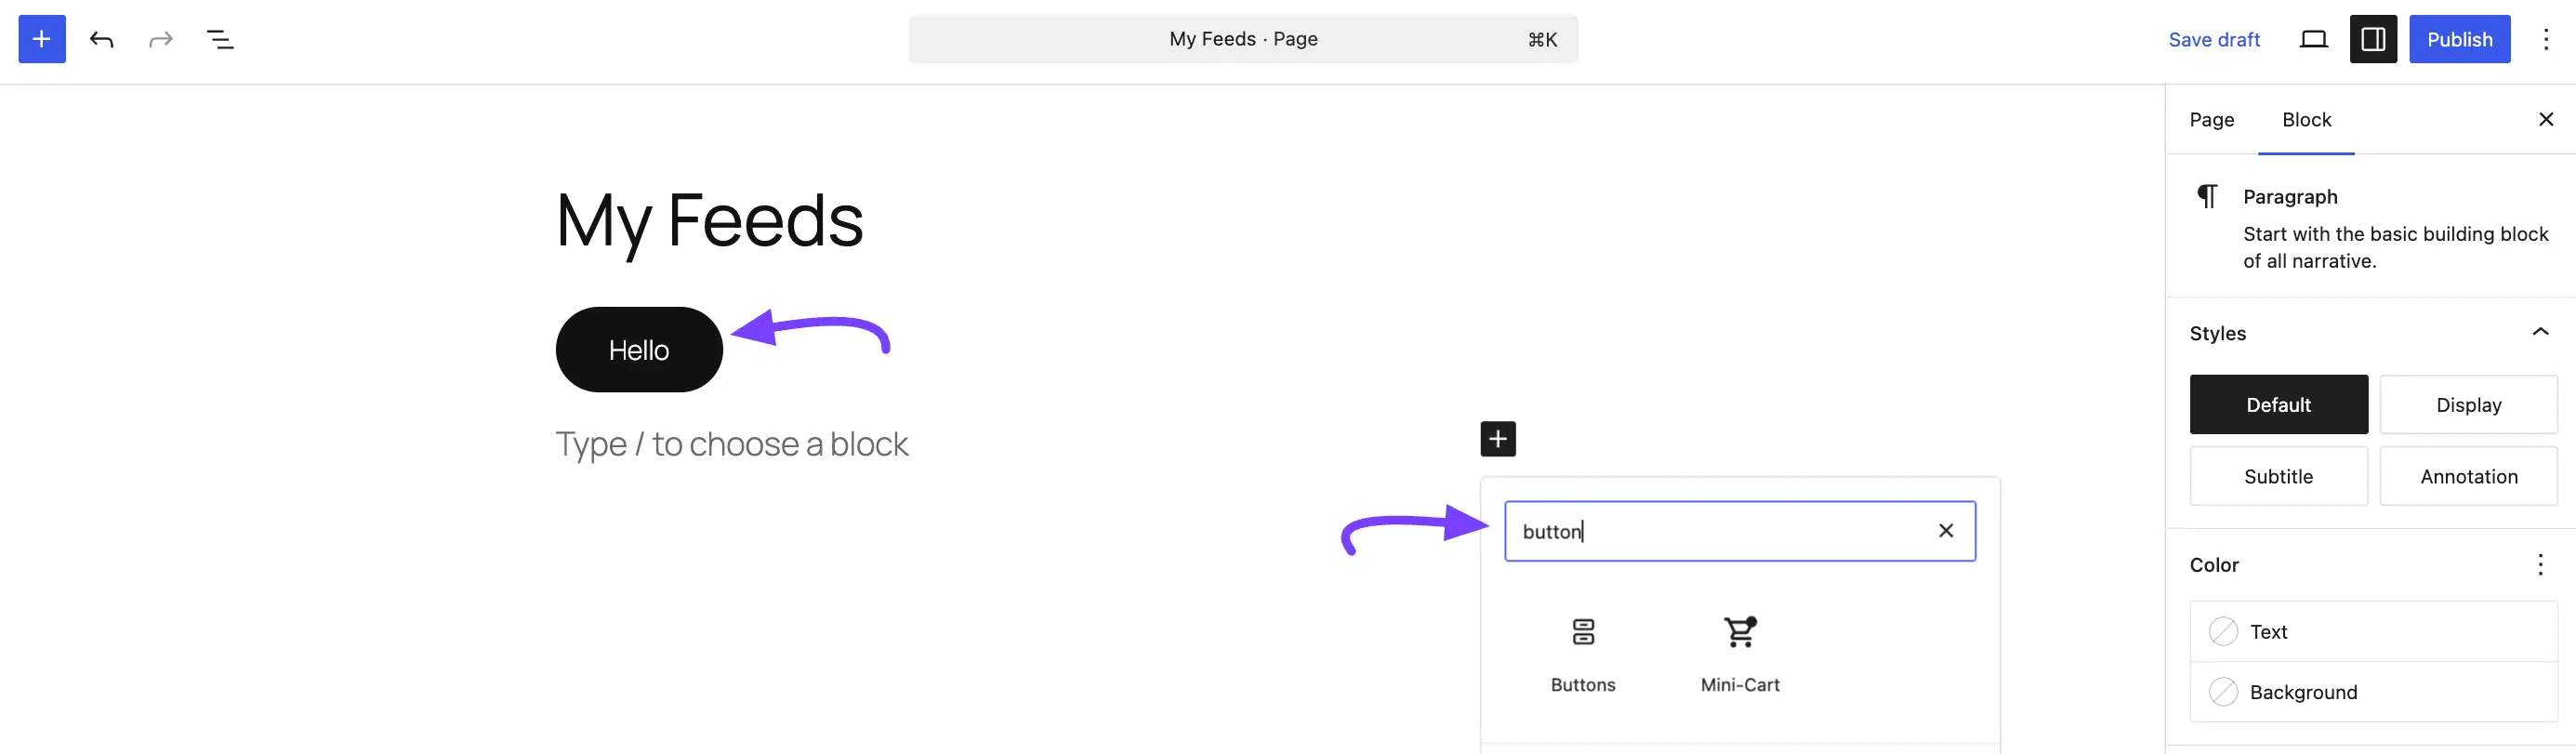
Inside the WordPress editor, click the plus icon (+) to add a new block. In the search bar, type "Button" and select the Buttons block.
Once added, you can customize the button's text (e.g., "Hello," "Chat With Us," or "Get Support").
Step 3: Add the Custom CSS Class
This is the most important step.
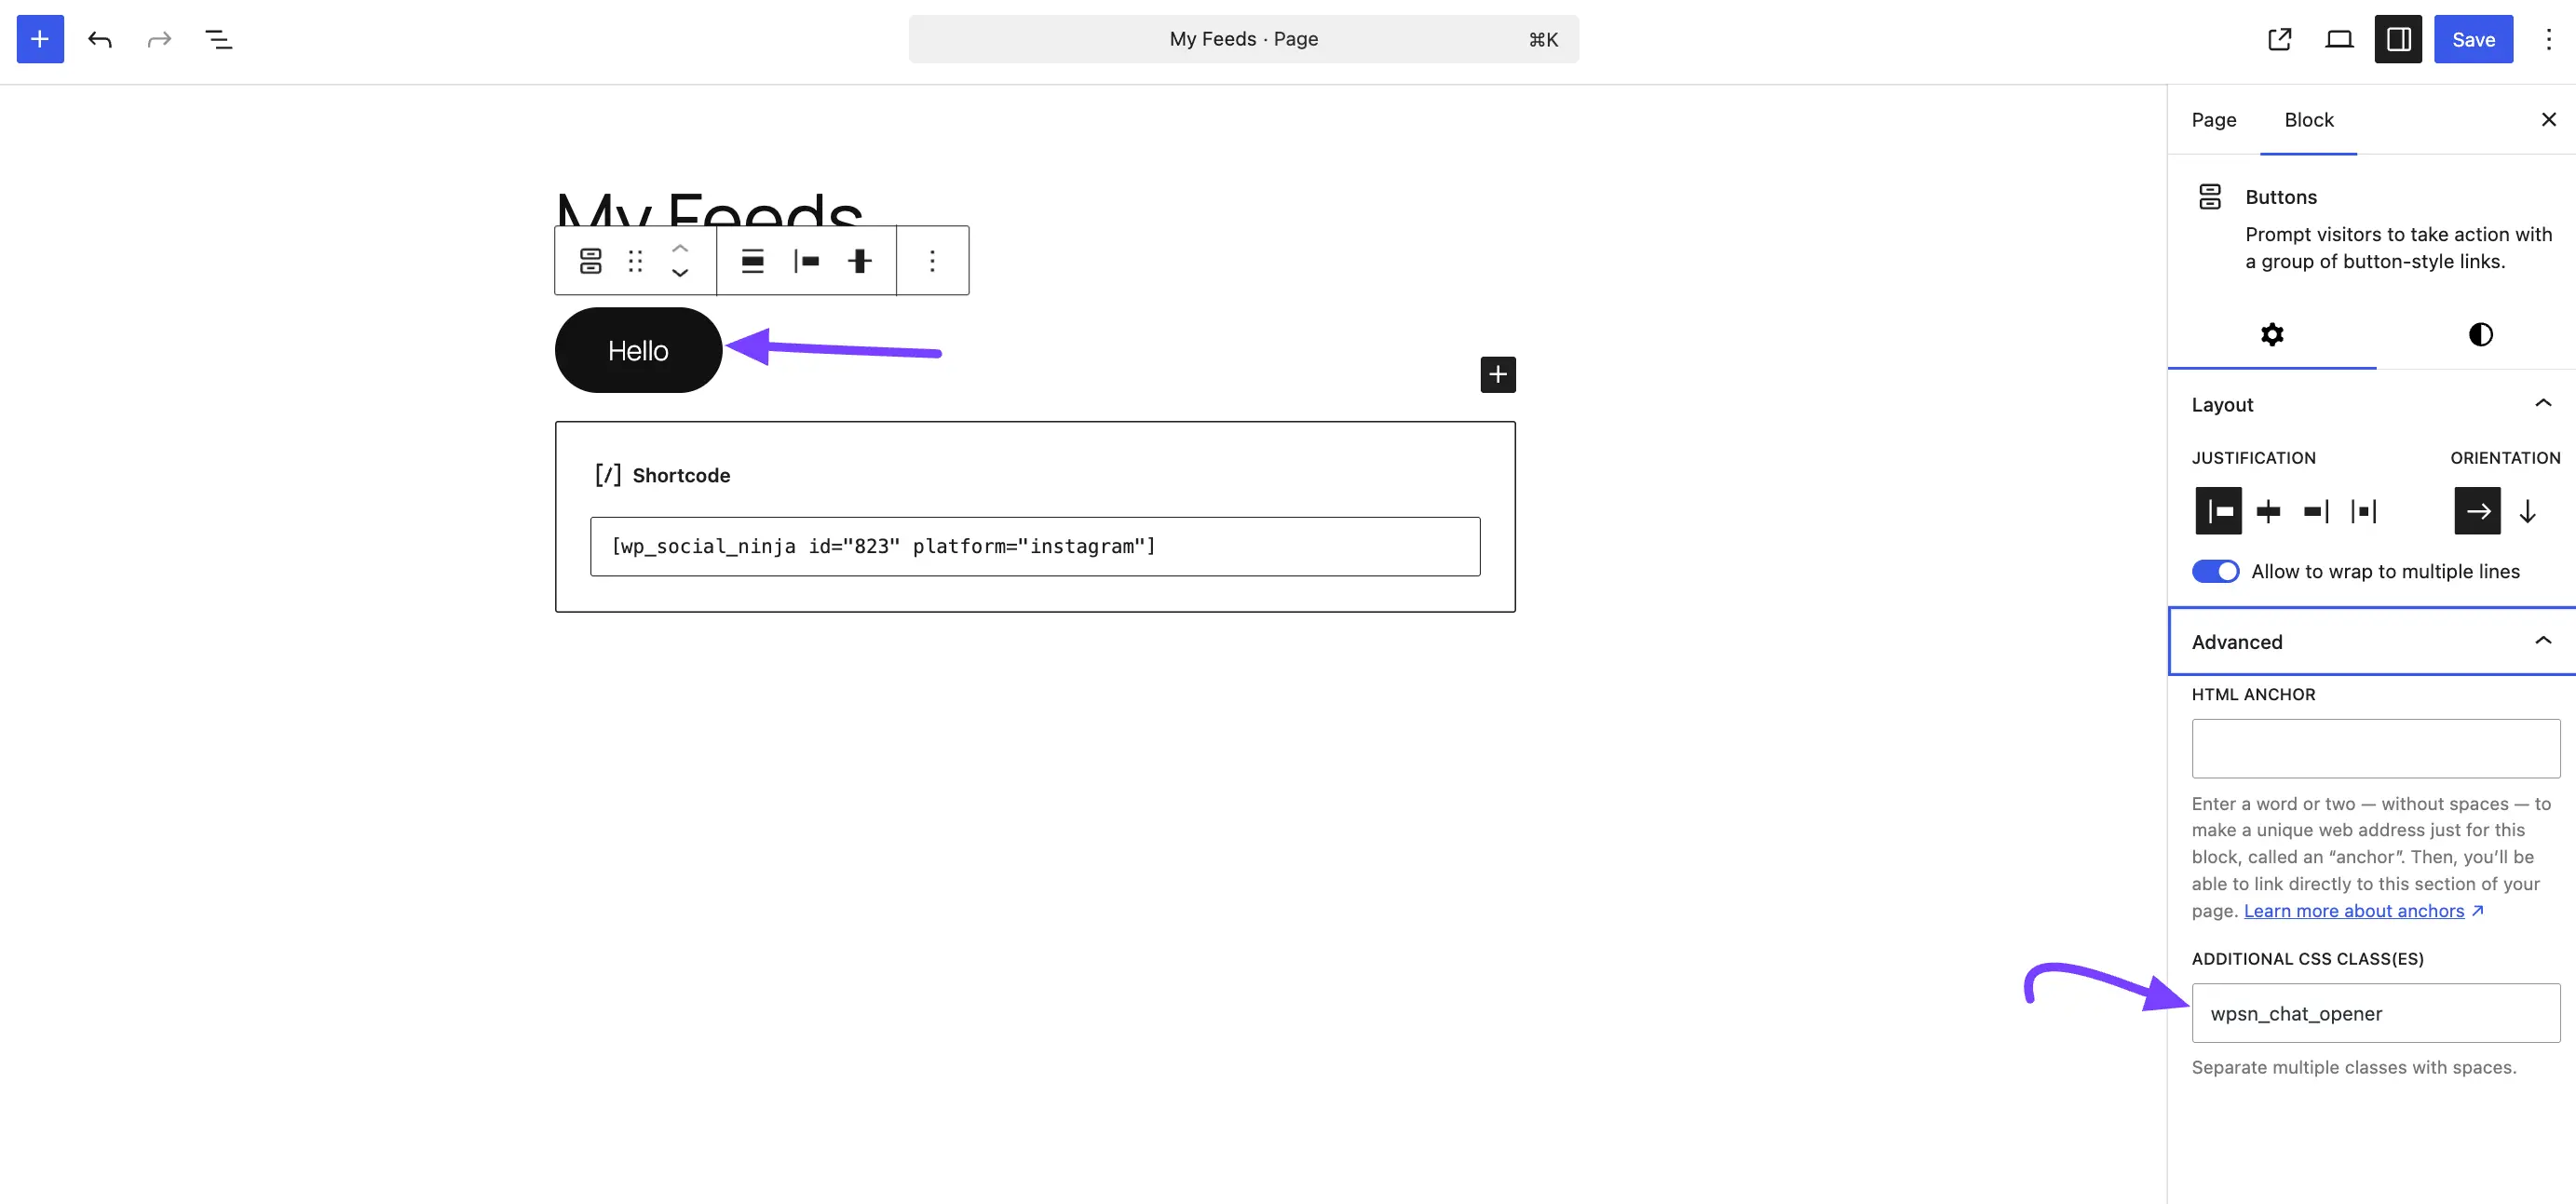
Click on the button you just added to select it. On the right-hand sidebar, make sure the Block settings tab is selected. Scroll down and click on the Advanced section to open it.
Find the field labeled Additional CSS class(es). In this field, type (or copy and paste) the following class exactly: wpsn_chat_opener
Step 4: Update and Test
Click the Update or Publish button in the top-right corner to save your changes.
Now, visit the live page on your website and click your new button. Your chat widget will pop open, ready for your visitors to start a conversation!