Appearance
How to Add Fluent Forms Reviews with WP Social Ninja
You can collect and display reviews directly from your website visitors using Fluent Forms. By integrating Fluent Forms with WP Social Ninja, you can automatically fetch form submissions and showcase them as Business reviews.
TIP
Displaying reviews from Fluent Forms is a premium feature and requires WP Social Ninja Pro.
This guide will walk you through the entire setup, from connecting the module to displaying your new reviews.
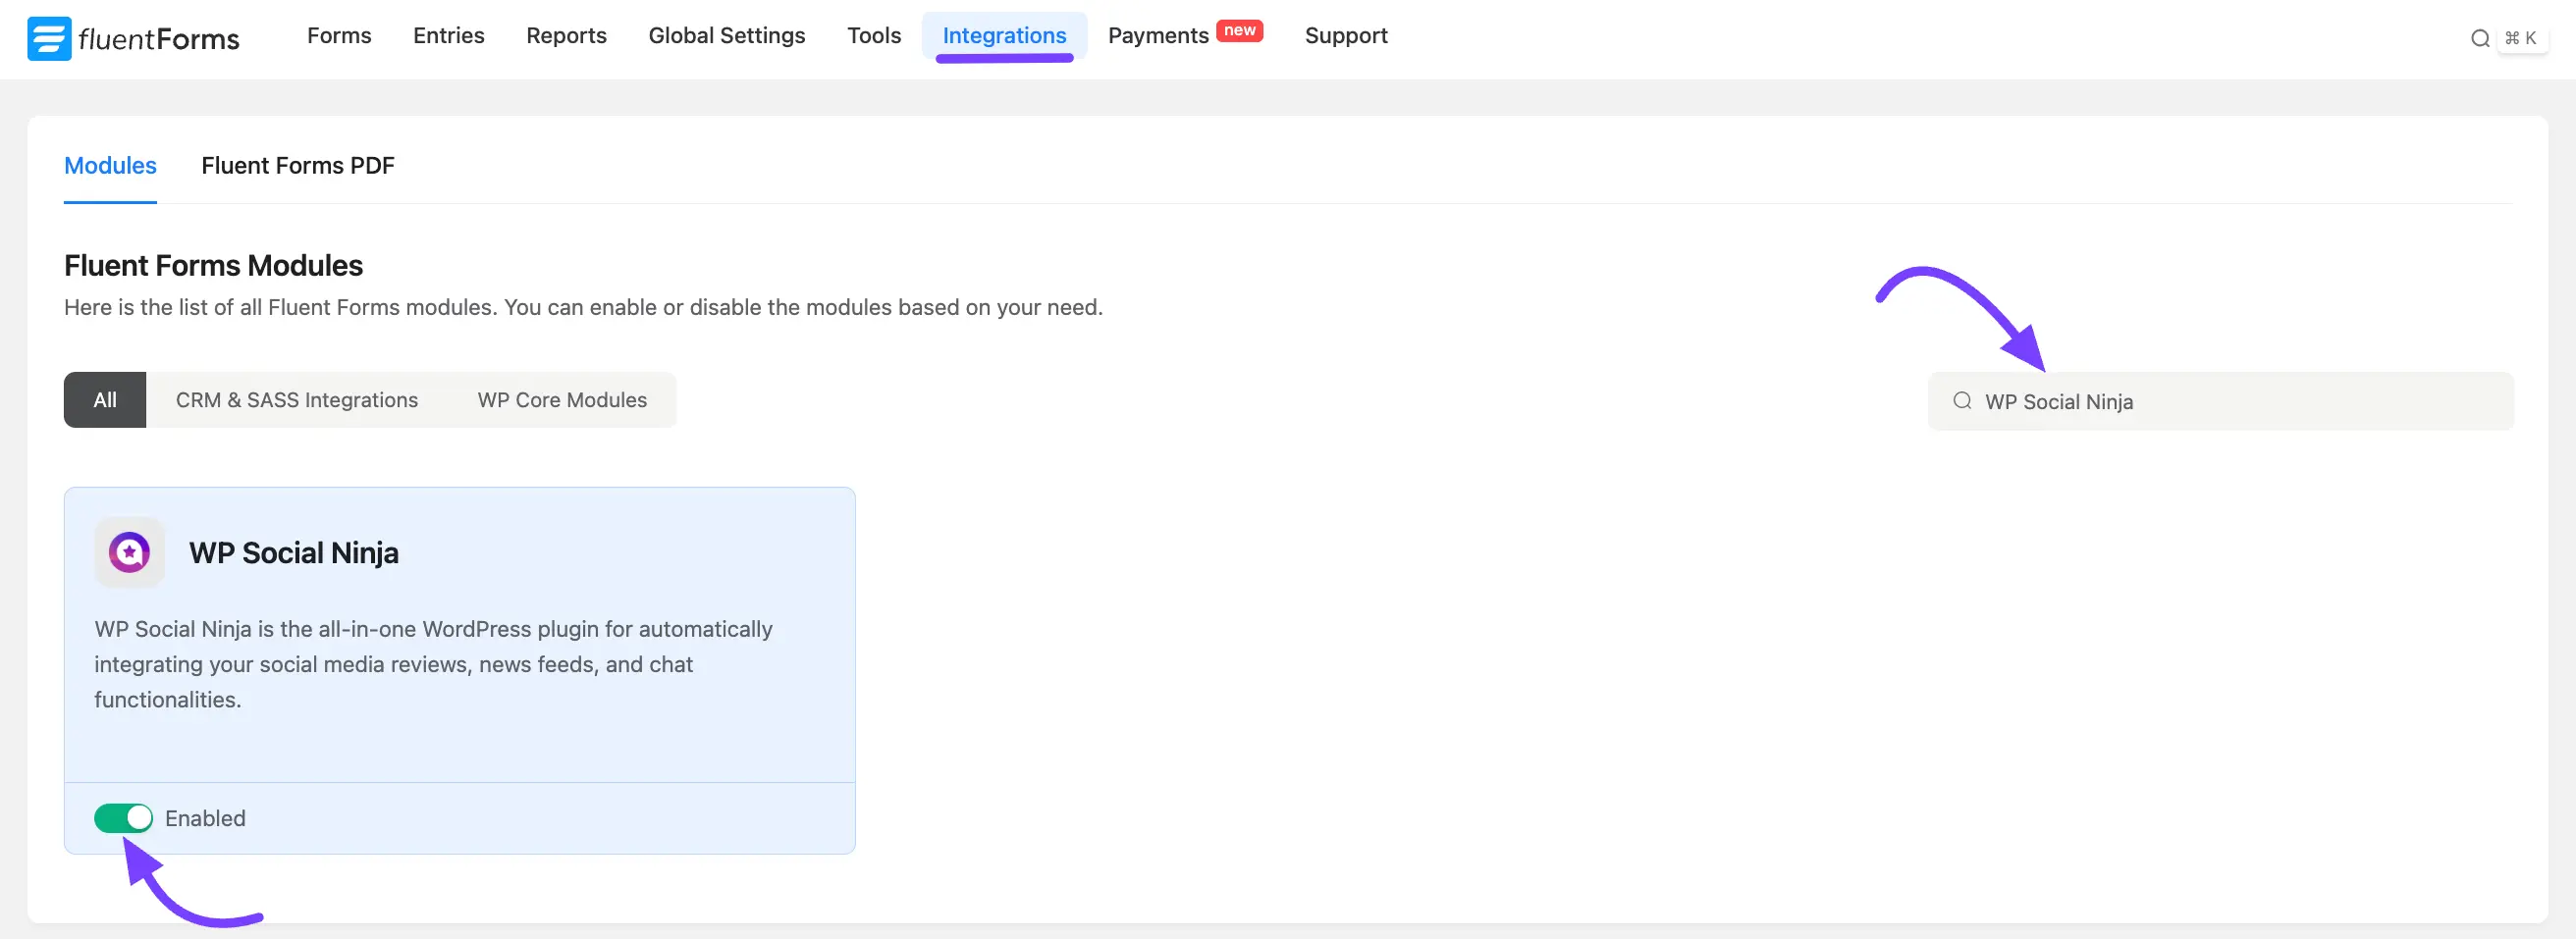
Step 1: Enable the WP Social Ninja Module
First, you need to enable the integration from the Fluent Forms dashboard.
From your WordPress dashboard, go to Fluent Forms → Integrations. Search for WP Social Ninja in the list, or scroll down to find it and click the toggle to enable the module.
This action connects Fluent Forms with WP Social Ninja, allowing them to share data.
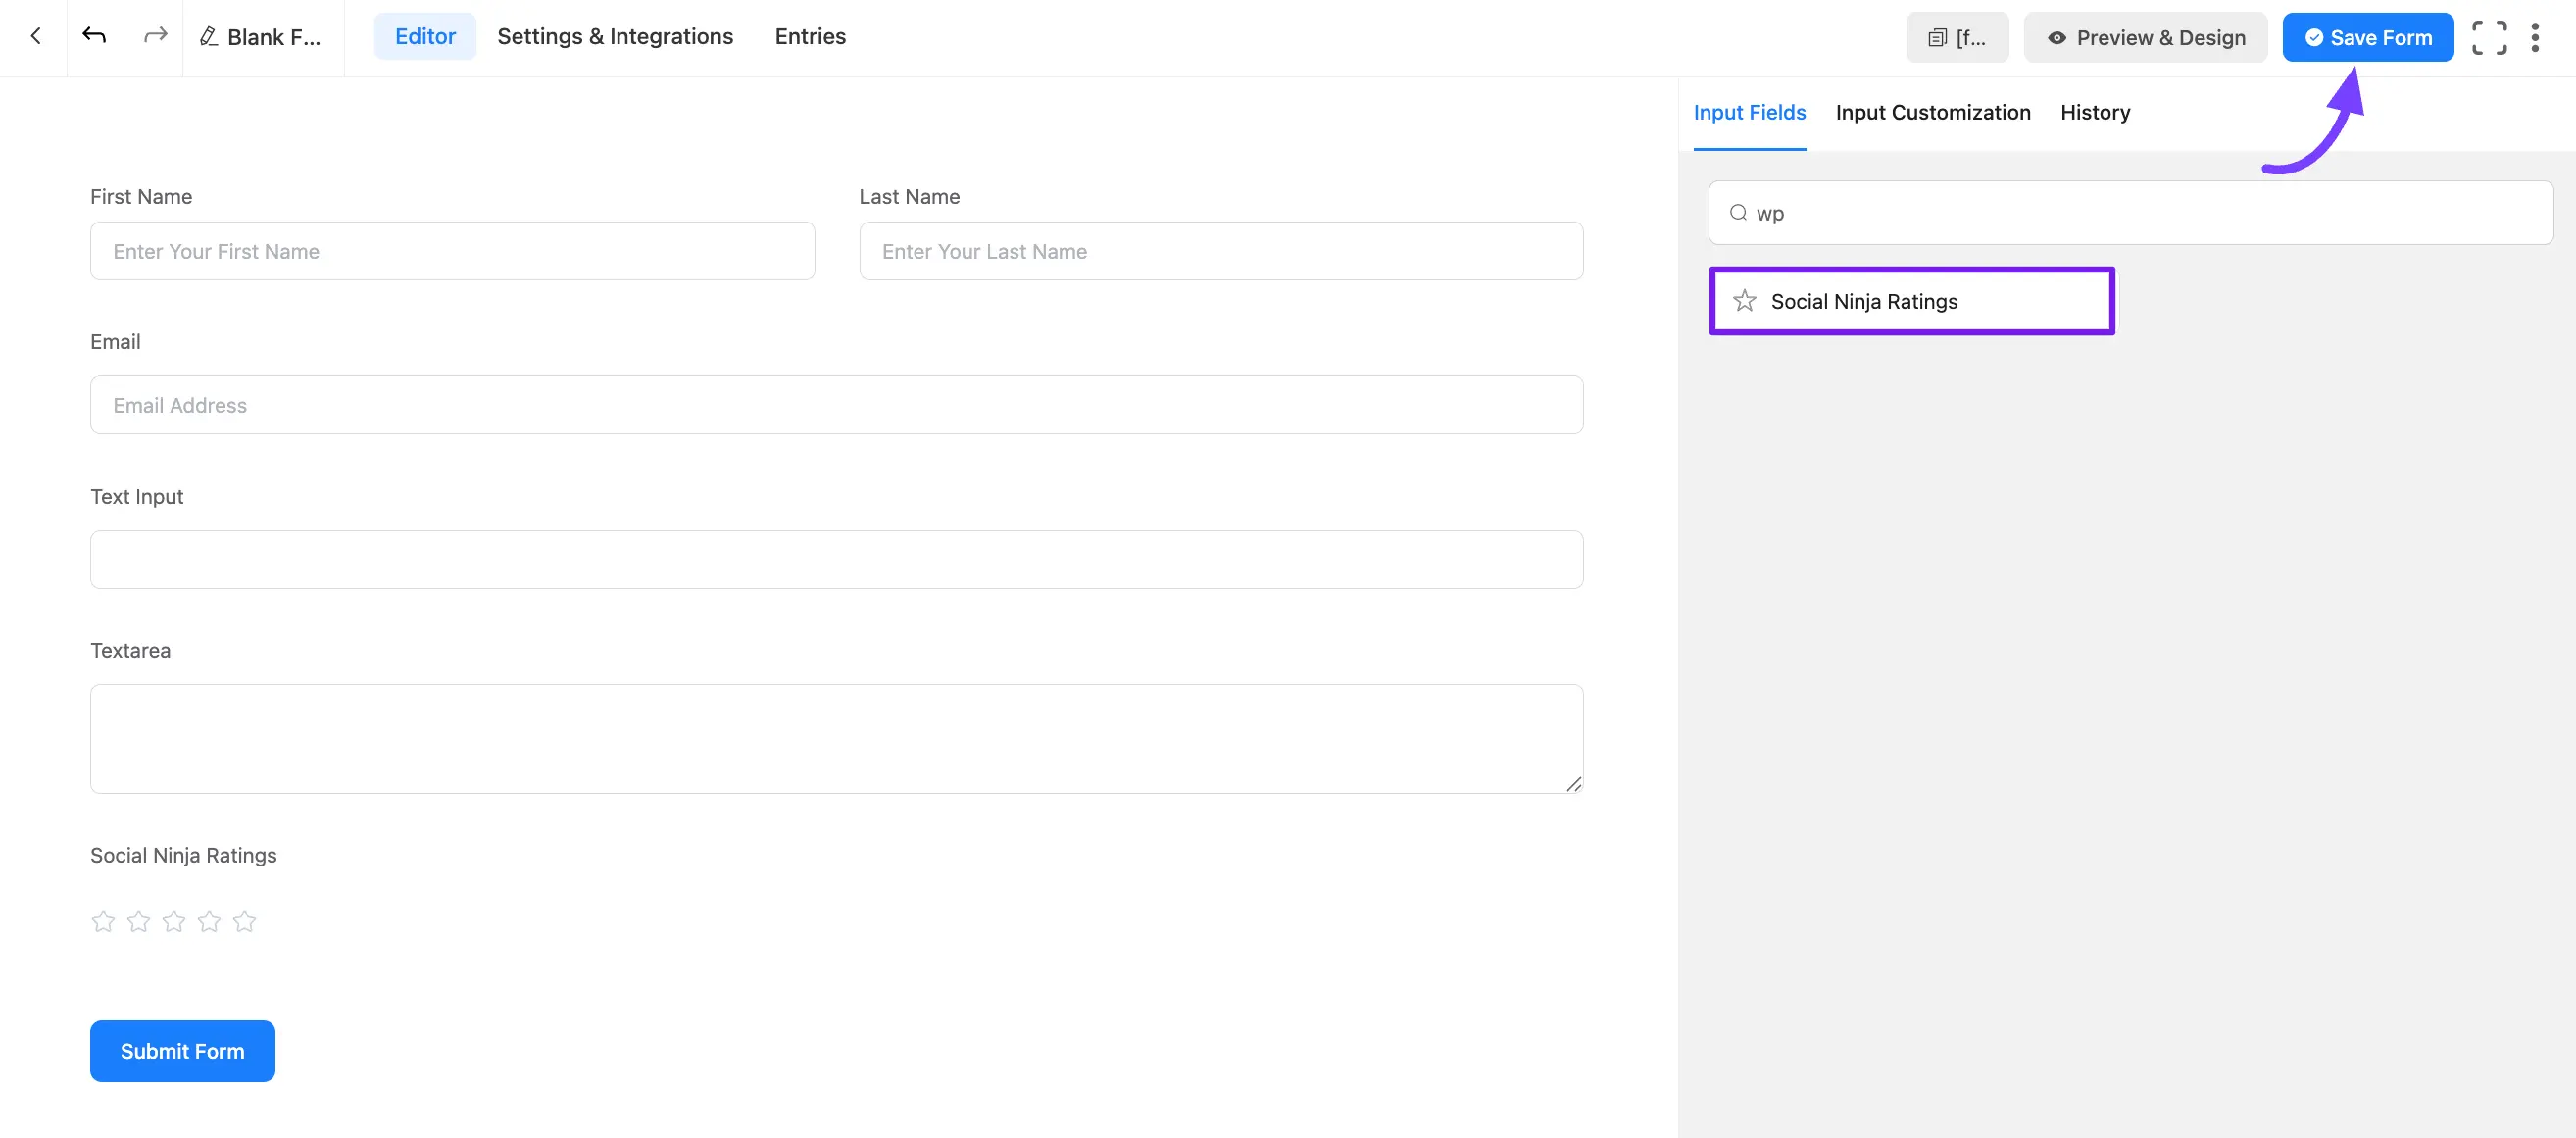
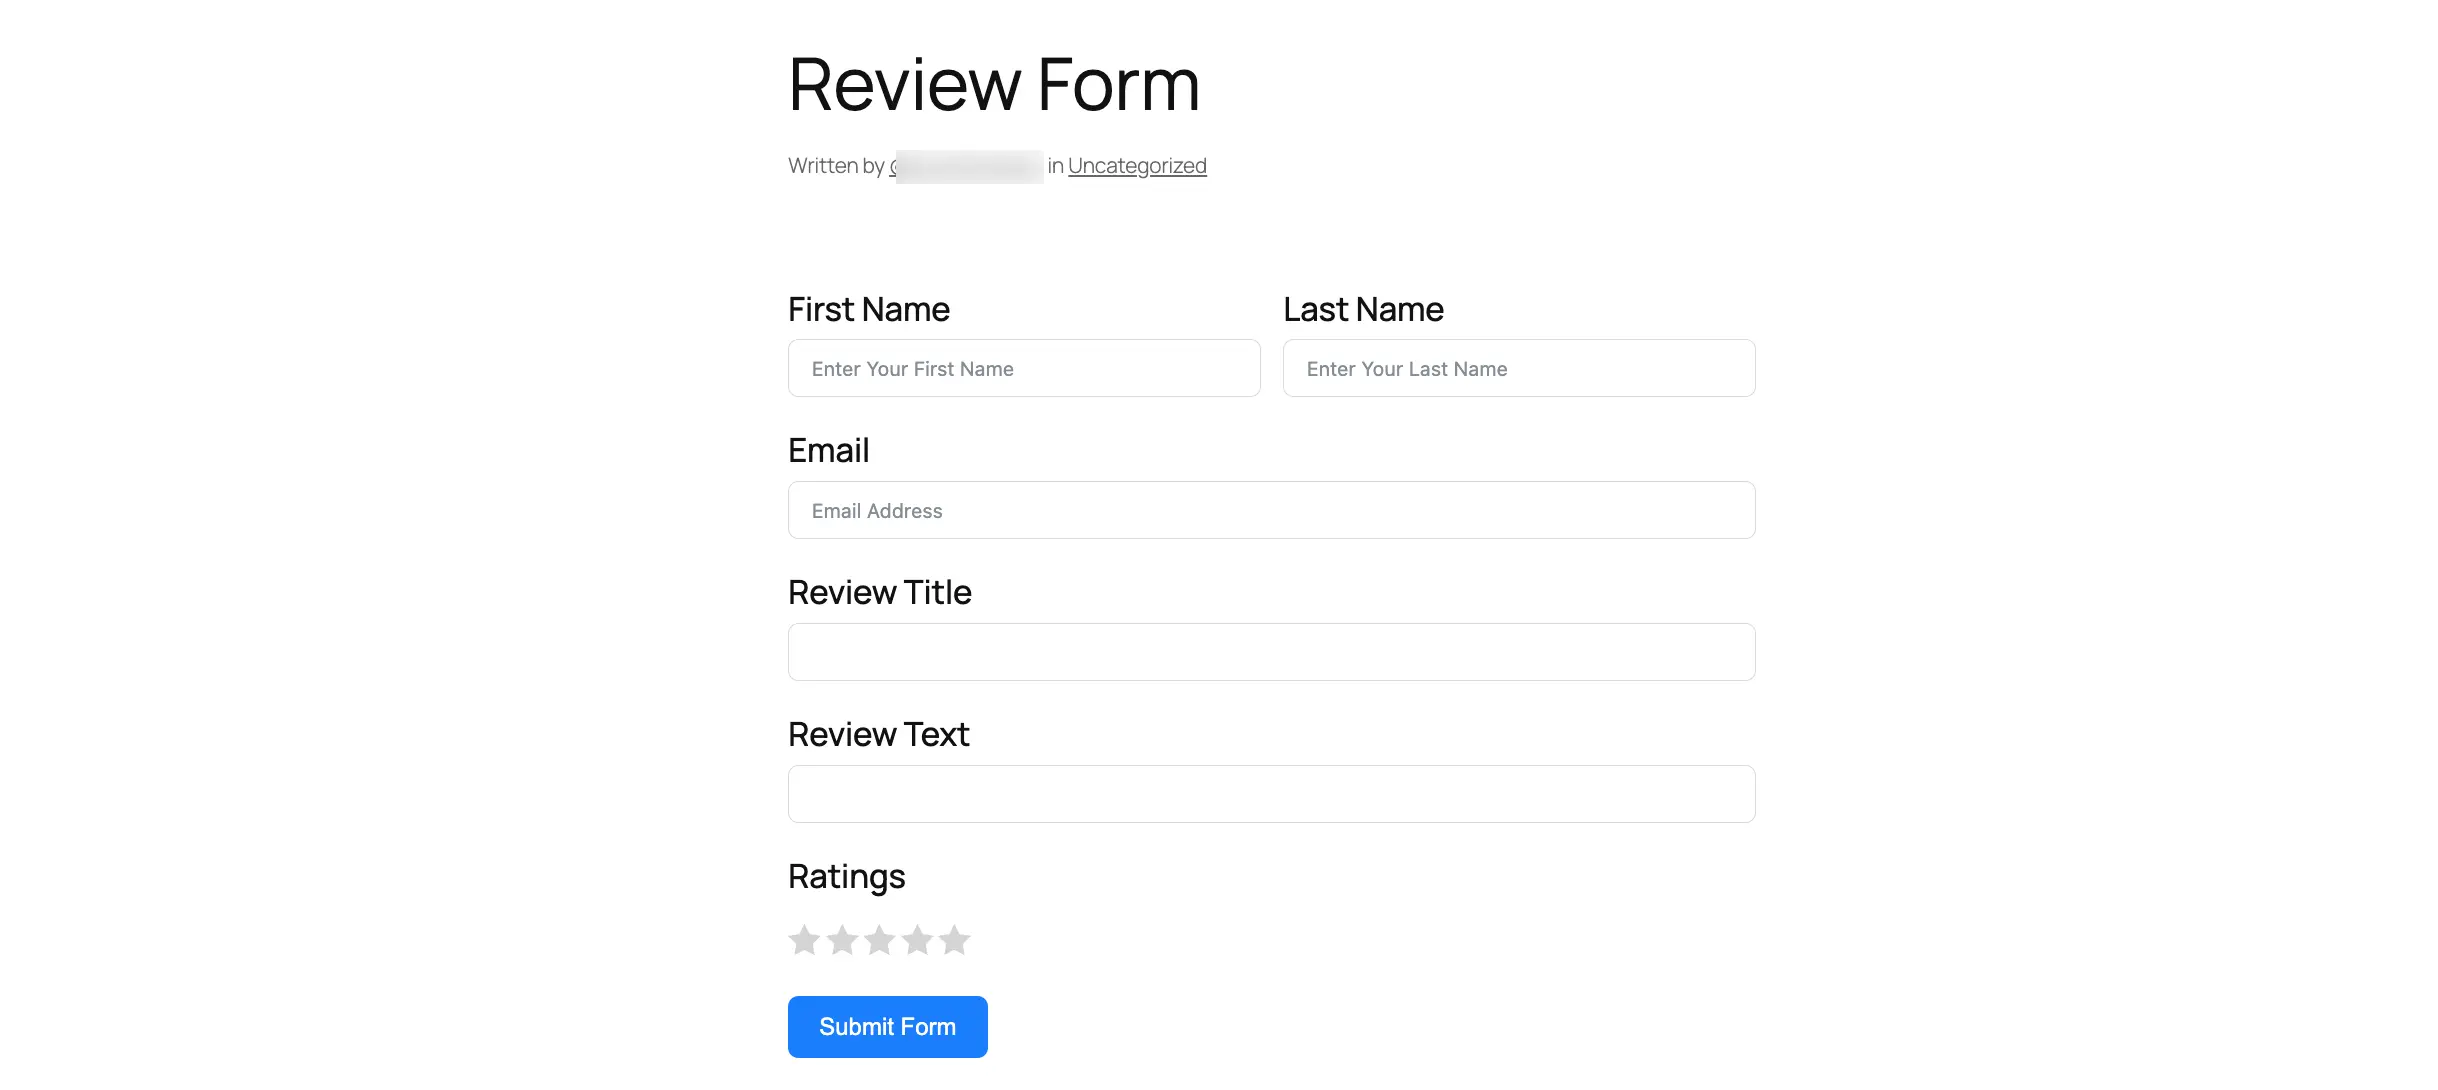
Step 2: Create Your Review Form in Fluent Forms
Next, you need to configure the specific form you want to use for collecting reviews. Go to your Fluent Forms dashboard. You can either Add a New Form or edit an existing one.
Ensure your form includes the necessary input fields, such as Name, Email Address, Text, and a Ratings field.
Note: The Ratings field in Social Ninja is now available within Fluent Forms.
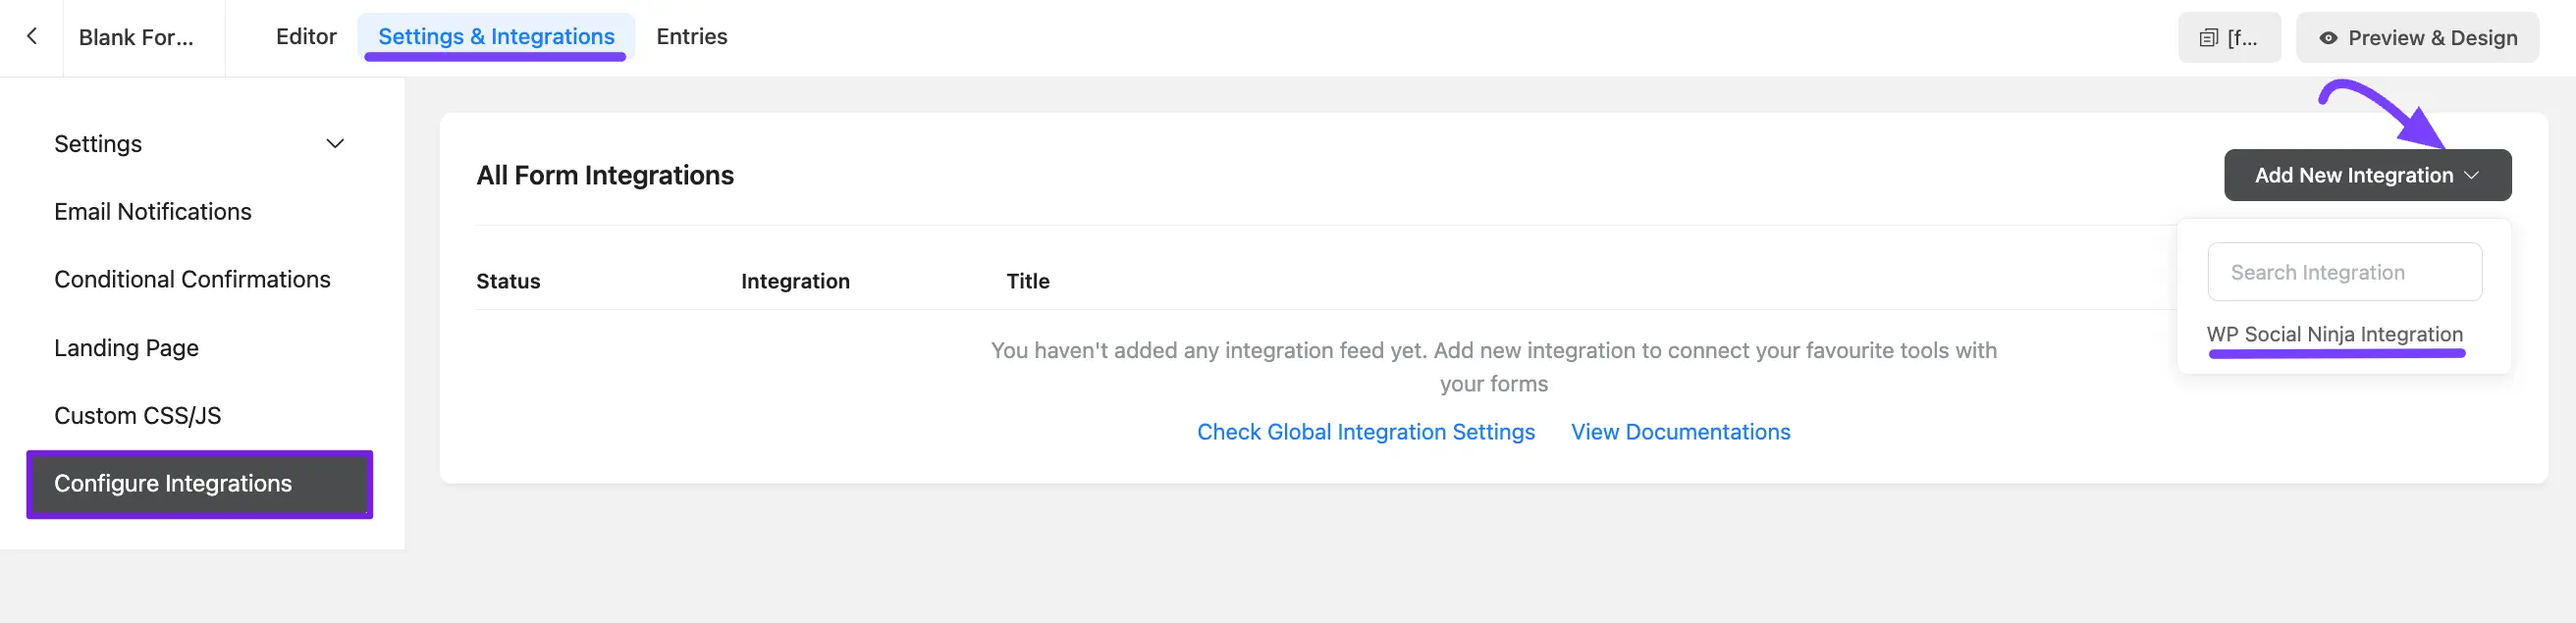
Step 3: Configure the WP Social Ninja Integration Feed
After you select the WP Social Ninja integration, a configuration panel will appear. You must tell this specific form to send its data to WP Social Ninja.
Inside your form editor, go to the Settings & Integrations tab. Select Configure Integration from the left-hand menu. Click the "Add New Integration" button and select "WPSocial Ninja Integration" from the dropdown list.
Step 4: Map Your Form Fields
A new configuration panel will appear. This is the most important step. You must "map" your form fields to tell WP Social Ninja which field is which.
Name: Provide a name for this specific integration feed. This is for your internal reference, for example, "Customer Review Form Feed."
Integration Source: From the dropdown menu, select the source of your reviews. In this case, you would choose Fluent Forms.
Ratings: This is a required field. From the dropdown menu, select the field in your Fluent Form that collects star ratings from users. Make sure to choose the shortcode of social ninja ratings {inputs.wpsr_rating_elem} from the dropdown.
Reviewer Name: This is a required field. Select the form field where users enter their full name.
Reviewer Email: Select the field where users provide their email address. This is typically not displayed publicly, but can be useful for your records.
Comment: This is a required field. Select the form field where users write their detailed review or feedback. Choose the shortcode from the dropdown option {inputs.input_text}.
Reviewer Image: If your form allows users to upload a profile picture or avatar (using a file upload field), you can map that field here to display the image alongside their review. Choose the shortcode from the dropdown option {inputs.image-upload}.
Reviewer URL: Use this to map a field where users can provide a link to their website or social media profile. This can be made clickable in the review template. Choose the shortcode from the dropdown option {labels.url}.
ReviewTitle: If your form has a field for a review headline or title (e.g., "Summary of your experience"), map it here. Choose the shortcode from the dropdown option {inputs.input_text_1}.
Category: If you use categories to organize your reviews (e.g., "Product Feedback," "Customer Service"), you can map a form field (like a dropdown or radio button) to this option to automatically categorize incoming submissions.
Conditional Logic: Enable this option to set specific rules for when a submission should be sent to WP Social Ninja. For example, you can create a rule to only send submissions that have a rating of 4 stars or higher.
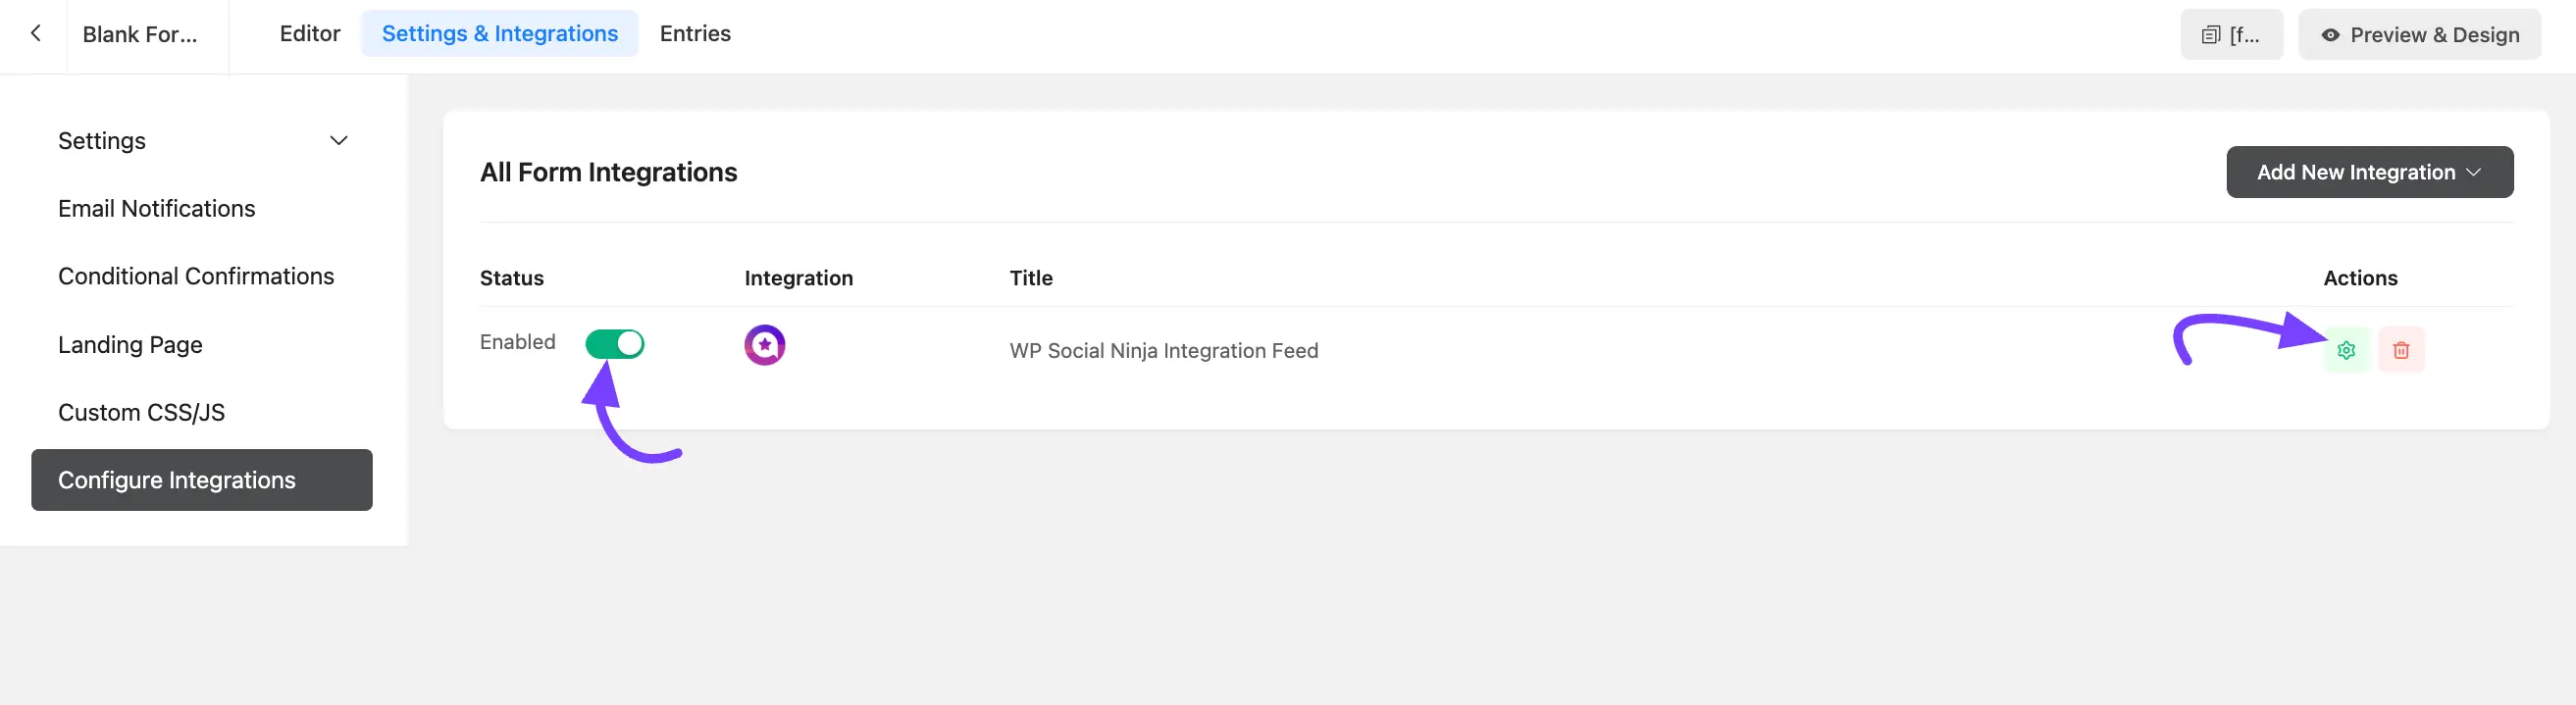
After you have mapped all the necessary fields, click the Save Feed button to finalize the integration setup.

The form has been integrated successfully. You can modify or remove the feed by selecting the Settings or Delete icon.
After that, click the Save Form button. Then you can copy the Form's shortcode and paste it into any page/post.
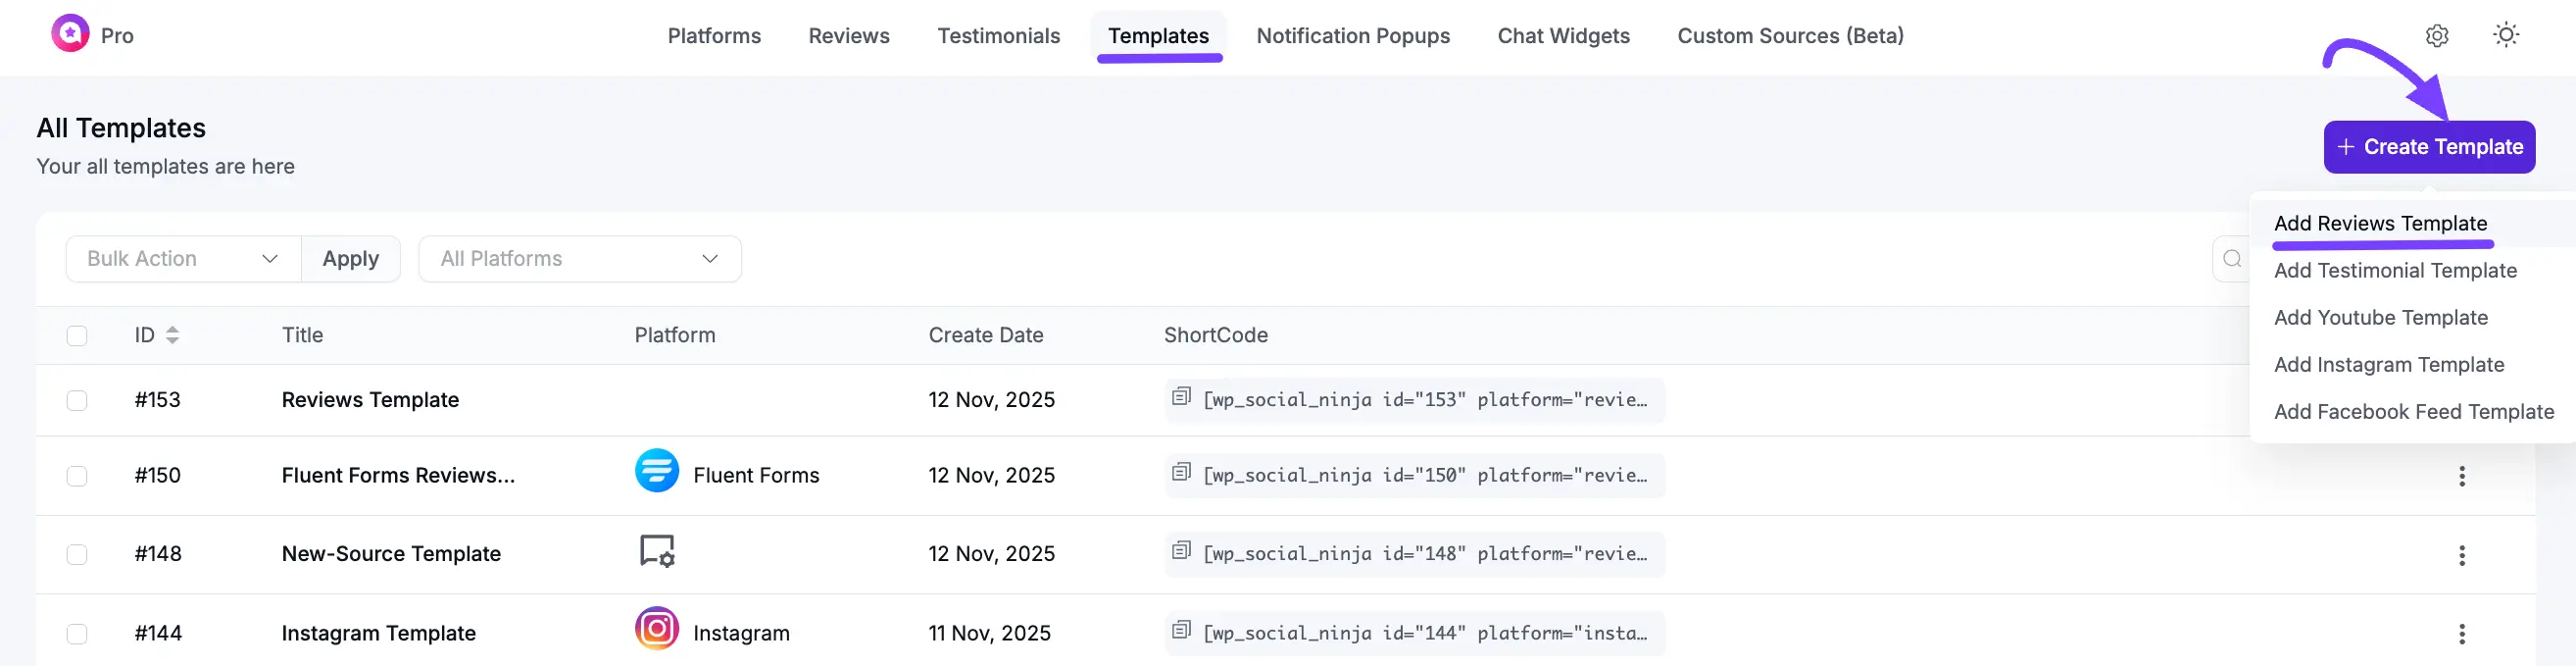
Step 5: Create a Fluent Forms Review Template
After setting up your form, create a template in WP Social Ninja to display the submitted reviews. Go to your WP Social Ninja dashboard. Click Templates → Add New Template and choose Add Review Template.
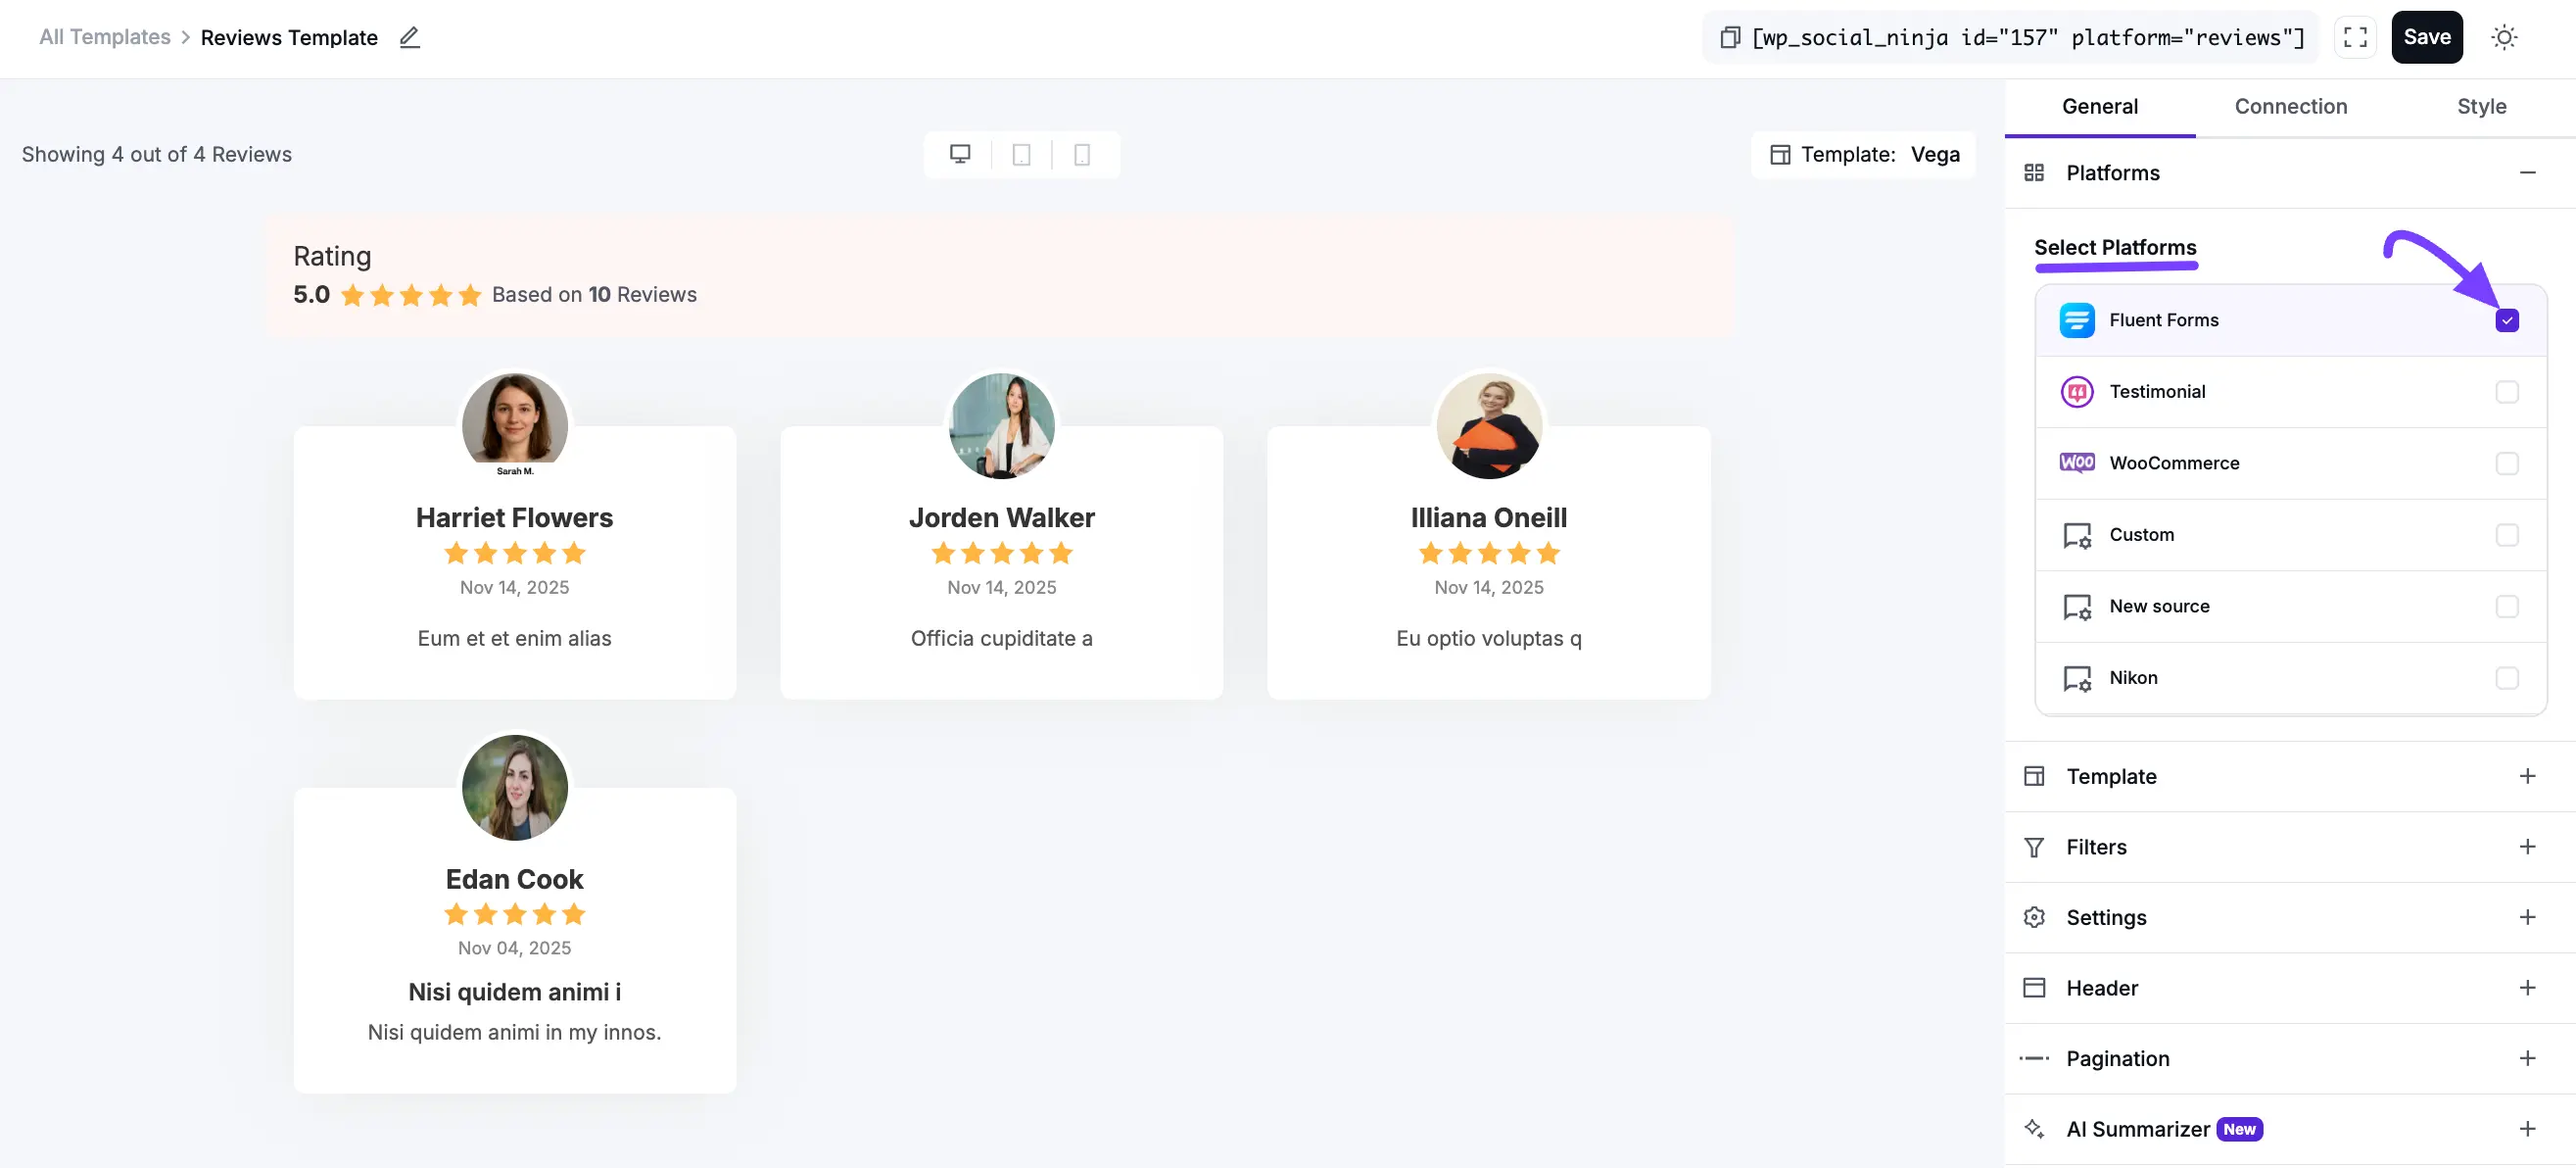
In the template editor, go to General → Platforms. Select Fluent Forms from the list of platforms. Style your template (layout, colors, etc.) and click the Save button.
Now, any reviews submitted through your configured form will automatically be fetched and displayed using this template.
Step 6: Display Your Form and Reviews
You now have two pieces to place on your site:
- The Form: Copy the shortcode for your Fluent Form and paste it onto a page (e.g., a "Write a Review" page).
- The Reviews: Copy the shortcode for your new WP Social Ninja Template and paste it onto a page where you want to display the collected reviews (e.g., your "Testimonials" page).
Manually Approve Reviews (Optional)
By default, reviews might appear instantly. If you want to approve each review before it goes live:
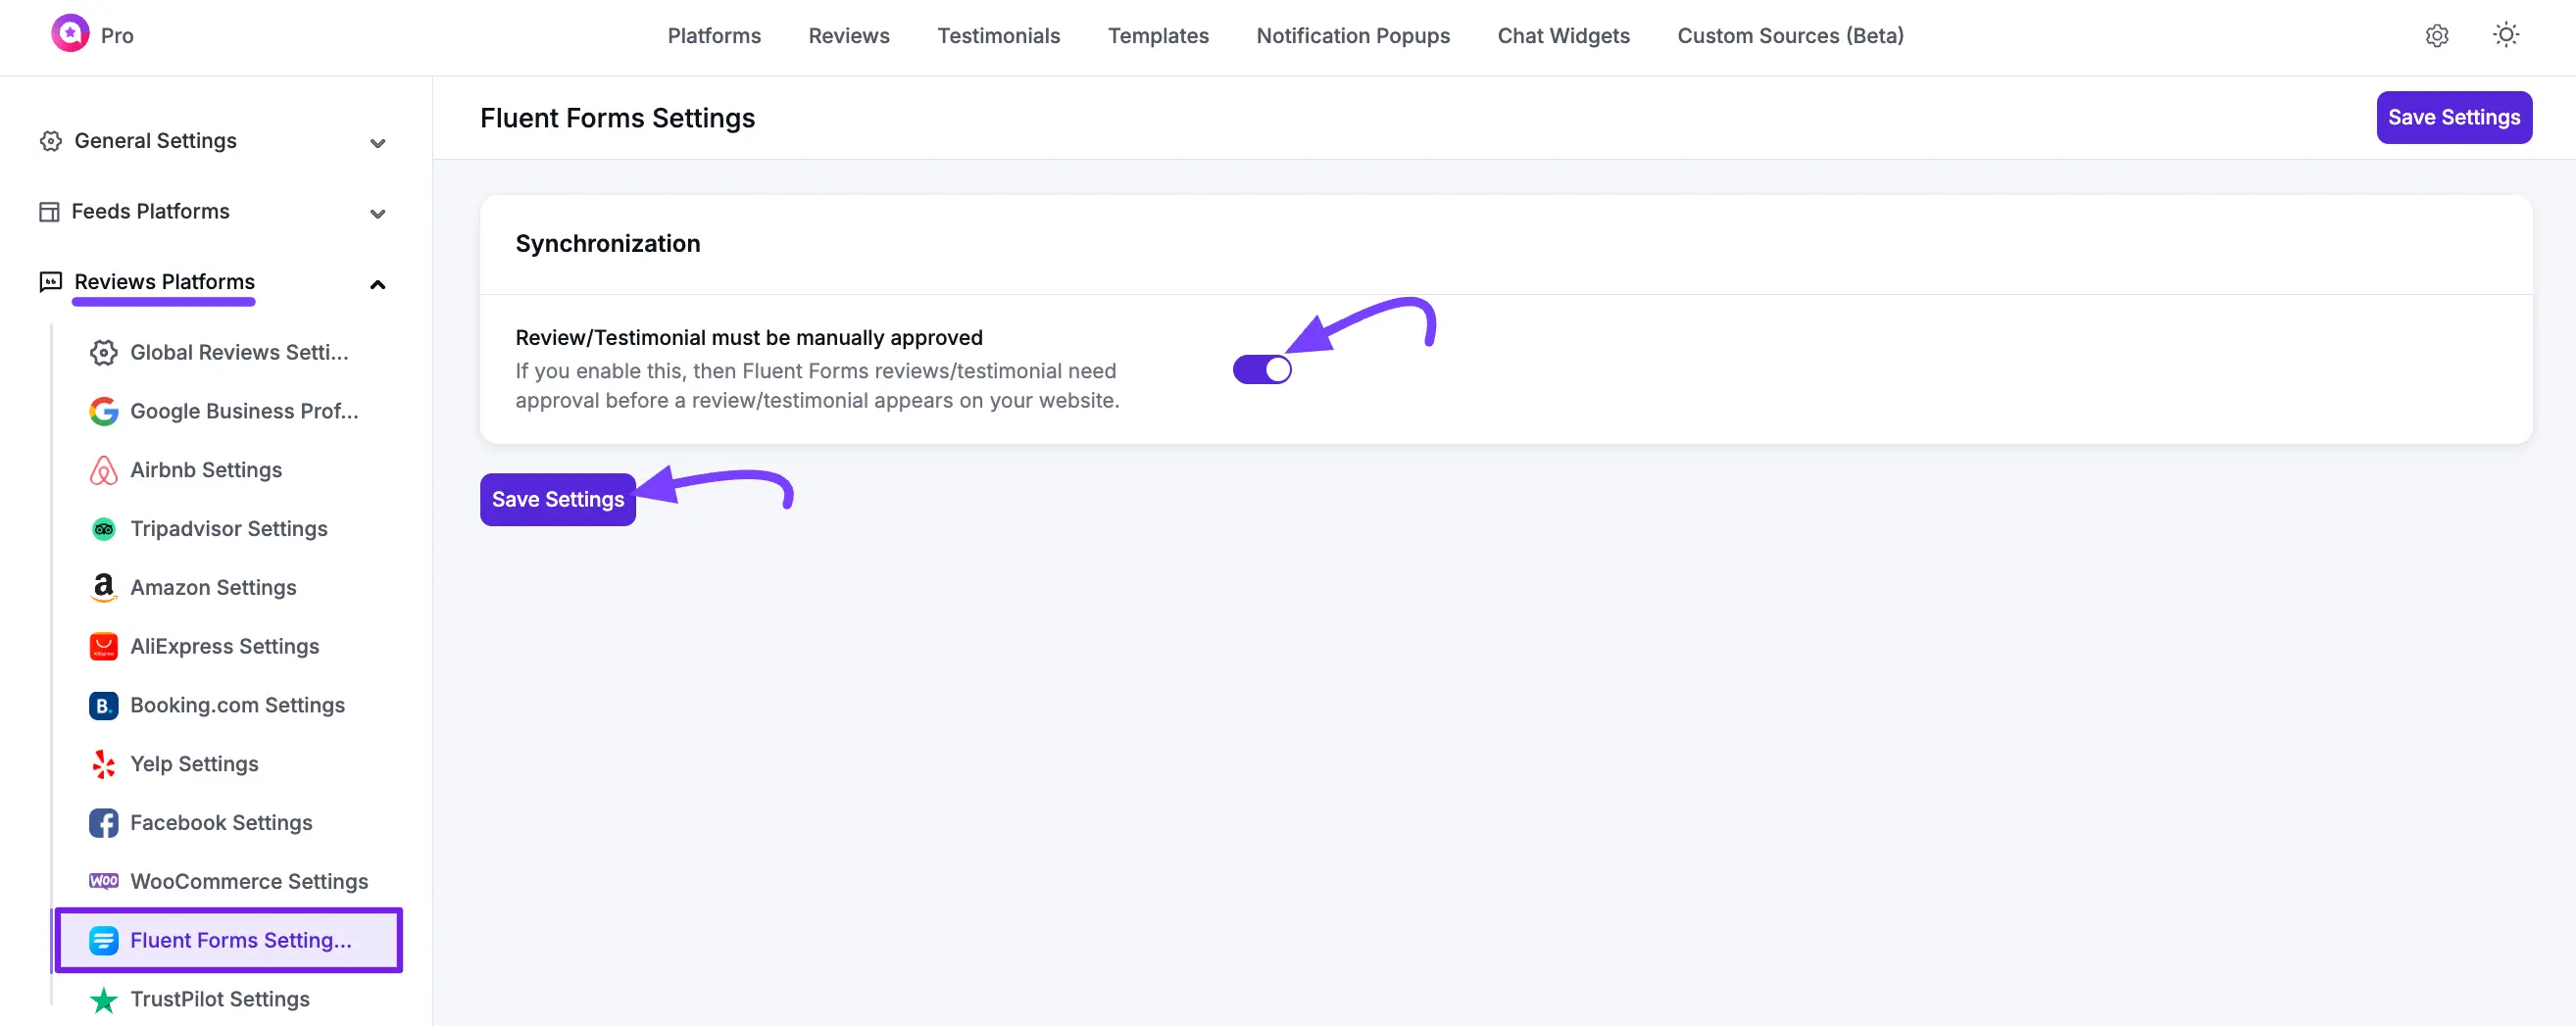
- Go to WP Social Ninja → Settings → Reviews Platform → Fluent Form Settings.
- Enable the Review/Testimonial must be manually approved option. After that, click the Save Settings button.
Now, all new submissions will go to the Reviews tab in WP Social Ninja, where you can manually approve or disapprove them before they appear on your site. You can check out the - How to add Custom Reviews documentation.