Appearance
Collect Feedback with Native Review Forms
The Native Review Form is a built-in tool that allows you to collect customer reviews directly on your website without needing third-party form plugins. It provides a streamlined way for customers to submit ratings, text, and even photos, which then feed directly into your moderation dashboard.
This guide walks you through creating, customizing, and displaying your native review form.
Step 1: Create a New Review Form
To begin, you need to generate a form dedicated to your feedback collection.
From your WordPress dashboard, navigate to WP Social Ninja → Review Forms. If you have no forms yet, click the + Create Form button in the center of the page.

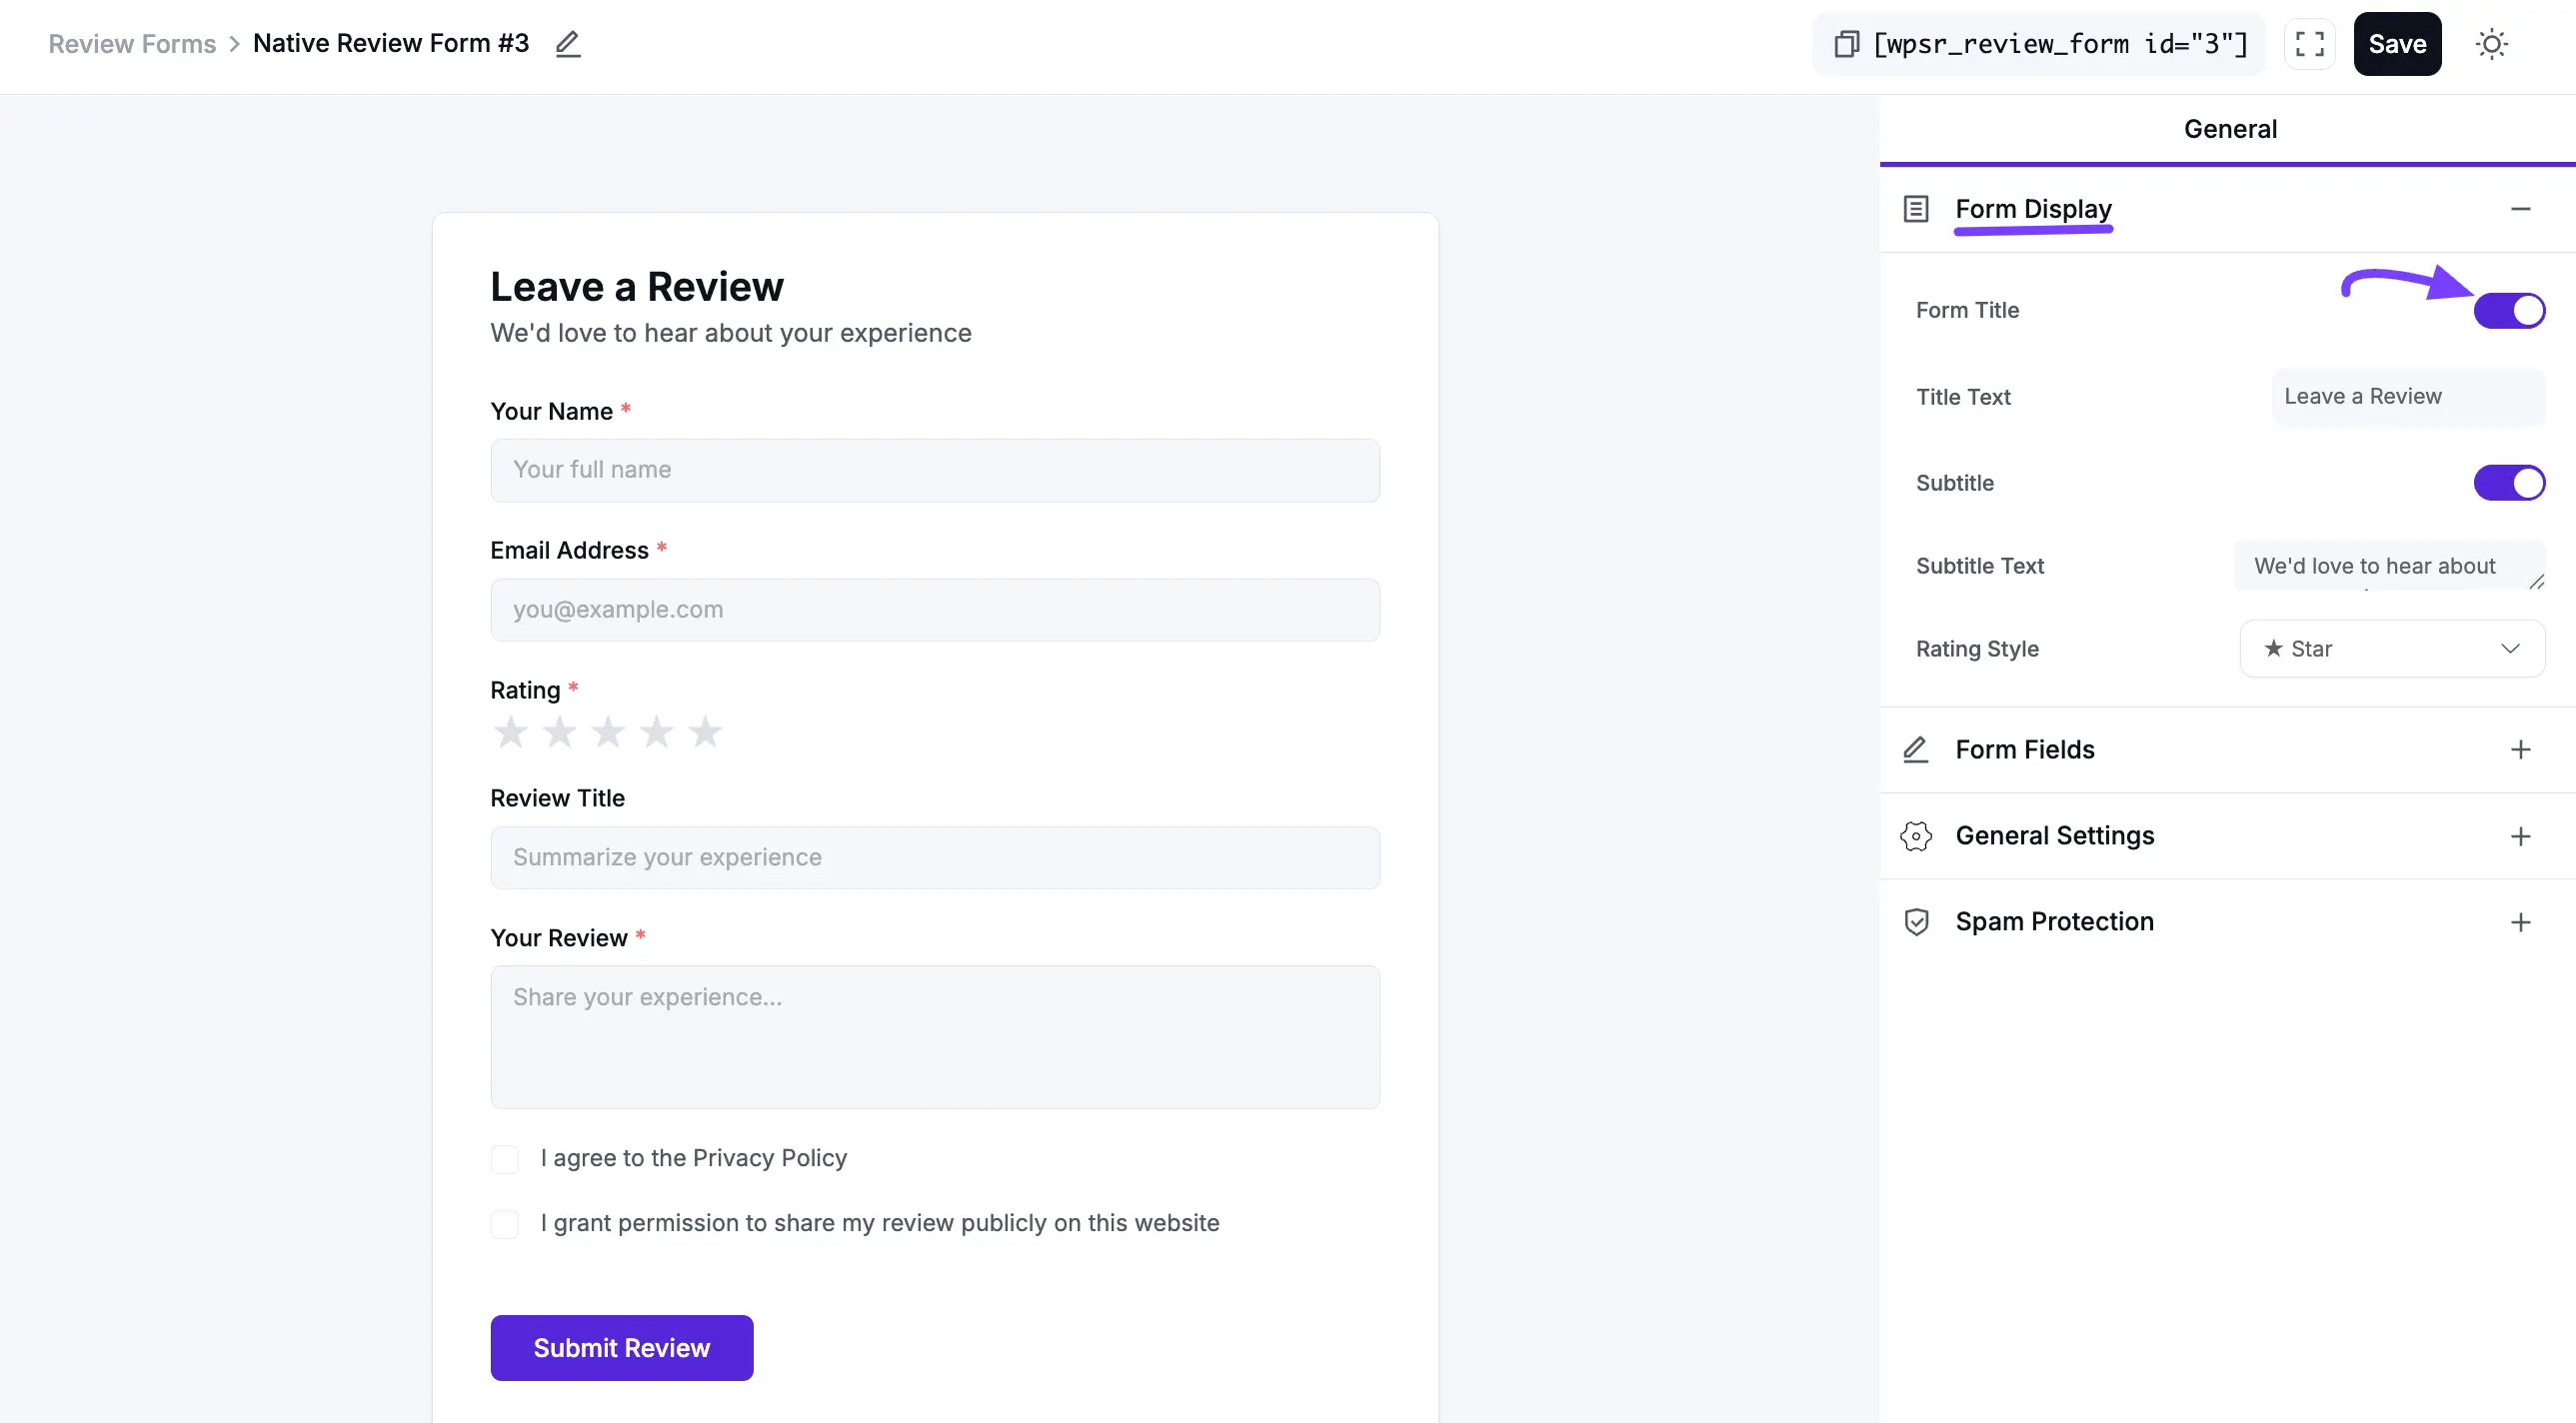
Step 2: Customize Form Display
Once the editor opens, the Form Display tab allows you to control the initial look and feel of the form.
- Form Title & Subtitle: Toggle these on to add a heading (e.g., "Leave a Review") and a short description to guide your users.
- Rating Style: Choose the visual icon for your ratings. Options include Star, Heart, Emoji, and Number.
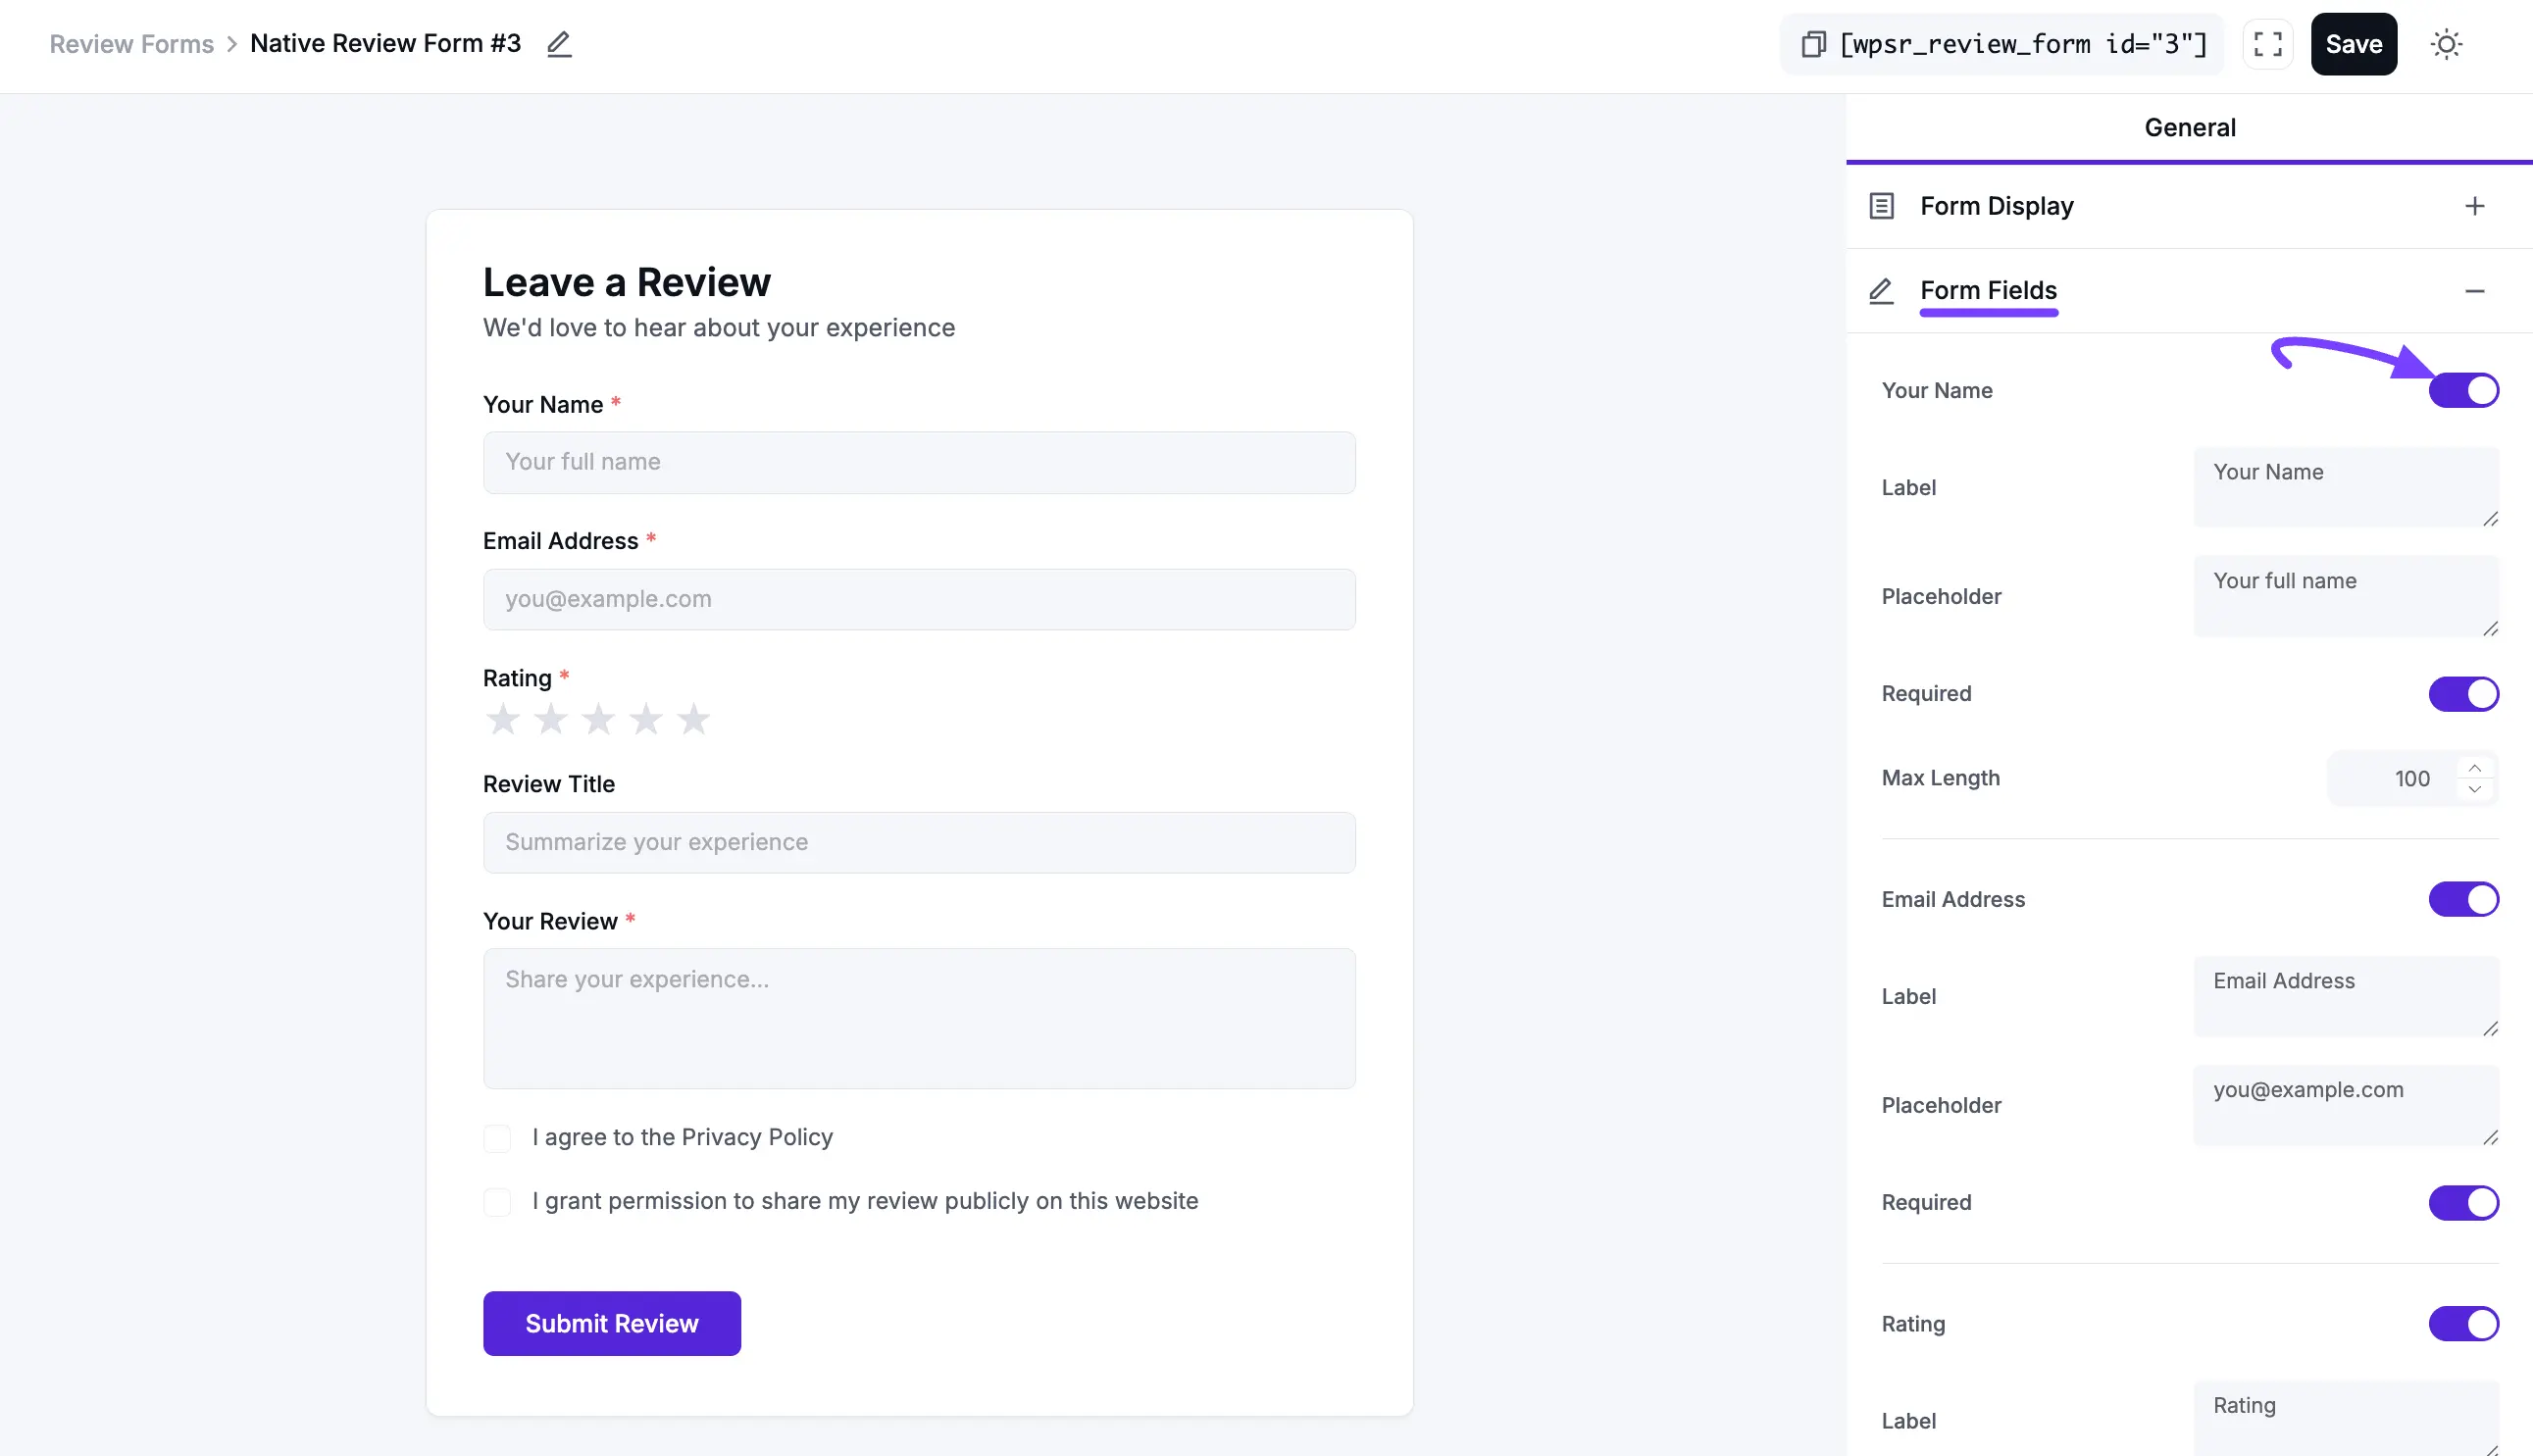
Step 3: Configure Form Fields
The Form Fields tab is where you determine what information you want to collect from your reviewers.
Available Fields
- Your Name: Collects the reviewer’s name. You can edit the label and placeholder text, and make it required. This field helps identify who submitted the review.
- Email Address: Captures the user’s email. You can customize the label and placeholder, and mark it as required if needed for follow-up or verification.
- Rating: Allows users to rate with stars. This is useful for collecting quick feedback and overall satisfaction.
- Review Title: Lets users add a summary of their review. You can set a character limit and decide whether this field is required.
- Your Review: This is the main text area where users write their detailed feedback. You can control the maximum length and number of visible rows, and make it required.
- Upload Photos: Enable this toggle to allow customers to upload images along with their reviews, providing valuable visual social proof.
- Privacy Policy Agreement: You can add required checkboxes for Privacy Policy (with a custom URL) and a Permission statement to ensure you have the right to display the review publicly.
Field Controls
For each field, you can:
- Enable/Disable: Show or hide the field using the toggle switch.
- Label: Change the field name displayed to users.
- Placeholder: Add example text inside the input field.
- Required: Make the field mandatory before submission.
- Max Length / Rows: Set limits for text input fields.
These options help you fully customize your review form to match your requirements and collect the information you need.
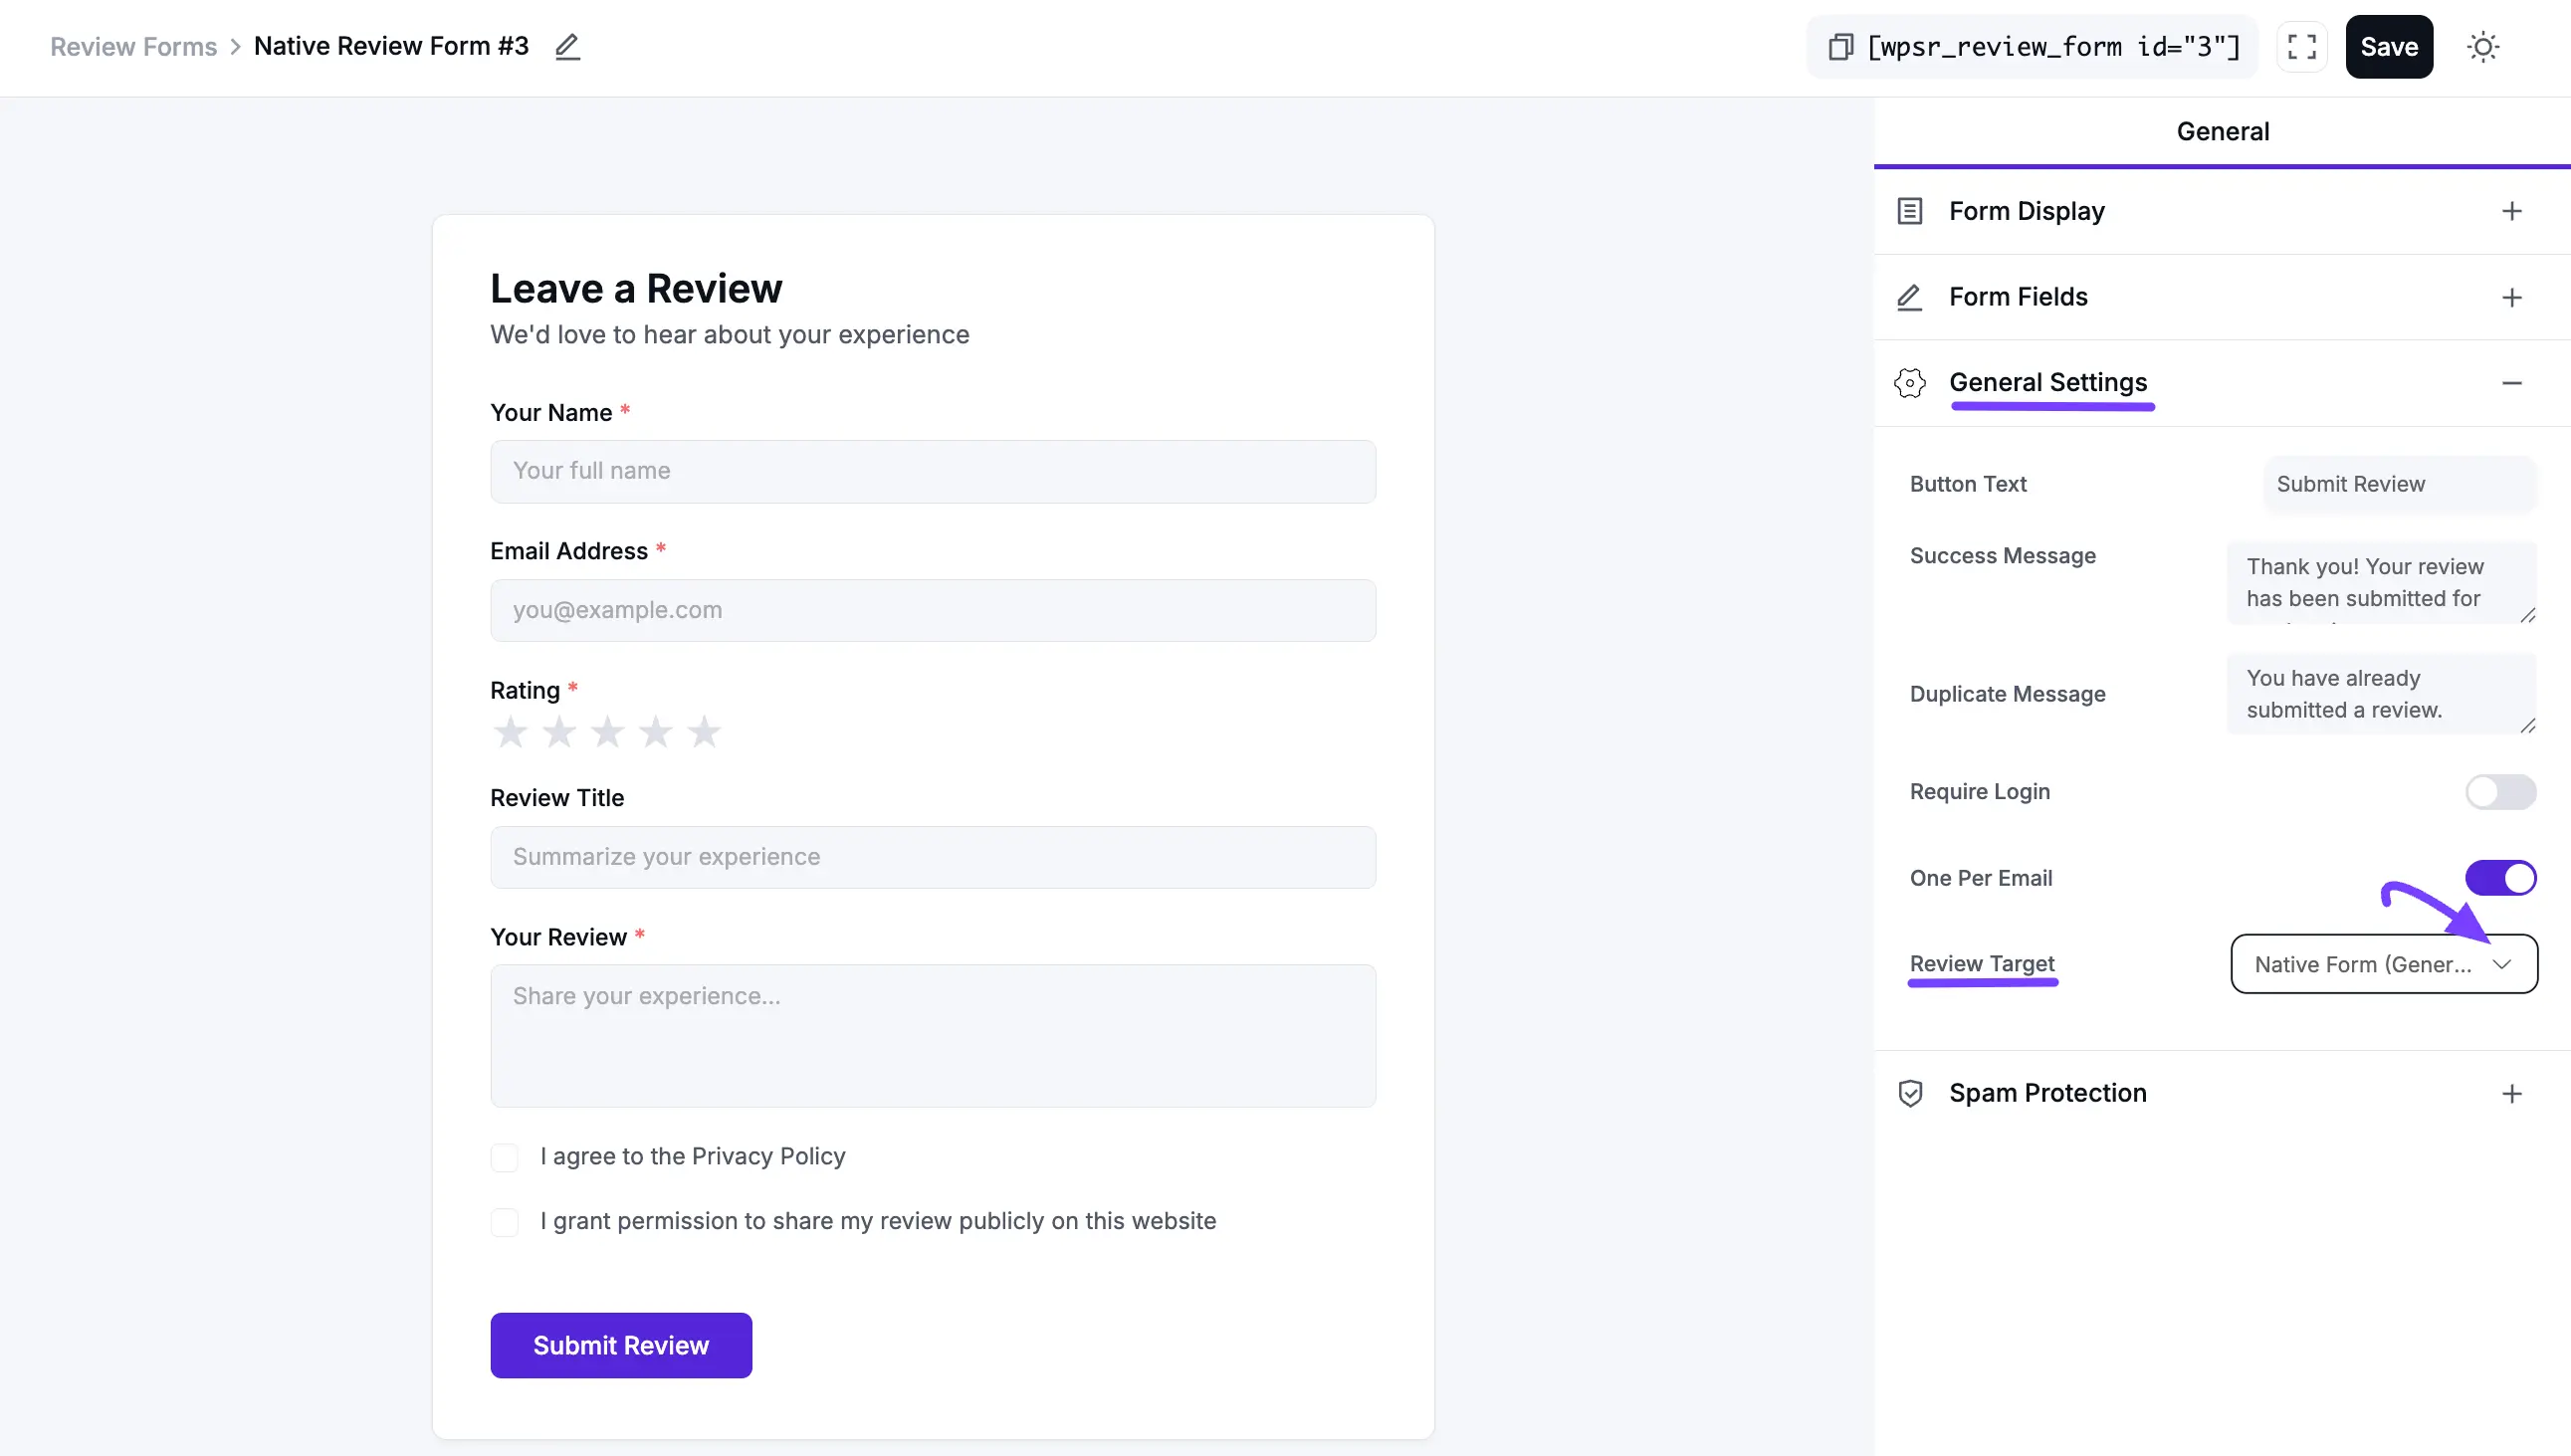
Step 4: Configure General Settings & Targets
In the General Settings tab, you manage the form's behavior and determine where the submitted data is sent.
- Submission Messages: Customize the Button Text (e.g., "Submit Review") and the Success Message users see after submitting.
Submission Rules:
- Require Login: Toggle this on if you only want registered site users to leave reviews.
- One Per Email: Enable this to prevent multiple submissions from the same email address.
Review Target: This is a crucial setting. It tells WP Social Ninja which category or product these reviews belong to. You can select:
- Native Form (Generic): For general site testimonials.
- FluentCart Product: To link reviews directly to items in your FluentCart store.
- WooCommerce Product: To link reviews to specific WooCommerce products.
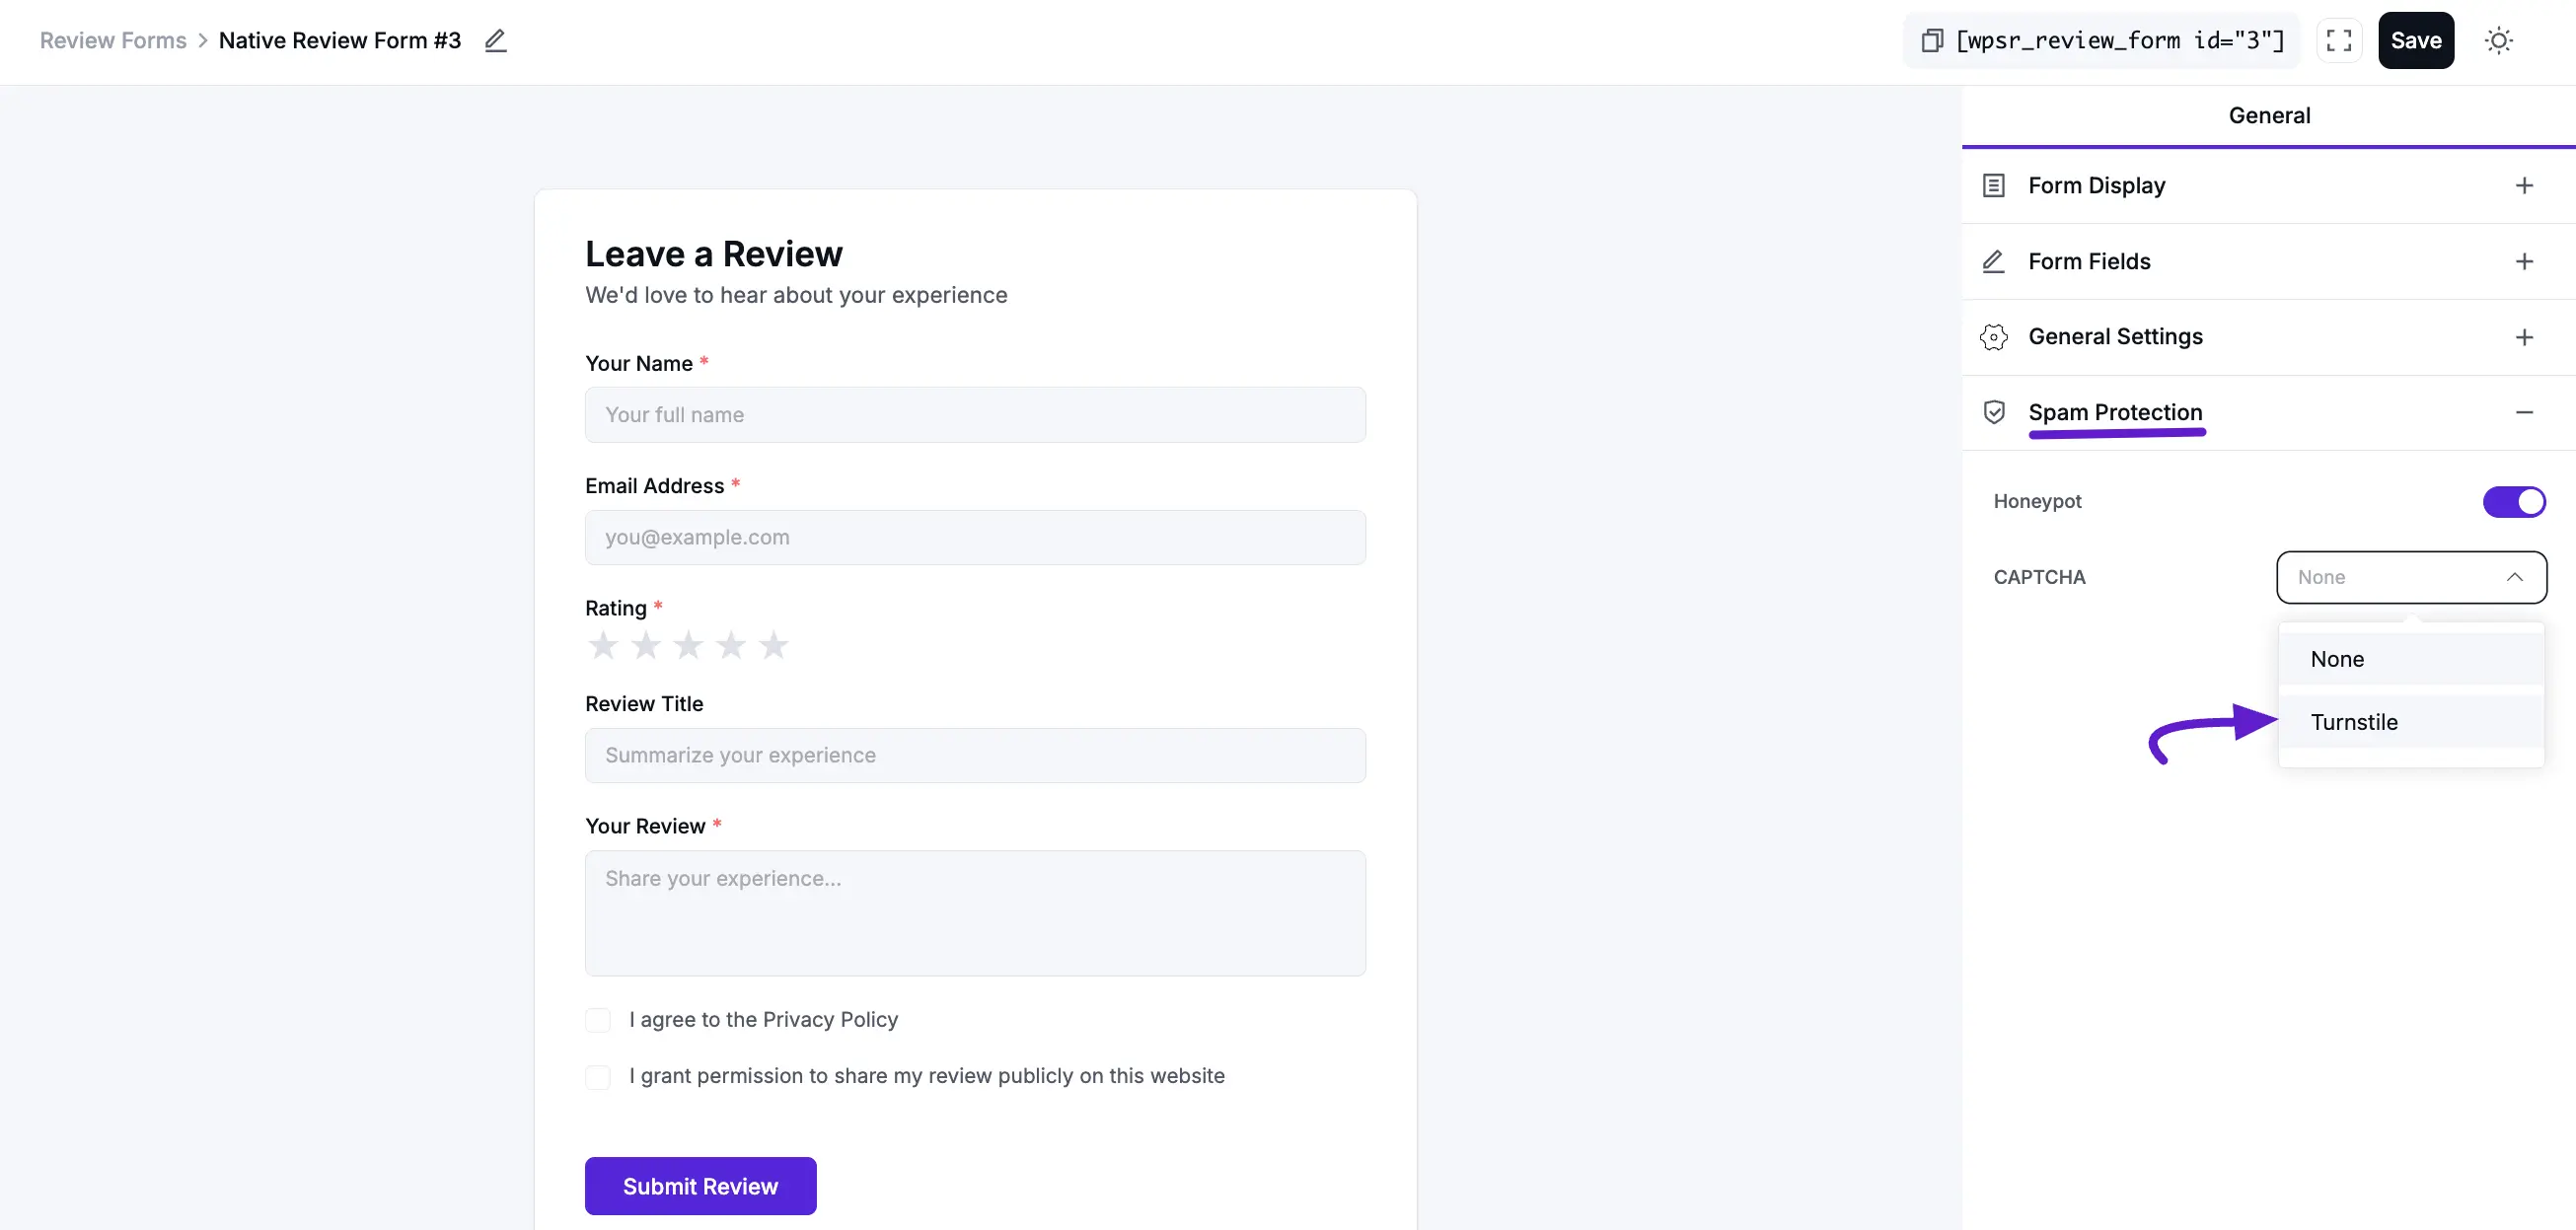
Step 5: Enable Spam Protection
To keep your reviews clean, use the Spam Protection tab. For stronger protection, select Turnstile. You will need to provide your Site Key and Secret Key from the respective provider. If you want to know more about cloudflare turnstile, read this Documentation
Step 6: Display the Form on Your Site
After clicking the Save button in the top-right corner, your form is ready to go live.
- Locate the Shortcode in the top bar of the form editor (e.g.,
[wpsr_review_form id="2"]). - Click the Copy icon next to the code.
- Paste this shortcode into any WordPress page, post, or widget area where you want the review form to appear.
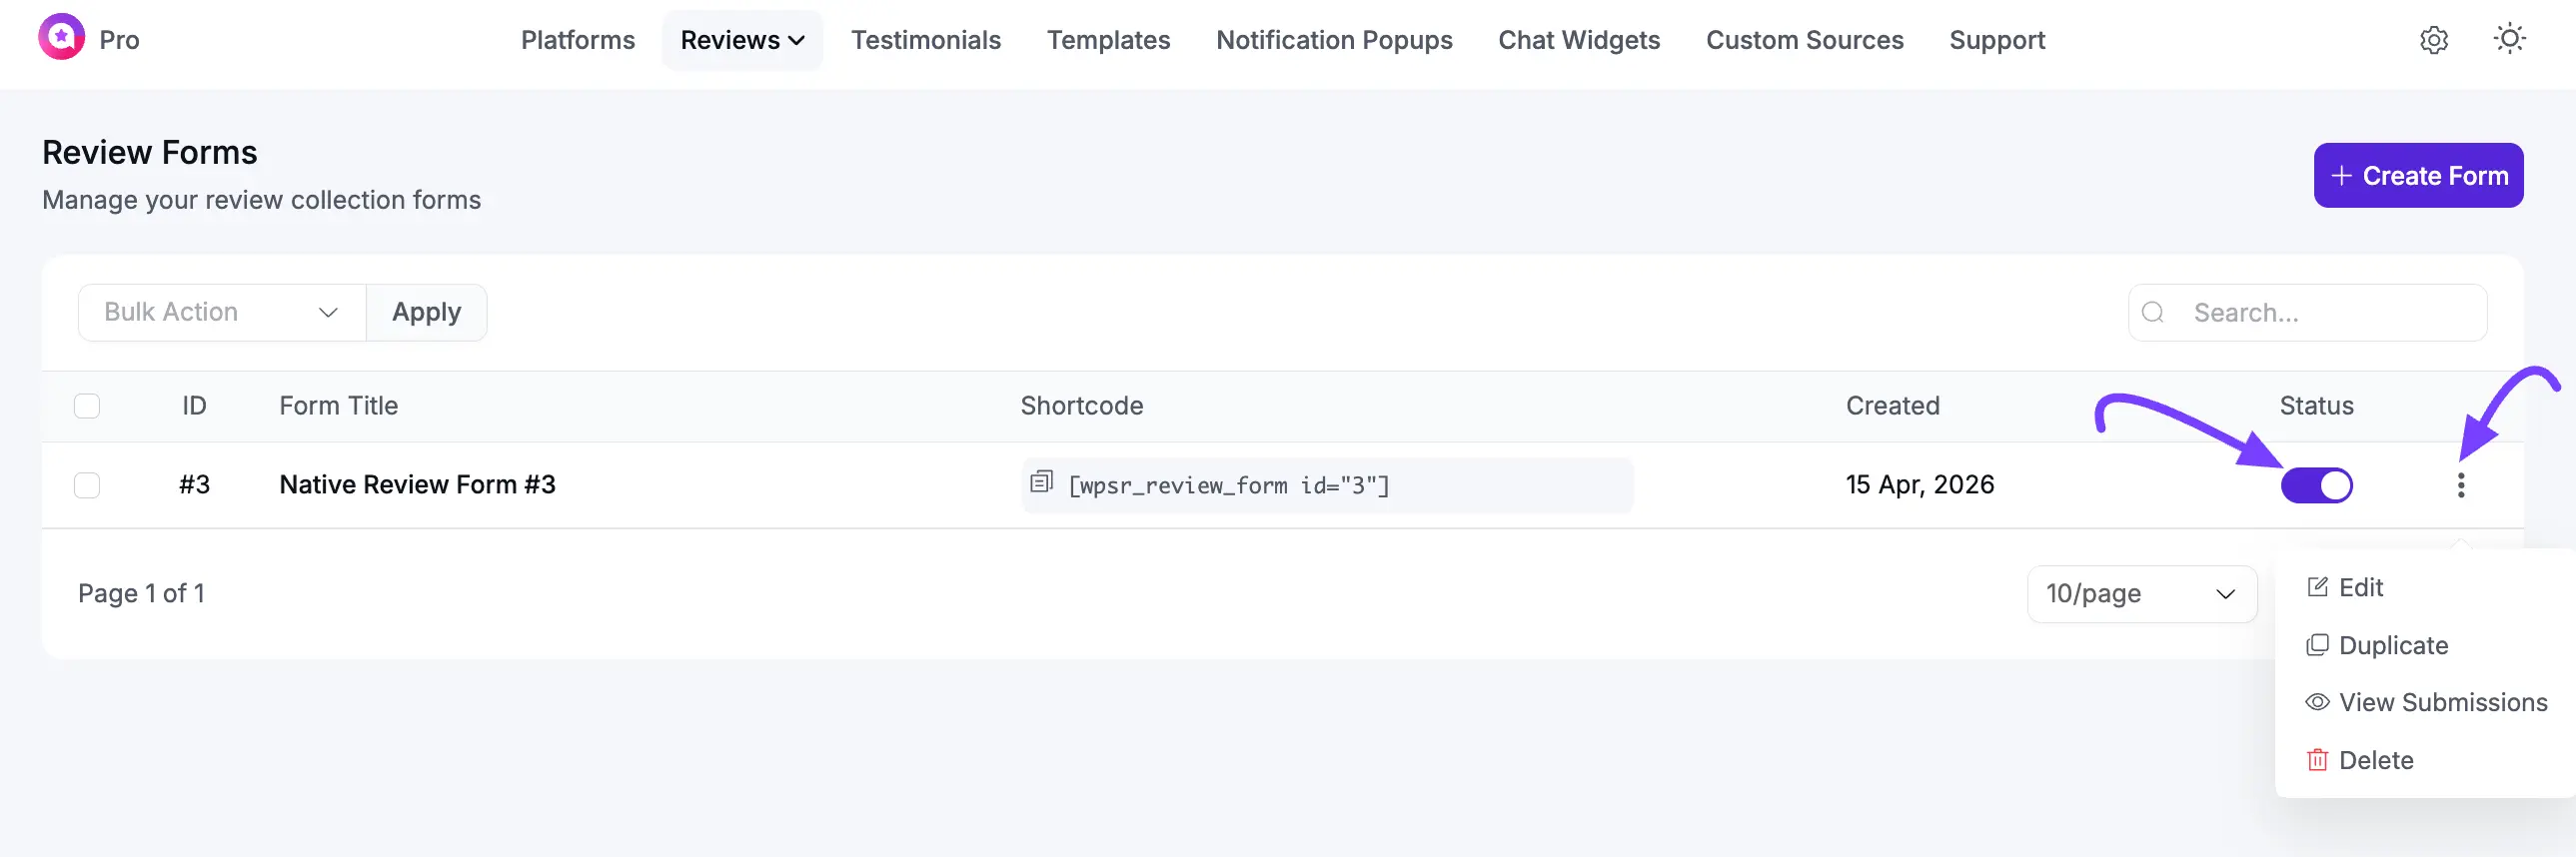
Managing Your Review Forms
Once you have created your Native Review Forms, you can manage them from the main Review Forms dashboard.
Status Toggle: Use the toggle switch to instantly enable or disable a form on your website without deleting it.
The options menu: Click the three-dot menu on the far right of any form to access the following actions:
- Edit: Re-open the form builder to modify fields, settings, or styling.
- Duplicate: Create an exact copy of an existing form to save time on setup.
- View Submissions: Jump directly to the reviews collected by that specific form for moderation.
- Delete: Permanently remove the form from your database.
Search & Bulk Action: Quickly find a specific form using the Search bar or use the Bulk Action menu to delete multiple forms at once.
NOTE
All reviews submitted through this form will appear in your WP Social Ninja → Reviews dashboard. Depending on your Global Review Settings, they will land in either the Approved or Pending tabs for moderation.